DJ's Starion with 4G64 and RX7 trans *updates on page 3*

Swaps in Progress, on the Road and on the Track.

Moderators: DJpowerHaus, mattmartindrift

DJpowerHaus
Sir Post A Lot
Posts: 1779
Joined: Wed Apr 07, 2004 3:24 pm
Location: Baltimore, MD
Contact:

DJ's Starion with 4G64 and RX7 trans *updates on page 3*

Post by DJpowerHaus »

BIG UPDATES in Last Page!

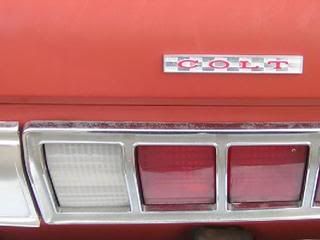
Its been really busy the last few months, but I'm finally settling into things out of college. But anyways.... I'm pretty set on the police car theme. I have white doors ready to go on. I think I can get the lights and siren to work too. Just need to finish it up with decals and strobes. If anybody has any ideas on how to get a half of this to be blue, I'd like to know.

Image
Image
the other side:
Image

Everything on the car is best summed up in this spreadsheet. Its good to keep track of every penny so you dont totally spend your life savings on a dumb car. This one has what I consider alot of $$, but for how insane its going to be, its NOTHING.

This is where the spreadsheet used to be...

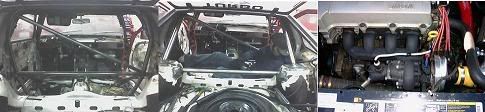
Here are some of the 240SX rack and pinion stuff. It went together really nice and easy. Still need to do the strut tops.. sort of holding off to see what kind of coilovers some friends of mine can get me in Japan. The steering is adjusted all the way up in the photo. We're extending it maybe 12" because that's how far we're pushing back the driver seat becuase of the floor mount pedals. Engine is moving back as far as we can get it too.. limited only by the oil pan... and that might change to front sump in the future so we can get FARTHER back yet. Right now the shifter sits about 6" farther back than stock, could use a little more, but we'll just make a long shifter for it and bend it to where we need it.
Image
Image

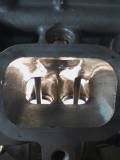
Here is a picture of the turbo next to a stock one...
Image
Here is it on the engine. The "brace" actually supports all the weight (it weighs about 30lbs with wastegate). I'm just holding it on so it doesnt slide off the flange. Still need to redo the whole manifold.
Image

This is just the beginning of the updates and progress. Things JUST started to slow down to a comfortable pace so I can focus finally.
Last edited by DJpowerHaus on Thu Nov 05, 2015 3:00 pm, edited 11 times in total.
Image
Getting the engine bolted in is about 10% of the way there.
The next 80% can go quickly with help and skill.
That last 10% takes about as long as the 90% that came before it.
Fabritory
Addict
Posts: 124
Joined: Sat Jun 05, 2004 11:39 pm

Post by Fabritory »

Congats ....once again you make the rest of us look bad :rolleyes:

Details on that roll cage please


Bushguard and Spotlight? :ph34r:
________________________________ FABRITORY ________________________
________________________Fabrication Laboratory___________________________
Fabritory
Addict
Posts: 124
Joined: Sat Jun 05, 2004 11:39 pm

Post by Fabritory »

Cams are sooo over rated!

Image

________________________________ FABRITORY ________________________
________________________Fabrication Laboratory___________________________
DJpowerHaus
Sir Post A Lot
Posts: 1779
Joined: Wed Apr 07, 2004 3:24 pm
Location: Baltimore, MD
Contact:

Post by DJpowerHaus »

So are timing belts! (Cant bend valves that arent open)

No updates today. Woke up exhausted.. it happens. Have some wiring harness work to do for some customers tonight or tomorrow, but my "revised" motor mounts will be done tonight.

Oh yeah.. about the motor mounts. I have 6 or 7 laying around, the 2 matching ones arent.. one is all bent up. There are seriously no 2 that are alike... I cant even say where they are all from.. Starions, D50s, I dont even know what's what. I think I had 2 matching ones at one point, but picked up the wrong one off the bench when I made my spacer plates. Bah.. I dunno.

I need minimum a matching pair... so I found one we had cut up from the first swap and I've gotten Brian from MA-motorsports.com to weld it up for me. I'm picking it up tonight and hopefully can get the motor in tomorrow without having to modify my spacer plates.... photos gallore when the motor is in and I can put the turbo on it!
Image
Getting the engine bolted in is about 10% of the way there.
The next 80% can go quickly with help and skill.
That last 10% takes about as long as the 90% that came before it.
DJpowerHaus
Sir Post A Lot
Posts: 1779
Joined: Wed Apr 07, 2004 3:24 pm
Location: Baltimore, MD
Contact:

Post by DJpowerHaus »

Brian W. at MA-motorsports.com did some great welds on my brackets and now the engine sits nice and straight. I've managed to put everyything in this morning to show how its REALLY going to go together. Prepare to be offended!

Image
Image
Image

This next shot shows through the rear radiator ducting straight through the firewall and out the front of the engine bay :-D:
Image

Here you can see the shifter location and stuff. We plan on moving the ebrake back as well as making a LONG steering wheel spacer.
Image
Image

I've gotta fix the brakes on the Festiva and do some harnesses today and tomorrow so this might be it for a day or 2. Next step is the transmission crossmember. Two of the RX7 transmissions came with RX7 crossmembers so I'm going to cut one and weld what's left to a starion crossmember. The only real thing that NEEDs to be done is to add angled wings to the SQ crossmember and use the rubber mounts from the RX7. They're suprisingly similar.
Last edited by DJpowerHaus on Tue Jan 24, 2006 2:01 pm, edited 1 time in total.
Image
Getting the engine bolted in is about 10% of the way there.
The next 80% can go quickly with help and skill.
That last 10% takes about as long as the 90% that came before it.
DJpowerHaus
Sir Post A Lot
Posts: 1779
Joined: Wed Apr 07, 2004 3:24 pm
Location: Baltimore, MD
Contact:

Post by DJpowerHaus »

I'll post the measurements and all that shit eventually. Don't really have the ability to make tons of them. Also remember that the brake pedal will need some modifications to work with the 240SX column unless you just replace them with some aftermarket pedals like I'm doing.
Image
Getting the engine bolted in is about 10% of the way there.
The next 80% can go quickly with help and skill.
That last 10% takes about as long as the 90% that came before it.
slowquest
Addict
Posts: 112
Joined: Tue Jun 14, 2005 11:30 pm
Location: Cincinnati, Ohio

Post by slowquest »

Don't get me wrong here, not flaming you at all, but is there a reason for mounting the intercooler flat like that. I'm guessing that your gonna run some sort of fresh air intake in the hood, but then, that is just a guess. I know your wanting to keep your weight centered in the car, just seems like having the i/c up high like that would hurt weight wise, but then again, it only weighs a few pounds. Or maybe your just a little like me, doing it cause it's different :blink:
carguyf545
Addict
Posts: 175
Joined: Wed Jul 27, 2005 12:41 am
Location: centralia WA.

Post by carguyf545 »

DJ, i know were there is a blue light bar, what are you willing to $$$$ or trade
Image
what a nice port job, probally hurt it more than i helped it.
Fabritory
Addict
Posts: 124
Joined: Sat Jun 05, 2004 11:39 pm

Post by Fabritory »

<!--QuoteBegin-slowquest+Aug 6 2005, 03:07 AM--></div><table border='0' align='center' width='95%' cellpadding='3' cellspacing='1'><tr><td>QUOTE (slowquest @ Aug 6 2005, 03:07 AM)</td></tr><tr><td id='QUOTE'><!--QuoteEBegin-->Don't get me wrong here, not flaming you at all, but is there a reason for mounting the intercooler flat like that. I'm guessing that your gonna run some sort of fresh air intake in the hood, but then, that is just a guess. I know your wanting to keep your weight centered in the car, just seems like having the i/c up high like that would hurt weight wise, but then again, it only weighs a few pounds. Or maybe your just a little like me, doing it cause it's different :blink:[/quote]
look at the length from the turbo outlet to the intercooler.....

Now look at the length from the intake manifold to the intercooler......

Imagine how much faster boost could go from the hot side to the cold side with that set-up


/nuff said
________________________________ FABRITORY ________________________
________________________Fabrication Laboratory___________________________
DJpowerHaus
Sir Post A Lot
Posts: 1779
Joined: Wed Apr 07, 2004 3:24 pm
Location: Baltimore, MD
Contact:

Post by DJpowerHaus »

Here is the real reason:
Image

There is a large area of low pressure at the front of the hood and alot of high pressure fresh air at the bottom of the airdam (more so with a splitter). With ducting you can route the cold highpressure air to the underside of the intercooler and have low pressure on the top. The result is alot of airflow without the need of a fan. (Air literally blows from high pressure to low pressure). That's why we have wind and breezes. Ever go to the beach and open the hotel doors on the beach side and the other side.. it'll suck a dog outta the room!

The short IC piping and mimimizing of hoseclamps to pop off also helped seal the deal. Also... the IC is high off the ground protecting it from some possible damage and destruction.

The hood will have to be modified, but dont think of it as an intake; its actually an extractor vent.
Last edited by DJpowerHaus on Tue Jan 24, 2006 2:02 pm, edited 1 time in total.
Image
Getting the engine bolted in is about 10% of the way there.
The next 80% can go quickly with help and skill.
That last 10% takes about as long as the 90% that came before it.
slowquest
Addict
Posts: 112
Joined: Tue Jun 14, 2005 11:30 pm
Location: Cincinnati, Ohio

Post by slowquest »

You're saying that the blue regions in that graph are low-negative pressure? I'm not big on aero, but that just seems wrong. i think of the car as an airplane wing. lots of drag, ie high-positive pressure, at the header panel, less at the base of the windshield, higher at the top of the windshield, then lowering as it goes across the hatch, until it hits what little spoiler we have, which would raise the pressure. :(


DJpowerHaus
Sir Post A Lot
Posts: 1779
Joined: Wed Apr 07, 2004 3:24 pm
Location: Baltimore, MD
Contact:

Post by DJpowerHaus »

That's right.. the air ramps up on the header panel but when its passes the ridge where the hood meets the header panel it creates a low pressure area on the leading edge of the hood. The rear of the hood sees higher pressure building up on the windsheild.. this is how cowl induction hoods work.

Venting the front of the hood will also reduce some front end lift at high speeds.
Image
Getting the engine bolted in is about 10% of the way there.
The next 80% can go quickly with help and skill.
That last 10% takes about as long as the 90% that came before it.
DJpowerHaus
Sir Post A Lot
Posts: 1779
Joined: Wed Apr 07, 2004 3:24 pm
Location: Baltimore, MD
Contact:

Post by DJpowerHaus »

Here is a little description of how far back the engine really is... its really not back far at all, but no radiator makes it looks crazy.. like this:

Image
Its an illusion!

But really, this is how the stock crossmember is set up. We are using the 2 big bolt holes as references. There is also a line marking the center of the where the motor mount lies. I've stacked the photos so you can get a better idea of how much it moved back, with the 240SX crossmember, which I moved forward about an inch for caster reasons, you have the same 2 reference points as before, but now you see how the 240SX mount center is pushed back some and my adapter blocks move me back some as well.

Image
Image
Getting the engine bolted in is about 10% of the way there.
The next 80% can go quickly with help and skill.
That last 10% takes about as long as the 90% that came before it.
DJpowerHaus
Sir Post A Lot
Posts: 1779
Joined: Wed Apr 07, 2004 3:24 pm
Location: Baltimore, MD
Contact:

Post by DJpowerHaus »

Here are some neato ones with the white door:

Image
Image
Image
Getting the engine bolted in is about 10% of the way there.
The next 80% can go quickly with help and skill.
That last 10% takes about as long as the 90% that came before it.
DJpowerHaus
Sir Post A Lot
Posts: 1779
Joined: Wed Apr 07, 2004 3:24 pm
Location: Baltimore, MD
Contact:

Post by DJpowerHaus »

Notice all of the strange angles that come with the RX7 transmission. The engine is straight, the bellhousing is straight and even the shifter is straight, but the transmission mount and case are definatly at an angle.
Image

Image

I could hack up the RX7 and/or Starion transmission crossmembers, but it looks like making one from scratch will be faster. I first made one out of wood to get all the points and angles correct. I then traced its critical points and angles to a piece of wood. This is going to be the template for when I finally get access to a brake. I'll then try to get MA to weld some bracing to the front and back (think of an 'I' beam). It will use the RX7 transmission bushings.
Image
Getting the engine bolted in is about 10% of the way there.
The next 80% can go quickly with help and skill.
That last 10% takes about as long as the 90% that came before it.
rarson
Addict
Posts: 55
Joined: Fri Apr 22, 2005 12:10 am

Post by rarson »

<!--QuoteBegin-slowquest+Aug 6 2005, 06:17 PM--></div><table border='0' align='center' width='95%' cellpadding='3' cellspacing='1'><tr><td>QUOTE (slowquest @ Aug 6 2005, 06:17 PM)</td></tr><tr><td id='QUOTE'><!--QuoteEBegin-->You're saying that the blue regions in that graph are low-negative pressure? I'm not big on aero, but that just seems wrong. i think of the car as an airplane wing. lots of drag, ie high-positive pressure, at the header panel, less at the base of the windshield, higher at the top of the windshield, then lowering as it goes across the hatch, until it hits what little spoiler we have, which would raise the pressure.  :([/quote]
Just a little info on the aero... The air likes to move straight. Wherever the car curves away from the straight line, it creates a low pressure area (roof is a great example). Wherever the car curves into the air, high pressure (base of the windshield).

This is of course putting it in very simple terms, but it should help you understand what is going on. I've spent a good amount of time studying the aerodynamic profile of the second-gen RX-7 and it looks very similar to the Starion's.

DJ, I'm a little curious about your rad ducting setup. First of all, I noticed the shifter is right in the way. Also, I like your idea of ducting out the back of the car (I am doing the same thing on my RX-7! Low pressure area, perfect spot for it). However, instead of ducting the hot air to the back of the car, with my car the idea I had was to relocate the radiator roughly where the gas tank now sits. The rad would be tilted towards the front of the car (same tilt as the stock rad mount if you've ever looked at one in an FC).

Now I realize the problem that the underside of the car would be a low-pressure area... especially with the underbody tray that I'm creating to smooth out the bottom of the car. However, I plan on ducting a path for air underneath the car up to the radiator.

Here is a quick picture of what I'm talking about. I didn't measure or anything when I drew the lines so it is a bit off. The rad will actually sit a bit further back (not with the diff right in the way). I just drew it to get the idea down.
rarson
Addict
Posts: 55
Joined: Fri Apr 22, 2005 12:10 am

Post by rarson »

Here is the picture.

Image
DJpowerHaus
Sir Post A Lot
Posts: 1779
Joined: Wed Apr 07, 2004 3:24 pm
Location: Baltimore, MD
Contact:

Post by DJpowerHaus »

The shifter in the way? I'm not ducting air from the engine bay to the back of the car. That'd be silly. I am ducting air in on the front of the rear fender flares to a radiator which sits in a box in the spare tire well. I should have a welder and a rear bar by next week. That's what Im using as my upper radiator support. It should be at a pretty steep angle (almost flat) leaning towards the front of the car.

Does that make more sense?

As for the comparision to the FC... they're similar (90% of cars are similar though). The starion has a more extreme high / low region up front though due to the angles and "facets" that mitsubishi likes to use so much.

With your design, I'm not quite sure if that's a good idea to duct from the underside. The tunnel you create will actually be pretty low pressure (think venturi tunnel on a F1 car). You might have a situation with more low pressure under the car than out the back. Plus you've got a differential in the way.
Image
Getting the engine bolted in is about 10% of the way there.
The next 80% can go quickly with help and skill.
That last 10% takes about as long as the 90% that came before it.
rarson
Addict
Posts: 55
Joined: Fri Apr 22, 2005 12:10 am

Post by rarson »

Ah, I get it. "This next shot shows through the rear radiator ducting straight through the firewall and out the front of the engine bay" That's what confused me.

I know from the drawing it looks like the diff would be in the way, but it's not. It looks that way because the crappy freehand approach I took to making the drawing. Basically, the gas tank will come out and the rad will be mounted near the vicinity of where the tank used to sit (behind the differential). I agree that underneath the car will be low pressure and it certainly would make it more difficult to duct, but I couldn't think of another way to do it. Now that you mention it though, my rear fenders flare out a bit behind the doors, so maybe I could do something along the lines of two large NACA ducts on them. If I follow the doors and keep the air moving straight into the ducts, there should be plenty of cooling available. This car is being setup for drag racing anyway, so cooling for such a short period of time shouldn't be much of an issue... especially since I'm planning to run the car without a turbo.
DJpowerHaus
Sir Post A Lot
Posts: 1779
Joined: Wed Apr 07, 2004 3:24 pm
Location: Baltimore, MD
Contact:

Post by DJpowerHaus »

I dont think my pictures work anymore, but oh well. They're outdated by now anyways. Eventually this will all go on the website. I'm still working on the car. It just takes time and patience. Hopefully I'll have it running in a few weeks. I ordered a 4x12x24" intercooler that should be here soon. Right now I have the motor pulled. I have to mount the flywheel correctly (more than 2 bolts) and I have to seal up the bellhousing to the transmission. I also have to "surface" the flywheel and clean up the clutch so it can attempt to hold the torque until I get a decent clutch.

I'm really working on pedals, the friewall, ducting, AN lines and fittings, water lines, etc. I REALLY need to get the cage done soon. Need a trailer to do that though. Once that's done things should come together FAST.

I am going to NEED coilovers to drive the thing though so that's a big concern right now too.
Image
Getting the engine bolted in is about 10% of the way there.
The next 80% can go quickly with help and skill.
That last 10% takes about as long as the 90% that came before it.
peregrine
Too Much Time on His Hands
Posts: 492
Joined: Tue Dec 28, 2004 5:26 pm

Post by peregrine »

cool dilly-o. i just ordered my intercooler today too. ill update my thread when i get it. how close are you to firing it?
Image
Fabritory
Addict
Posts: 124
Joined: Sat Jun 05, 2004 11:39 pm

Post by Fabritory »

Mike we're in the in same boat with the clutch situation
________________________________ FABRITORY ________________________
________________________Fabrication Laboratory___________________________
DJpowerHaus
Sir Post A Lot
Posts: 1779
Joined: Wed Apr 07, 2004 3:24 pm
Location: Baltimore, MD
Contact:

Post by DJpowerHaus »

I still need to make my exhaust manifold and intake manifold. I'm waiting for the Intercooler to arrive for the intake manifold due to how I am mounting it with such short piping. I am going to test TEST TEST my wiring this weekend and do all that other stuff I mentioned.

Depending on how the exhaust manifold progress goes, maybe 2 weeks. I'm sort of planning on having Matt do the exhaust manifold stuff just so its done and we can fire up the motor and maybe dyno it. I have a strange feeling its going to crack either way. Long term plans involve using my SS flange to make a NICE tubular manifold as a backup/replacement for this one.
Image
Getting the engine bolted in is about 10% of the way there.
The next 80% can go quickly with help and skill.
That last 10% takes about as long as the 90% that came before it.
DJpowerHaus
Sir Post A Lot
Posts: 1779
Joined: Wed Apr 07, 2004 3:24 pm
Location: Baltimore, MD
Contact:

Post by DJpowerHaus »

We pulled the engine so we could do some engine bay modifications as well as have the motor inside to do the fabing of various engine parts and plumbing.

Here is our nice firewall box. This is what we'll mount the box behind the motor too. Also, note the new placement of the battery. Dry cell batteries are neat. And I can still use the wipers! Image

Gained a few inches of steering angle by moving in the RHD steering protrusion. Metal doesnt like to bend this way.. and it shows. We'll probably just cover it in some sort of heat sheild anyways so its not a biggie.
Image

Here is a photo of Matt riding the 4G64.
Image

I was pretty deadlocked with this exhaust manifold thing. The SSAutochrome manifold is really junky. We had cut the flange a few months ago thinking we could port it out and slip it in and get a good weld.. well, that wasnt going to happen. We were about to order some stainless tubing and start over when we decided to just weld it together and hope for the best. If anything it really helped with morale with this project.

Image

Image

Further boosting of morale was done tonight when I found that my 12x24x4" intercooler had shown up! I couldnt (and was too tired to) start modifying the tubing to fit better, but you can get the general idea. I guess I need to get dad to make my throttle body flange ASAP!
Image

Matt also welded the braces on the transmission crossmember. I think it will be plenty strong now. I made 2 of these. One needs some more slots and holes but all the hard work is done.
Image
Last edited by DJpowerHaus on Tue Jan 24, 2006 2:03 pm, edited 1 time in total.
Image
Getting the engine bolted in is about 10% of the way there.
The next 80% can go quickly with help and skill.
That last 10% takes about as long as the 90% that came before it.
DJpowerHaus
Sir Post A Lot
Posts: 1779
Joined: Wed Apr 07, 2004 3:24 pm
Location: Baltimore, MD
Contact:

Post by DJpowerHaus »

The IC will fit BTW. See what I've got to work with?

Image
Image
Getting the engine bolted in is about 10% of the way there.
The next 80% can go quickly with help and skill.
That last 10% takes about as long as the 90% that came before it.
Fabritory
Addict
Posts: 124
Joined: Sat Jun 05, 2004 11:39 pm

Post by Fabritory »

Let's see her modified rack
________________________________ FABRITORY ________________________
________________________Fabrication Laboratory___________________________
2000_turbo
Knowlege Seeker
Posts: 32
Joined: Wed Oct 12, 2005 1:56 pm
Location: Rotterdam (The Netherlands)
Contact:

Post by 2000_turbo »

I've got the same I/C DJPowerhaus! It's a very efficient I/C. One side of the I/C is warm (duh) and the other side of the I/C is always cold, there is even some moisture on it.

Image

Old vs new.

Image


Gr,


Martyn.
4G63Turbo
Knowlege Seeker
Posts: 7
Joined: Tue Jul 13, 2004 1:34 pm

Post by 4G63Turbo »

BUMP for updates and pics.
DJpowerHaus
Sir Post A Lot
Posts: 1779
Joined: Wed Apr 07, 2004 3:24 pm
Location: Baltimore, MD
Contact:

Post by DJpowerHaus »

The only real picture is on the homepage at the bottom. Other than that its been sitting at the shop waiting for a cage for fucking 4 months.

We did change the intercooler setup to be where the stock radiator would go. This way we can use a stock hood, and maybe even one fo those carbon 83 hoods. I'm now trying to make the car look mostly stock, other than it being REALLY low. We are going to use a clutch fan of of one of the trucks behind the intercooler. This will be nice for drifting when you're running high boost and RPM, but your forward speed is low.

But yeah.. I've gotten REALLY depressed the last few months becuase of the lack of progress. Having this board up will help get me to focus again.
Image
Getting the engine bolted in is about 10% of the way there.
The next 80% can go quickly with help and skill.
That last 10% takes about as long as the 90% that came before it.
saturnshadow
Addict
Posts: 55
Joined: Thu Aug 25, 2005 7:13 pm
Location: vally in cali

Post by saturnshadow »

yeah i was thinking about putting the rad in the back, but i was going to take out the side windows and put clear plactic ducts to it.
I Drive a turbo Sat..
Kümmern Sie sich um Ihre eigenen Angelegenheiten!
Image
DJpowerHaus
Sir Post A Lot
Posts: 1779
Joined: Wed Apr 07, 2004 3:24 pm
Location: Baltimore, MD
Contact:

Post by DJpowerHaus »

Updates! Here are some of the latest photos. Nothing really looks different to most people, but oh well. More work has been done these last few weeks than than in 6 months. Everythings just together / appart / together / appart, etc. I'm finally starting to feel like there is some progress.

Image
Here is my new firewall. I copied it from Smog on SQC. He's doing a 1JZ swap. This was MUCH easier to do than my old setup with the aluminum angle around the hole. Much easier to seal up and much safer. I might one day cut some holes in it to access things on the back of the engine. For now though I can reach behind the engine with lots of space to spare. You can also see where I drilled the welds to remove the brackets in the engine bay. I'll be sanding and painting them eventually. Also there is my front engine support. Its not meant to hold the engine up, just to keep it from torquing... we are redoing the engine mounts to be solid now though. And we gave up on the rear radiator and we modified the water pipe to point forward. That is a very full are of the engine and I'm sure I'll curse it in a few months. And look at my poor NEW tensioner. Hasnt seen one revolution of the engine and its already rusty.

Image
Here is my fuel cell.. 20gallons. I'm not sure how I didnt realize how big it was going to be. The biggest problem is that it basically extends from the rear frame all the way to the rear crossmember. I cant even lower it becuase it SITS on the rear crossmember. At this height the fuel pumps and sump sits right below the rear frame. At least it'll make it easier to mount them up. I'll be filling in the surrounding area with carbon fiber. Also you can see the few bits of cage I have done so far.

Image
Here is the seat (Momo Corsa ($40 used) and a nice Momo suede steering wheel I sprung for. I also you can see the 240SX steering column bolted to the Starion mounts (I drilled 2 holes and made a little bracket at the firewall). I also have a 10" steering wheel spacer (yowza!) and an extender on the adjustment bar so I can get out without much trouble and without removing the steering wheel. The yellow you see in the door is from the plasma cutter. I have the glass sliding up and down the stock rail held in with a pin (or down with a pin or anywhere else I chose to drill a hole). The RX7 shifter is boxed in and is already starting to get a little rust on it. I still need to patch up the stock shifter hole and make a shifter that will extend back a few inches. The ebrake has also been moved back and tilted up, that is what you see at the bottom center. Not pretty, but it'll look better with paint and maybe carbonfiber accents.

I'm waiting for some of the last fittings to come in. Once I get those, the radiator setup and the engine mounts done, I should be ready to almost start this thing. I'm aiming for early April to run it. Beyond that it will just be a matter of getting all the pedals and brakes in. I plan on driving it o my birthday, May 1st. After that.. I'll have 2 months to tune it, paint it, make all the CF parts and hopefully make it something worth showing off at the SQC Pigeon Forge meet this 4th of July.
Image
Getting the engine bolted in is about 10% of the way there.
The next 80% can go quickly with help and skill.
That last 10% takes about as long as the 90% that came before it.
peregrine
Too Much Time on His Hands
Posts: 492
Joined: Tue Dec 28, 2004 5:26 pm

Post by peregrine »

bout fuckin time. i was wondering if youd ever get back to work on that thing. hurry up and get it running. im sick of being the only one here with a running rwd swap :lol:
Image
DJpowerHaus
Sir Post A Lot
Posts: 1779
Joined: Wed Apr 07, 2004 3:24 pm
Location: Baltimore, MD
Contact:

Post by DJpowerHaus »

That's a wicked pedal setup. Ideal really. Must cost a fortune. If my budget racecar is going to cost me $10,000 I dont want to even see the bill on yours... and by mid April no less :-D.

==================================================

So.. updates:
Ordered an RX7 pressure plate (ACT Xtreme) and 6 puck unsprung disk (ACT). Saved $50 just by saying it was for an RX7 and not a Starion (they're the exact same part). Also got a new pilot bearing for the Fidanza. Screw a new TOB. I've got enough and they'll be fine.

Ordered an AFCO 22x18.5x3" radiator. Wont have to modify IC pipes. Wont have to make the old brass Z radiator work just to have to redo it after I smash up the front end for the first time (it'll happen evntually).

Fitted my sidebars. Pretty sweet. I wont hit my elbows! and as far as my steering wheel tilts up with the extender, getting in and out will be easy! Won't have to remove the steering wheel just to get in and out like some people.

Matt put my steering wheel spacer on a lathe and trued it up some more. Should be damn near dead on now unless the Momo wheel itself doesnt run true.

Mounted my pedals to a 2x4 which I'll mount and probably use for a little while (rapid prototype!). Not nearly as much knee/steering wheel interference as I expected. I'll cover it up so people dont laugh. Or I'll just find some aluiminum stock to replace it some day. Matt's going to try to help me get some -3 braided lines and fittings.

I'm putting my slightly off center engine mounts back in so I can run it.. I'll make new / straighter mounts later.

Brian at MA welded up my rear water pipe. I was amazed to find that it still barely clears the modified firewall.. I have to unbolt the engine and transmission and move it forward to pull the pipe.. what a pain. Stupid water pipes. I guess I could make an access panel on my firewall if I wanted to. Had him weld a little piece of 1/4" flat stock that I tapped for a Bosch water temp sender (240SX temp sensor is the same). Pressure tested.. siliconed.. mounted. YES!

I'm going to run this damn thing in 2 weeks or I'll start kicking people!

Anyone know anything about motorcycle coil on plug wiring? I dont know which is (+) and which is (-). I'm doing the rest of my wiring next weekend I hope.

Here are some HUGE pictures to look at if you've got the pipe: http://projectzerog.com/images/temp
Image
Getting the engine bolted in is about 10% of the way there.
The next 80% can go quickly with help and skill.
That last 10% takes about as long as the 90% that came before it.
DJpowerHaus
Sir Post A Lot
Posts: 1779
Joined: Wed Apr 07, 2004 3:24 pm
Location: Baltimore, MD
Contact:

Post by DJpowerHaus »

AFCO 22x18.5x3" radiator fits like a glove. I am using a fan and shroud from a Volvo. Not sure what but I got it from Scuba Steve. It was recalled becuase of some circuity issues which can be eliminated. Its made by Bosch and looks top notch. I had to trim the shroud to make it fit REALLY tight. Right now its held on snug with the water pipes themselves and 1 zip tie. Clears the pulleys by about 3/4" now. I have the IC, radiator and fan all behind the lower core support and in front of the engine. Water pipes were really easy to make with stuff I found around the shop.

I did find the wiring of the coils and did that up. I had 2 wires pull out of my weatherpack connects so I'm pretty upset with that. Need to take it appart somehow now.

Put the intake, exhaust, throttle body, timing belt, pulles, accessory belt on. Welded up my turbo bracing. List is getting shorter and shorter!
Image
Getting the engine bolted in is about 10% of the way there.
The next 80% can go quickly with help and skill.
That last 10% takes about as long as the 90% that came before it.
sander
Knowlege Seeker
Posts: 1
Joined: Mon Apr 03, 2006 9:39 pm
Location: i-vtec MD y0.
Contact:

Post by sander »

Looks good Mike! Id like to check it out sometime!
sander.
DJpowerHaus
Sir Post A Lot
Posts: 1779
Joined: Wed Apr 07, 2004 3:24 pm
Location: Baltimore, MD
Contact:

Post by DJpowerHaus »

Scuba Steve helped me pull my subframe (with poly bushings, suspension techniques sway bar and springs and blown KYB GR2s, and fresh brake pads) from white car. Pressure washed it, ran to the shop, put it on the racecar. Looks nice now that its not monster trucking. Still not as low as I envisioned. I'm too used to looking at 240s I guess. I also started to rewire. I looked at my wiring from 6 months ago and just wasnt pleased with it. I went back to the drawing board and ended up wtih basiclly the same drawing... oh well. I did remove some of the plugs that I had in there. It would have made more of a rats next to unplug the harness than to label the pins for the junction strips I have. Looks mega messy now, but I'll test that it all works before I start shortening wires. Still need to get my turbo oil drain and oil cooler fittings to stop leaking. JB weld... and if that doesnt work... trashcan.

More small things ordered tonight. $90 for some hood pins, trunk latches, fuse blocks. Oh well, that's how it goes.
Image
Getting the engine bolted in is about 10% of the way there.
The next 80% can go quickly with help and skill.
That last 10% takes about as long as the 90% that came before it.
DJpowerHaus
Sir Post A Lot
Posts: 1779
Joined: Wed Apr 07, 2004 3:24 pm
Location: Baltimore, MD
Contact:

Post by DJpowerHaus »

Got enough wiring done to flip the ignition switch and turn on the fuel pumps. Found 1 leaky line so I'm going to have to fix that tomorrow. Nothing worse than coming to work in an office smelling like gas. I have fuses now! YIPPY! And my battery still holds charge since when I bought it. Should be able to get most of the wiring finished tomorrow. Then there are the last bits until I start the engine!

Also I ordered my harnesses.. some 300ZX brakes are in the shop waiting to be rebuilt (they were remanufactured and blew the seals the first press of the pedal!) Need to get brake lines and power steering lines sorted out as well.

Trying to get it on the track May 6th.. this is a TALL order! But we'll try. Tomorrow I'm not going to forget to get the camera.. so next week I'll have some pictures.
Image
Getting the engine bolted in is about 10% of the way there.
The next 80% can go quickly with help and skill.
That last 10% takes about as long as the 90% that came before it.
DJpowerHaus
Sir Post A Lot
Posts: 1779
Joined: Wed Apr 07, 2004 3:24 pm
Location: Baltimore, MD
Contact:

Post by DJpowerHaus »

I forgot where I put the camera.... haha.. pics when I find it.
Image
Getting the engine bolted in is about 10% of the way there.
The next 80% can go quickly with help and skill.
That last 10% takes about as long as the 90% that came before it.
saturnshadow
Addict
Posts: 55
Joined: Thu Aug 25, 2005 7:13 pm
Location: vally in cali

Post by saturnshadow »

DOH.... CAMERA!!!
yeah i want to see it. been puting in apps for a 2nd job hoping i can get my cars done.
I Drive a turbo Sat..
Kümmern Sie sich um Ihre eigenen Angelegenheiten!
Image
DJpowerHaus
Sir Post A Lot
Posts: 1779
Joined: Wed Apr 07, 2004 3:24 pm
Location: Baltimore, MD
Contact:

Post by DJpowerHaus »

You dont want to see these photos. They suck. Pictures dont do that amount accomplished in the last few weeks justice.
Image
Getting the engine bolted in is about 10% of the way there.
The next 80% can go quickly with help and skill.
That last 10% takes about as long as the 90% that came before it.
peregrine
Too Much Time on His Hands
Posts: 492
Joined: Tue Dec 28, 2004 5:26 pm

Post by peregrine »

post haste!
Image
DJpowerHaus
Sir Post A Lot
Posts: 1779
Joined: Wed Apr 07, 2004 3:24 pm
Location: Baltimore, MD
Contact:

Post by DJpowerHaus »

Still no photos, but when I get them it will be worth the wait.

I did get it running this weekend finally. I had the CAS in correctly with the timing marks lined up. I, for shits and giggles, but it off 180 degrees... and it starts right up.

3 months of down time due to that.
Image
Getting the engine bolted in is about 10% of the way there.
The next 80% can go quickly with help and skill.
That last 10% takes about as long as the 90% that came before it.
DJpowerHaus
Sir Post A Lot
Posts: 1779
Joined: Wed Apr 07, 2004 3:24 pm
Location: Baltimore, MD
Contact:

Post by DJpowerHaus »

Not going to have this thing done enough to take a $300 trip to PF. We did get the TPS thing resolved. I had wired the power and ground backwards. Switched them and its fixed. We went though the startup instructions in the manual and get the base timing set. Now the engine puts off much less heat. Before I was getting a slight glow on the exhaust manifold after a few minutes of running and EGTs at the turbine of 1000F. I'll be leaving for 2-3 weeks so this is all the progress for a while probably. I wanted to post some pictures and details for everybody though.

1988 Starion
Steering: 240SX HICAS front rack
Column: 240SX
PS Pump: Nissan KA pump with -6 low pres. lines and some crazy -6 high pressure stuff
Hubs: 240SX S14 5 lug
Brakes: 300ZX 4 piston
Brake Lines: 14000psi braided -3 and -4 lines
Winters Performance Floor Mount Pedal Assembly with Balance Bar
Tein HA front coilovers, Suspension Techniques rear springs, KYB rear struts
Poly Bushings in Rear
60k mile differential (woot)
Odyessy Dry Cell Battery Mounted on firewall under dash
OBX-R Cam Lock SFI approved Harnesses
Momo Corsa Suede Steering wheel on 12" custom spacer
Momo Corsa Racing Seat
HKS orange on black EGT and boost gauges
20 Gallon Summit fuel cell with dual -8 outlets to dual 255lph Walbro fuel pumps.
AFCO aluminum radiator with Volvo fan and shroud.

2.4L 4G64 6-bolt Wideblock with 4G63 Head
Wiseco Forged Pistons (87mm bore) 8.7:1
Scat Forged Rods w/ ARP bolts
Clevite 77 Bearings
ARP Head and Main Studs
Forced Performance 3 Cams
Crower Springs and Titanium Retainers
Cometic MLS Headgasket
NGK BP6ES Spark Plugs
Large Oil Cooler with -8 lines to Evo3 oil filter housing

Autronic SMC v1.92 ECU with Antilag
MSD DIS-4 Ignition firing 4 Denso GSXR coil-on-plug
Delphi 950cc Fuel Injectors
Dual Walbro 255LPH pumps fed through -6 braided lines regualted by Aeromotive A1000 fpr
Innovate LC-1 Wideband

Holset HX35 Turbo
-6 oil feed with .080" restriction
Bullseye 9cm Turbine Housing (heavy)
Modfied SSA Exhaust manifold
35mm SSA External Wastegate
3" Side Exit Exhaust behind passenger door

24x12x3 Intercooler w/ 2.5" pipes
Modified Stock intake manifold with 2.5" Mustang Throttle Body
No BOV

Mazda RX7 Turbo II Transmission
Mazda B2600 Bellhousing
Fidanza Starion Flywheel
Competition Clutch Sprung hub 6 puck clutch (rated to 550+ hp)
Custom Driveshaft with Spicer replacement u-joints

To sum it up:
Mitsubishi Starion (chassis), Mitsubishi 1G Eclipse(head), Mitsubishi 2G Eclipse (lifters), Mitsubishi Galant (Timing Belt), Ford F150 (Oil Cooler), Dodge D50(block), Suzuki GSXR (coils), Dodge Cummins Diesel (Turbo), Mazda B2600 (Bellhousing), Mazda RX7 (transmission), Ford Mustang (Throttlebody), Hyundai Elantra (Valvecover), Nissan S13 240SX (Steering), Nissan S14 240SX (Hubs), Nissan 300ZX (brakes), Lexus SC300 (bumpercore)

haha. I'm Dr. Frankenstein!

Image
Image
Image
Image
Image
Image
Image
Image
Image
Image
Image
Image

Future plans include swapping black doors back on, paint job on the engine bay and front fenders and polishing the otherwise good black paint from the doors back. I'm also going to paint the engine bay gloss black and tidy it up some more. Also, I want to tear that ugly purple tint off and get it redone.

Its disappointing to not be able to finish for PF, but maybe later this year it'll be able to show up at a meet 100% finished.
Last edited by DJpowerHaus on Tue Jul 11, 2006 7:38 pm, edited 1 time in total.
Image
Getting the engine bolted in is about 10% of the way there.
The next 80% can go quickly with help and skill.
That last 10% takes about as long as the 90% that came before it.
4g63mightymax
Addict
Posts: 91
Joined: Fri May 26, 2006 8:43 am
Location: MA
Contact:

Post by 4g63mightymax »

DAMN thats hot. I would guess that there are several people in here drooling. Including myself.
-Jeremy
Mike
Addict
Posts: 176
Joined: Fri Sep 03, 2004 8:50 pm
Location: Aurora, IL

Post by Mike »

What did you do about the length of the throttle cable?
DJpowerHaus
Sir Post A Lot
Posts: 1779
Joined: Wed Apr 07, 2004 3:24 pm
Location: Baltimore, MD
Contact:

Post by DJpowerHaus »

I made a bracket/stop that bolts to the steering column, I made it based on the length of the throttle cable. So basically the throttle cable does not bolt to the firewall. I made a bracket to suit where it wanted to be.

This was pretty easy to make but might need to be redone. The Mustang throttlebody only requires like 1" to go full throttle and with the ratio on the stock throttle pedal. I might need to shorten the pedal above the fulcrum. The way it is now I have very little pedal movement.

I dont recommend the floor mount pedals (these are Winters Performance BTW). Because of the 45 degree angle at the base of the firewall, you have to move the pedals back about 12" or up a few inches to clear the master cylinders. Changing this means you will need to modify the stock seat, shifter, ebrake and steering wheel. This was a MAJOR pain for me. If I had to do it again, I'd definatly use hanging pedals instead and keep the seat in the stock location.

And some bad news too. Last night in the rush to get some more tuning done, I accidently shorted the braided sheilding of the EGT wire with a positive to the cluster which may have fried the MSD. I was too upset to look at it anymore. I have yet to fully troubleshoot it, but as of last night I was not getting spark even when tapping the inputs to ground with power going to the MSD.

I'll try to diagnose it before I leave for 3 weeks, so if I have to ship it back for repair it'll be back when I return from Mississippi. I plan on ripping out all my wiring and buying some pre-made wiring setup. I've spent MONTHS thinking about this and probably spent about $100 on materials, and somehow I still come up with shit. For example: my easy to reconfigure junction board... screws vibrated out when the car was running and started bouning around on the baord arcing from the power supply wires to the bracket.
Image
Getting the engine bolted in is about 10% of the way there.
The next 80% can go quickly with help and skill.
That last 10% takes about as long as the 90% that came before it.
Fabritory
Addict
Posts: 124
Joined: Sat Jun 05, 2004 11:39 pm

Post by Fabritory »

That shit is gangsta im glad to it coming togeter for you , boy do i have an uptade for this good ol' site
________________________________ FABRITORY ________________________
________________________Fabrication Laboratory___________________________
DJpowerHaus
Sir Post A Lot
Posts: 1779
Joined: Wed Apr 07, 2004 3:24 pm
Location: Baltimore, MD
Contact:

Post by DJpowerHaus »

Waiting on a response from this thread:

http://www.msdignition.com/forum/showthread.php?t=6703

I'll be away for a work trip for 3 weeks. I already have an RMA number so I'm going to box it up and get it ready just in case.
Image
Getting the engine bolted in is about 10% of the way there.
The next 80% can go quickly with help and skill.
That last 10% takes about as long as the 90% that came before it.
rarson
Addict
Posts: 55
Joined: Fri Apr 22, 2005 12:10 am

Post by rarson »

DJ, I didn't see which clutch you said you used, was it for the Starion? Is there any pilot bearing issue with using the Starion stuff on the RX7 tranny?
DJpowerHaus
Sir Post A Lot
Posts: 1779
Joined: Wed Apr 07, 2004 3:24 pm
Location: Baltimore, MD
Contact:

Post by DJpowerHaus »

You use the Starion pilot bearing in the Starion flywheel. The RX7 clutch is the same as the Starion clutch so use whatever is cheaper. It all slides together fine.
Image
Getting the engine bolted in is about 10% of the way there.
The next 80% can go quickly with help and skill.
That last 10% takes about as long as the 90% that came before it.
Post Reply