1988 chrysler conquest 4g63 + t-56
Moderators: DJpowerHaus, mattmartindrift
it regulates the oil pressure of the cylinder head at above stock rpm levels so that you don't lose oil pressure due to a lack of oil in the pan since its all in the head. Our engines have a poor oil return design and this helps by limiting excessive oil from reaching the head. Since my turbo will be fed off the oil filter housing the head needs less oil anyways.


-
jeffball610
- Too Much Time on His Hands
- Posts: 619
- Joined: Wed Feb 22, 2006 5:29 am
- Location: Las Vegas, NV
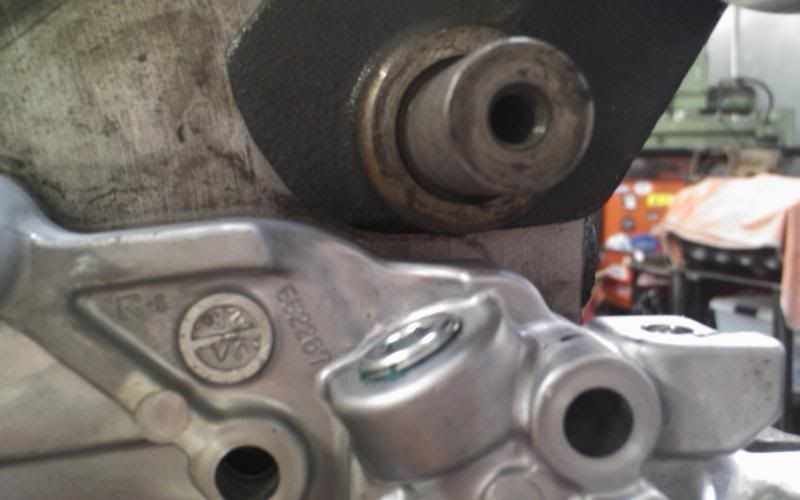
What are the benefits to using the EVO front case if any? Are you running the EVO oil filter housing as well? The EVO housing will allow you to run some fairly large oil cooler lines for an air to oil cooler and puts the oil filter facing down. At least that's what I remember from looking under a couple EVOs.
Do it in a Datsun!
1972 Datsun 510
7-bolt 4G63T, EVO 9 pistons and rods, Garrett GT3076R, "flipped" stock intake, Toyota R154, Z31 R200 w/ CVs
1972 Datsun 510
7-bolt 4G63T, EVO 9 pistons and rods, Garrett GT3076R, "flipped" stock intake, Toyota R154, Z31 R200 w/ CVs
i've been told it adds around 50-60 hp.
seriously though just cuz i wanted to. i had to run the evo 8 oil filter housing cuz the evo 3 filter housing points the filter towards the subframe. I figured if I can run the evo 8 oil filter housing why not the evo 8 oil pump. Maybe its better, maybe its not. I highly doubt its worse. At the end of the day its newer and now I know that I can get a new oil pump at the dealer hopefully easier in the future.
seriously though just cuz i wanted to. i had to run the evo 8 oil filter housing cuz the evo 3 filter housing points the filter towards the subframe. I figured if I can run the evo 8 oil filter housing why not the evo 8 oil pump. Maybe its better, maybe its not. I highly doubt its worse. At the end of the day its newer and now I know that I can get a new oil pump at the dealer hopefully easier in the future.


been a while since I last updated. I've been super occupied with other stuff, however I was able to assemble the engine and it is now ready to be installed, which should happen sometime this week. Didn't take any pictures of the finished product yet, but the head is on, the oil pickup tube had to be modified so the stay was short enough to bolt onto the arp main studs, pan was painted, crank scraper installed, etc. I ditched the windage tray idea because the oil pickup tube stay was in the way and the pan has a windage tray anyways kindof. I picked up an oem water pump with the jay racing adapter kit and will be welding on a fitting of my own so that my heater core, throttle body fiav, and turbo water lines can act as bypasses while the car warms up and the thermostat is closed. also got my new brake master cylinders from tilton and I think I have found a solution to the pedal assembly mounting question. My steering rack options are still up in the air.
Also, I realized I can still use the oem brake master cyilinder resivour, so I will for appearance and ease of bleeding purposed. Same with the clutch master cyilnder. Still working on a slave cylinder for the clutch so I can't buy the master cyilnder just yet. as always, I'm sure I'm forgetting something. Can't wait to get the engine in and start bolting stuff up so this looks like a car again.
Also, I realized I can still use the oem brake master cyilinder resivour, so I will for appearance and ease of bleeding purposed. Same with the clutch master cyilnder. Still working on a slave cylinder for the clutch so I can't buy the master cyilnder just yet. as always, I'm sure I'm forgetting something. Can't wait to get the engine in and start bolting stuff up so this looks like a car again.


-
jeffball610
- Too Much Time on His Hands
- Posts: 619
- Joined: Wed Feb 22, 2006 5:29 am
- Location: Las Vegas, NV
thought I would update. The flywheel clutch, and pressure plate are on with the new design steel pilot bearing adapter bill made. The turbo is also on and I've spent a TON of time cleaning/painting the suspension components I can before they go on. Found one of my torque rods has a pretty huge bend in it, so I'm going to have to get that replaced. I'll be bending it back for now since its going to the shop while I'm in texas to have the exhaust and driveshaft and transmission cross memeber welded up. when I get back I'll hopefully have a ton of parts that are on backorder waiting for me. My internal slave cylinder adapter will be ready tomorrow and if my calculations are correct I shouldn't need too much adjustment from the original specifications. I've realized the thermostat housing is rather impractical back there and may yet need some type of modifications. I had it welded up so it doesn't work as a radiator cap, however it still has all of the other features working. More pictures to come later.
Brian
Brian
Well, I didn't do my homework good enough, didn't test fit the transmission well enough, and am now eating my words for it. The transmission doesn't fit. It REALLY doesn't fit. It REALLY REALLY doesn't fit. I'm having a new tunnel put in. I apologize greatly to anyone who was mislead by my posts. I am going to go back and edit all my previous posts so that no one will be mislead like I was. Hopefully no one has already bought the transmission for their car like I did.
Oh well....
Oh well....
some pictures:
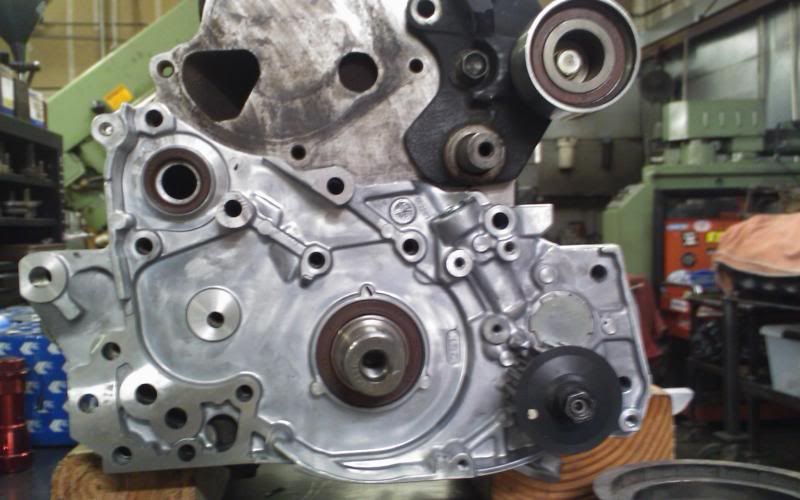
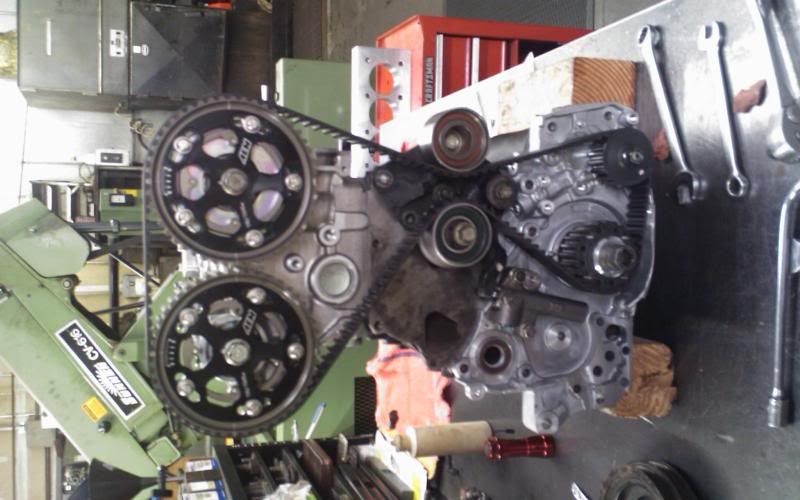
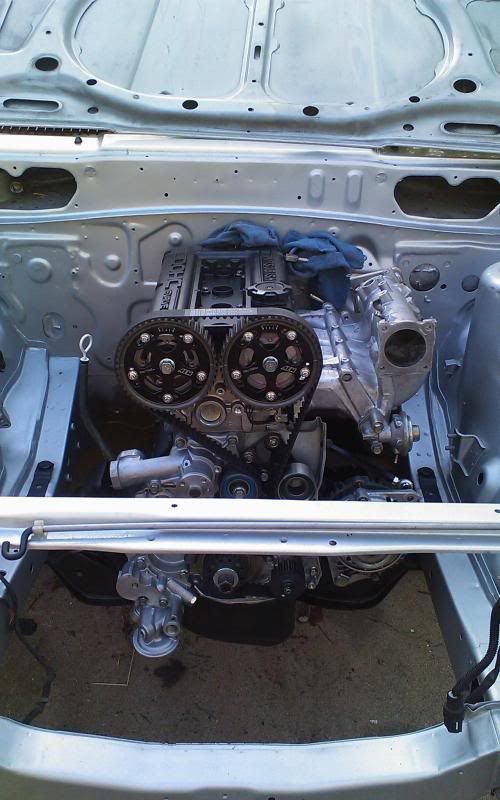
the motor:

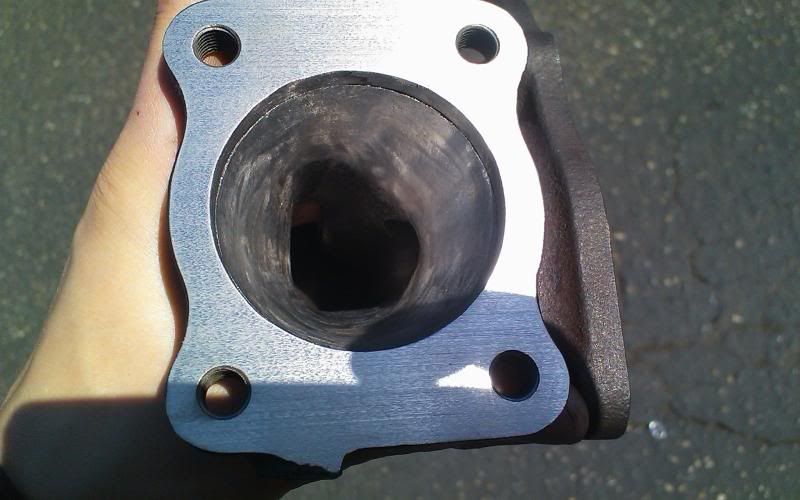
ported the turbine housing a little tiny bit:
put the suspension back on:


the hood latch:


found out the sway bar will not let me use the bigger oem oil filter so I'll have to buy some smaller oem ones:

picked up my new release bearing:

had an adapter made:


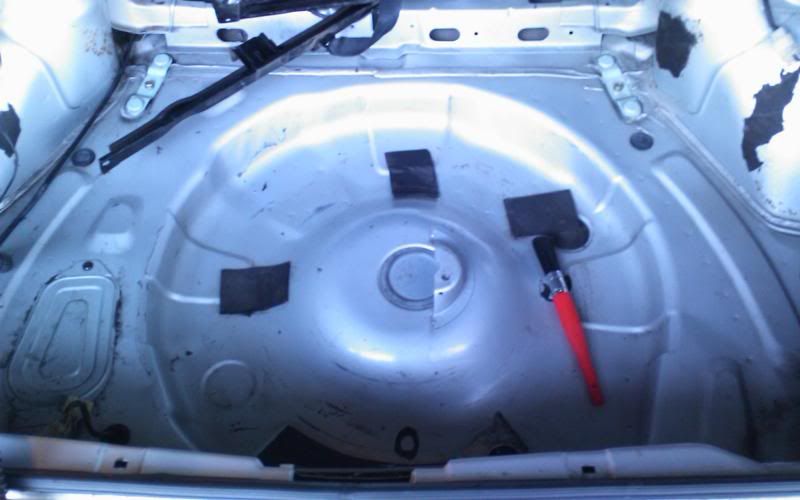
cut a big fucking hole in the floor of my car:


the motor:
ported the turbine housing a little tiny bit:
put the suspension back on:
the hood latch:
found out the sway bar will not let me use the bigger oem oil filter so I'll have to buy some smaller oem ones:
picked up my new release bearing:
had an adapter made:
cut a big fucking hole in the floor of my car:
So I've got a ton to update I'll try and make it quick. On a personal note, I had to move back in with my parents because i'm changing schools for next year and that means the car had to move, as well as me having to quit my job. Basically I didn't want to sign a lease somewhere I wasn't going to live for more than 3 months. So now the car is ALMOST done (not really, these things are never "done") and I'm broke. Good news is I've got time on my hands to do all the little details, but we'll see how it goes.
The stuff your interested in:
I guess Bill made a small miscalculation on the bell housing, as you may know me and matt were the first to get these bell housings so were effectively test fitting them. Bill is going to make a new design but in the mean time, my shifter will point a little bit to the passenger side:

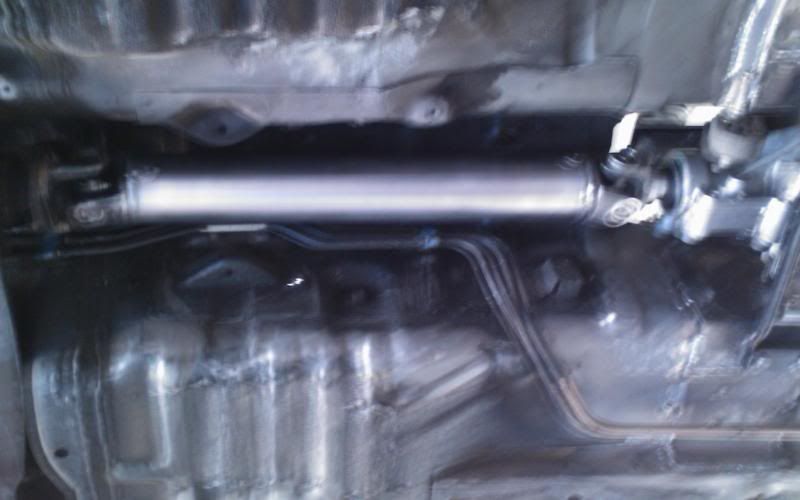
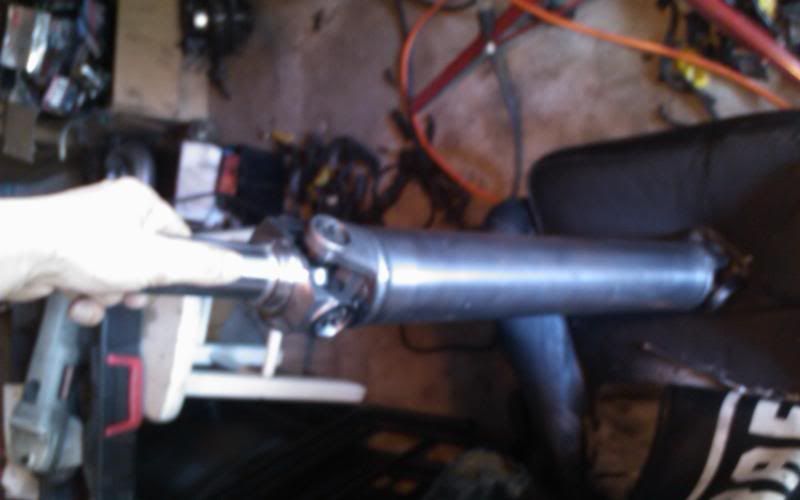
heres my driveshaft:
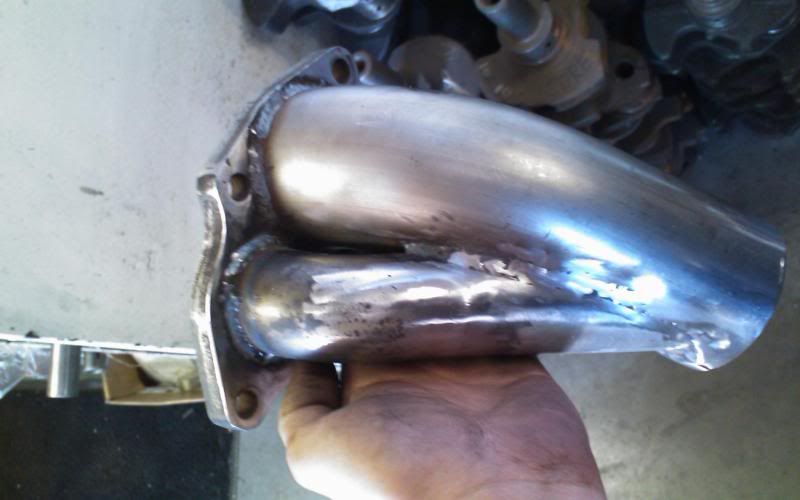
Exhaust:
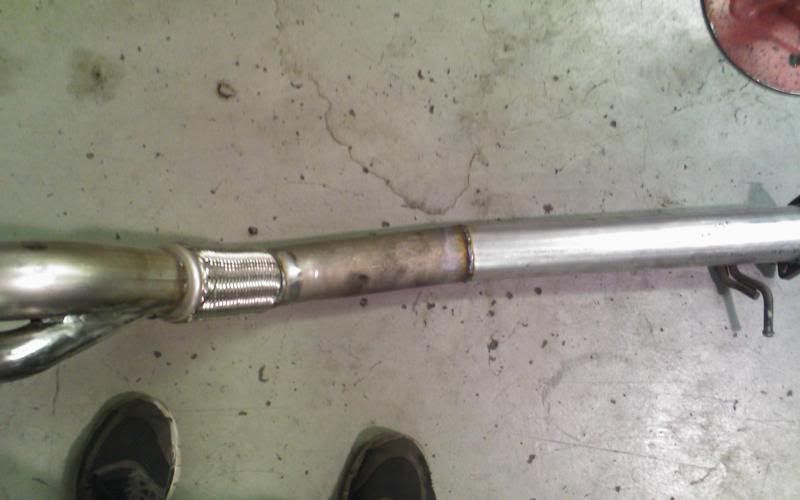

we built a cat back too, didn't have time for pictures of that though...
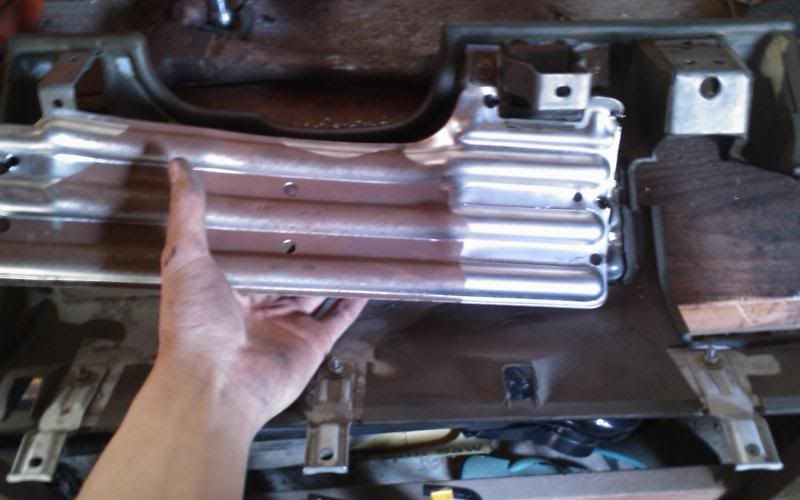
Tunnel almost done:


We did basically finish the tunnel but I haven't taken any pictures yet. The hole you see there is to allow me to get a ratchet on the top two bolts when removing the transmission. I'm going to weld 4 nuts on the under side and then that panel will seal the hole when I'm driving. The whole tunnel came out nice, but like everything you ever do in life, I can think of ways to improve it.
more to come later, the updates will probably slow down now as I have no money, but hopefully I'll get the car started sooner than later.
Also, I F&*KED up like an idiot. Turns out the flywheel I've been using this whole time is a fwd flywheel not an awd flywheel. SCREW ME. Now I've got to have another flywheel modified.
you win some you lose some.
The stuff your interested in:
I guess Bill made a small miscalculation on the bell housing, as you may know me and matt were the first to get these bell housings so were effectively test fitting them. Bill is going to make a new design but in the mean time, my shifter will point a little bit to the passenger side:
heres my driveshaft:
Exhaust:
we built a cat back too, didn't have time for pictures of that though...
Tunnel almost done:
We did basically finish the tunnel but I haven't taken any pictures yet. The hole you see there is to allow me to get a ratchet on the top two bolts when removing the transmission. I'm going to weld 4 nuts on the under side and then that panel will seal the hole when I'm driving. The whole tunnel came out nice, but like everything you ever do in life, I can think of ways to improve it.
more to come later, the updates will probably slow down now as I have no money, but hopefully I'll get the car started sooner than later.
Also, I F&*KED up like an idiot. Turns out the flywheel I've been using this whole time is a fwd flywheel not an awd flywheel. SCREW ME. Now I've got to have another flywheel modified.
you win some you lose some.
-
need2boostpsi
- Knowlege Seeker
- Posts: 29
- Joined: Wed Jul 07, 2010 3:32 pm
started the laborous process of removing the automatic seat belts and ALL of the wires that go with it. Swaping to manuals. Basically I have tons of time on my hands, no money, and a couple back ordered parts I'm waiting on. I cut out some metal from behind the dash to make it lighter, and I'm almost done removing all the wires from the a/c system, then I'll remove all the wires from the cruise control and abs. I'm considering re-wiring the entire ignition system to just a push button, with a couple hidden switches. For now I'll keep the factory alarm though.
well I'm almost done wiring. I've got a lot of soldering ahead of me but heres a sum up of what I've done:
removed all wires and components relating to radiator fans, abs system, cruise control system, automatic seat belts, ignition coil, and the a/c system.
started rewiring the cars so none of the wires go under the drivers and passenger seats. The ebrake light will be the only question mark here. I've relocated the wiring for the factory dome lights, removing roughly 10 feet of wire. Most of the wires will go under the dash or down the drivers side sidekicks. I'm planning on mounting the battery behind the drivers or passengers seat possibly. This will allow it to keep a low center of gravity in the middle of the car without making the wires too long. The car does need a master cut off switch though.
this car will have no center console, just the ebrake.
I am switching to normal manual seat belts until I have funding for a cage. the factory lap belt will be preserved, with the belt extended and anchored on the B pillar to create a normal 3 point seat belt.
I've figured out most of what the factory wiring is and does. I am looking for a better solution to the radiator and radiator fans, whatever I go to it will only have one relay instead of two. Hopefully I can finish the wiring within the next two weeks.
Due to finacial issues I've put a new goal on this project. Finish the wiring, put the interior back together, and put the engine bay together before I leave for school. This way the only thing holding me back will be the steering and brakes by the time I leave for school.
time for some photo updates...
got my clutch master cylinder finally:

removed a heavy sheet of metal from the pad on the bottom of the dash by your shins:
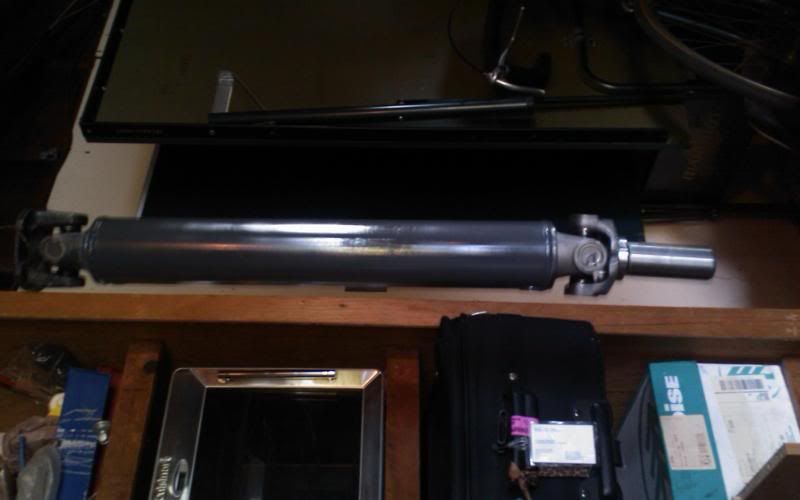
took a better picture of my driveshaft:
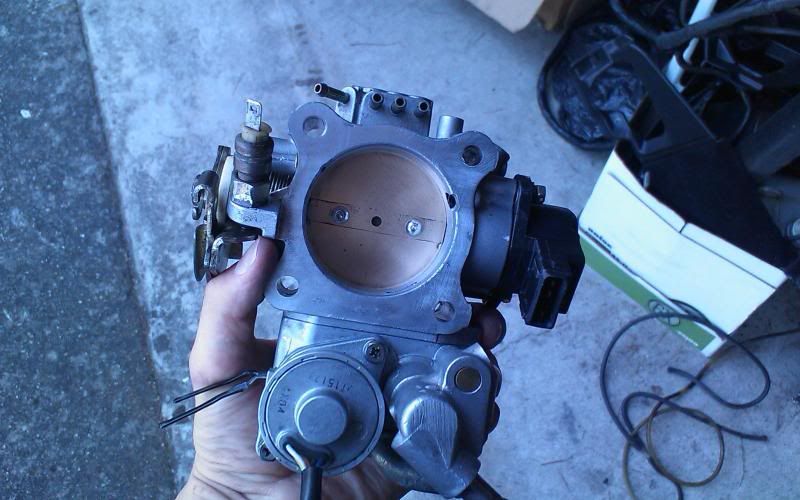
rebuilt my throttle body. Modified by yours truely:
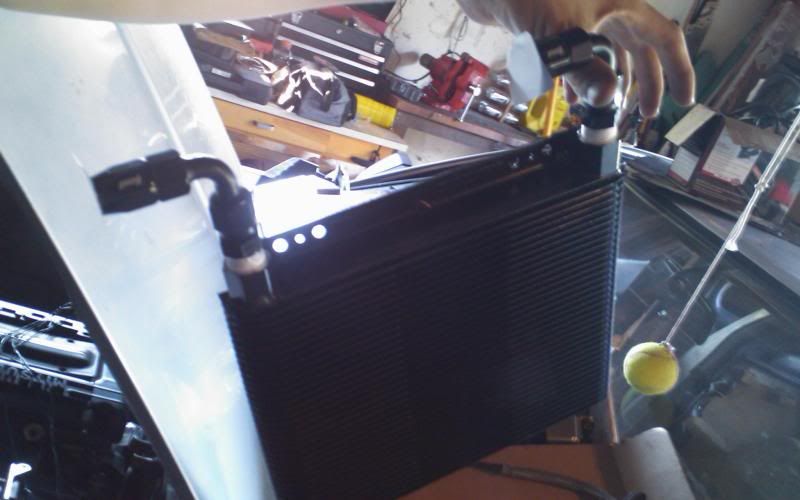
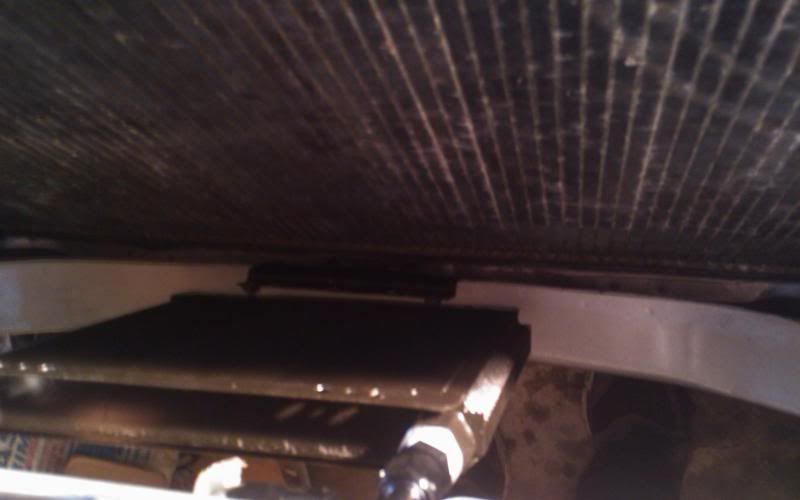
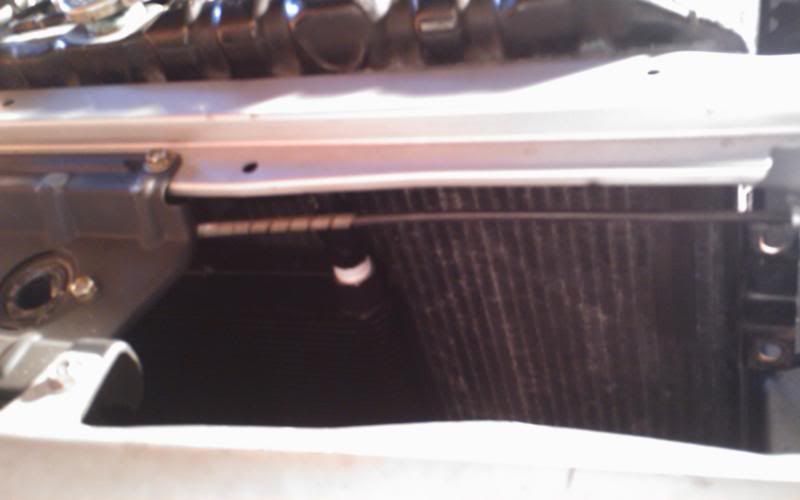
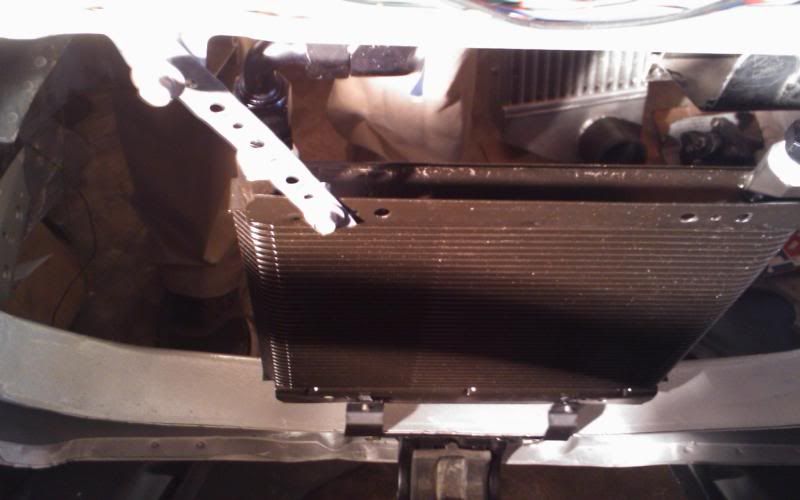
took a picture of my oil cooler that I'm waiting on some fittings for:
found my old greedy turbo timer and harness, found out it plugs right in and all I have to do is play musical wires:


for anyone wondering how the wiring is going:
 hey you can see my tunnel here
and this is a mock up of my upper intercooler pipe kinda:

got my clutch master cylinder finally:
removed a heavy sheet of metal from the pad on the bottom of the dash by your shins:
took a better picture of my driveshaft:
rebuilt my throttle body. Modified by yours truely:
took a picture of my oil cooler that I'm waiting on some fittings for:
found my old greedy turbo timer and harness, found out it plugs right in and all I have to do is play musical wires:
for anyone wondering how the wiring is going:
hey you can see my tunnel hereand this is a mock up of my upper intercooler pipe kinda:
Thought I'd post some more pictures. I made a bracket to hold my oil cooler, it was very cool. I'll explain later.
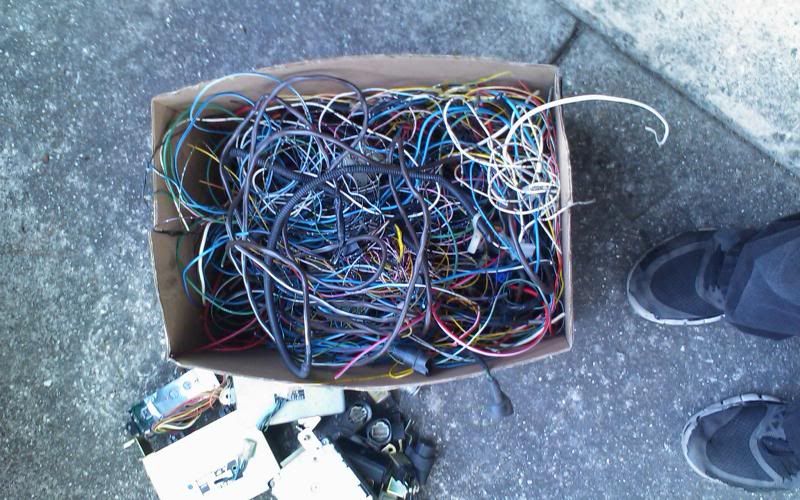
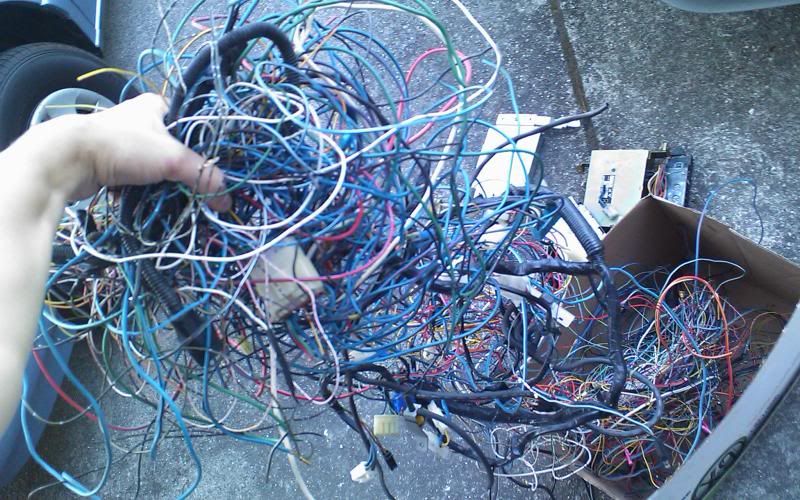
this is roughly how many wires I've removed from the interior alone.
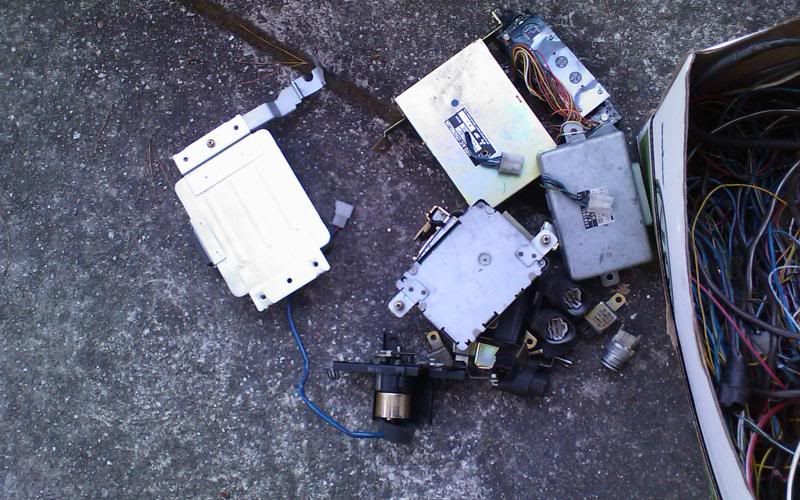
all the little components I've removed
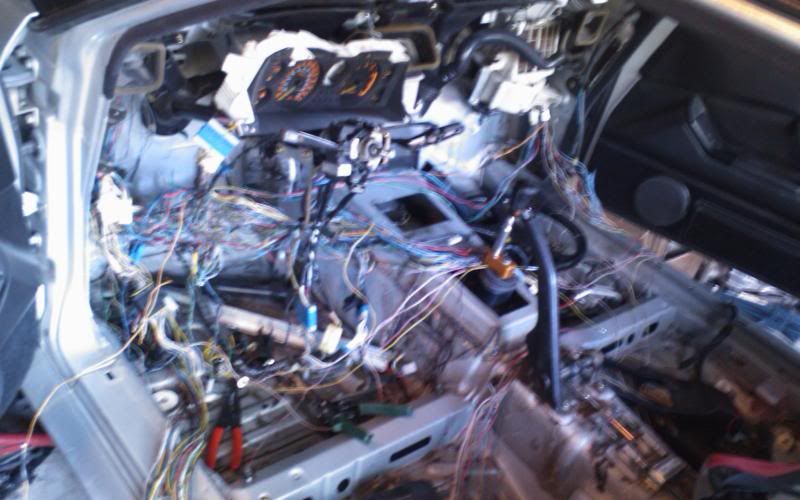
heres a somewhat recent picture of the interior

Today, first I modified the front bumper for lightness and intercooler fitment


Then I somehow realized that the center two nuts for the bumper that I just cut out of my bumper were spaced exactly the same as the oil cooler I bought and so I cut it out and bent the metal how it needed to be

fits like a charm.
this is roughly how many wires I've removed from the interior alone.
all the little components I've removed
heres a somewhat recent picture of the interior
Today, first I modified the front bumper for lightness and intercooler fitment
Then I somehow realized that the center two nuts for the bumper that I just cut out of my bumper were spaced exactly the same as the oil cooler I bought and so I cut it out and bent the metal how it needed to be
fits like a charm.
if your talking about the wires, I followed a 3 step plan.
1. Elminate all the wires you don't want.
2. determine which wires will prevent you from simply placing the wires under the rear seats instead of the front seats so no one will notice (I seriously think this is about 10 or so.
3. re wire those wires so they no longer go under the front seats.
I'll give two examples so this is easier to understand perhaps.
The passenger side door speaker wires go from the head unit, under the dash towards the drivers side door, down along the bottom of the drivers side door, under the passengers and drivers seat, and then along the bottom of the passengers door, finally returning under the dash before it goes through the wall into the door itself. These two wires can simply be cut, removed, and replaced with a significantly shorter wire that simply goes from the head unit, behind your glove box and directly to your speakers. The wires actually split into two a foot or so away from the head unit since the drivers and passengers door speakers use the same signal. Make sure you only delete the speaker your re-wiring and not both.
Another example is the power source for the dome light. The power for the dome light is off of a common power wire that goes through the car and powers a couple other things. If you go into the headliner and re route these wires down the drivers A piller rather than the passengers B pillar, you not only save about 20 feet of wire, but you also are able to tap into the exact same wire the dome light was already tapped into, just earlier in the wire. This wire is then no longer tied down where it used to split and is free to be re-located.
the biggest challenge is finding a new place to mount the power side view mirrors control. I have to do this anyways since I'm not running the factory peice.
ON THE OTHER HAND. If your talking about the insulation, I haven't finished yet, but I've just been using a paint scrapper. I'll have to find something better for the harder to get stuff, but most of it is just coming off really easy.
for the brackets in the engine bay, I cut them with tin snips and a cut off disk until they were as close as I could get to the spot welds, then grinded/sanded the spot welds down until they were flush. No filling needed.
For the insulation, like I said most of mine has been coming off. Obviously we had to take a lot off before we welded, but because we tried to hammer out the tunnel as much as we could before hand, a lot of it just came off in big chunks. I don't know what I'm going to do for the rest of it, but it doesn't seem like it will be too bad.
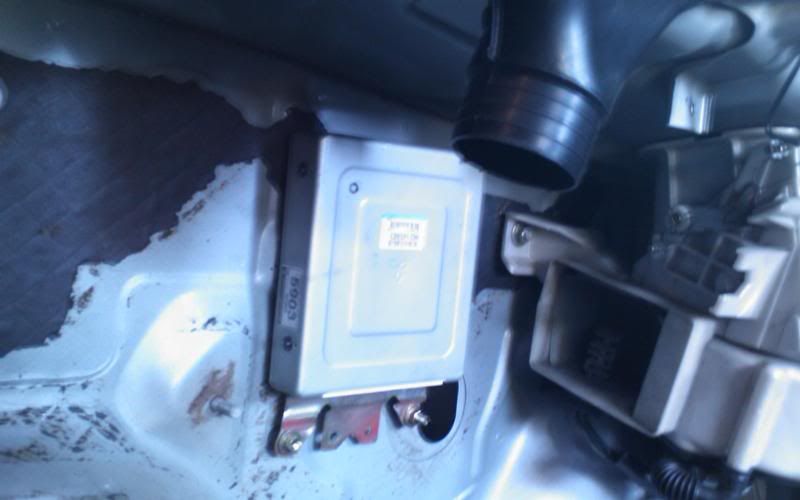
On a positive note, I've almost mounted my ecu, just have to find some type of adhesive rubber to put on the back so it doesn't shake itself to death.
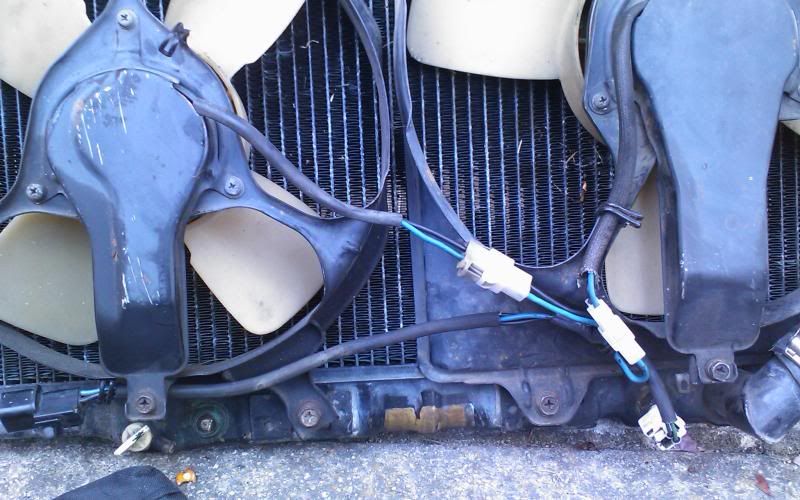
I've also finished wiring in the new radiator fan wires. I decided the oem set up was EXTREMELY GHETTO. Having the ground for the fans be the radiator is just asking for electrolosis to occure. I was looking around and thought to myself, hey, I bet the dsm thermoswitch would work. Sure enough it does. This is a two pin switch instead of 1, so the ground can be routed back into the primary wirng harness.
I also finished the mount for my oil cooler and almost finished the lines. I say almost for two reasons. I'm still waiting on summit to ship the adapters I bought in may, and also because one of the 90 degree fittings I bought stripped while I was installing it and was unable to finish it.
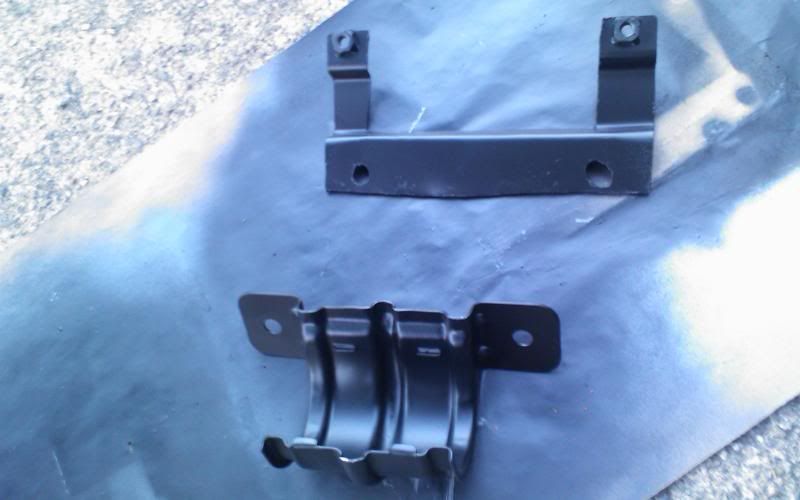
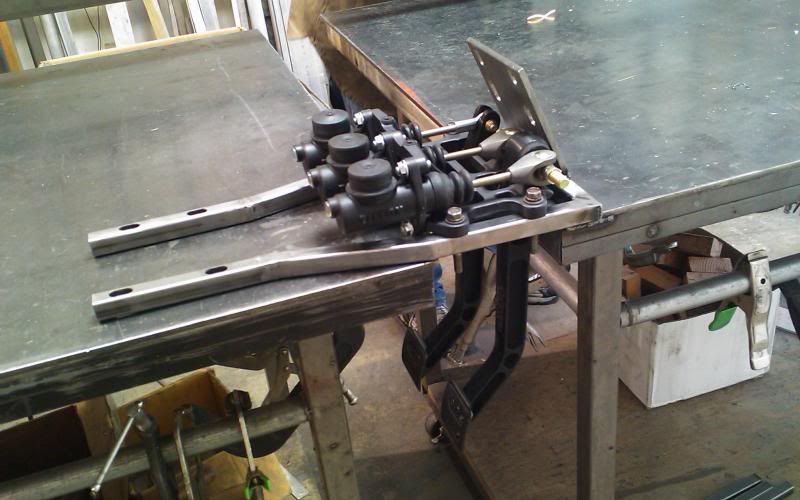
I also had a pedal assembly bracket made, but it needs modifying.
A lot of almost and not too much to check off the list.
For the insulation, like I said most of mine has been coming off. Obviously we had to take a lot off before we welded, but because we tried to hammer out the tunnel as much as we could before hand, a lot of it just came off in big chunks. I don't know what I'm going to do for the rest of it, but it doesn't seem like it will be too bad.
On a positive note, I've almost mounted my ecu, just have to find some type of adhesive rubber to put on the back so it doesn't shake itself to death.
I've also finished wiring in the new radiator fan wires. I decided the oem set up was EXTREMELY GHETTO. Having the ground for the fans be the radiator is just asking for electrolosis to occure. I was looking around and thought to myself, hey, I bet the dsm thermoswitch would work. Sure enough it does. This is a two pin switch instead of 1, so the ground can be routed back into the primary wirng harness.
I also finished the mount for my oil cooler and almost finished the lines. I say almost for two reasons. I'm still waiting on summit to ship the adapters I bought in may, and also because one of the 90 degree fittings I bought stripped while I was installing it and was unable to finish it.
I also had a pedal assembly bracket made, but it needs modifying.
A lot of almost and not too much to check off the list.
well guys, I'm extremely excited because I just realized if all goes well tomorrow, I should be able to start putting the interior back together. I still have a few more wires to do, but they are all under the dash, so all the engine bay stuff can be put in (most of it already has) and the rear interior can be put back together complelely.
I'm excited.
I'm excited.

great news everyone. My pedal assembly braket is done. My car (once the bracket is painted) has 3 pedals again. First time in what, a year or so? lol
ON TO THE PICTURES!
during assembly
damn thats sexy
check out my other side!
hugging the steering shaft:
wow, I cut and welded this bad boy and it still got in the way

nothing a BFH can't fix:
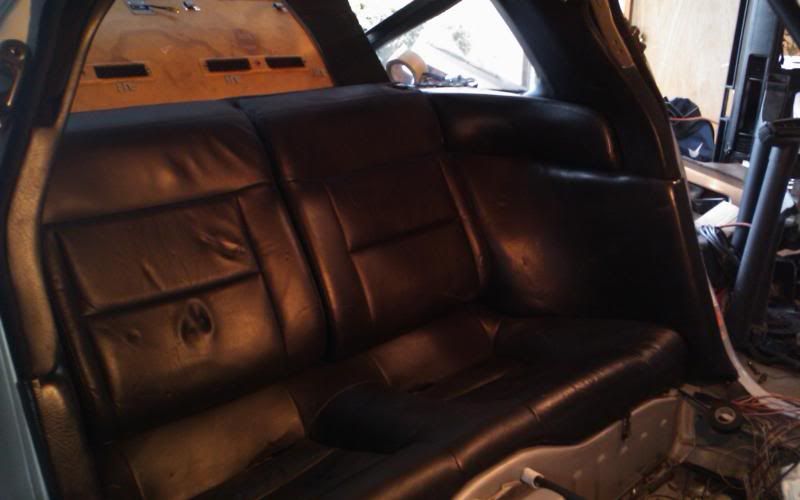
I'm stoaked needless to say. I also got my rear seats back in. Now I have a place to sit and reflect on my work, kinda.... I'm too tall to sit back there, hahaha
ON TO THE PICTURES!
during assembly
damn thats sexy
check out my other side!
hugging the steering shaft:
wow, I cut and welded this bad boy and it still got in the way
nothing a BFH can't fix:
I'm stoaked needless to say. I also got my rear seats back in. Now I have a place to sit and reflect on my work, kinda.... I'm too tall to sit back there, hahaha
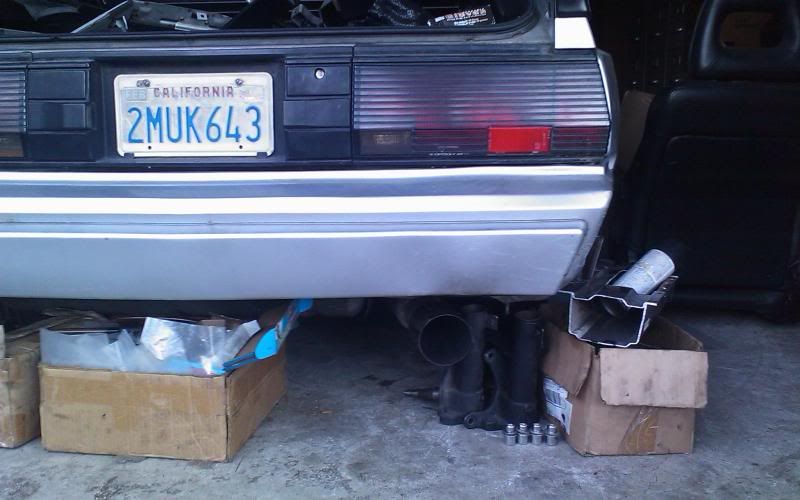
put the exhaust back on
also slapped my black air dam on so it wouldn't be taking up space in the garage while I'm gone.

I also finally got my adapters for the oil cooler. NOT from summit though. Screw summit.
So now whats left? I've got a tiny bit of wiring, the coolant lines, the intercooler piping, and some clean up work here and there. The biggest thing is the flywheel screw up on my part.
My goal is to finish the wiring by september and put the dash back in. Then the car will sit until I have the funding to finish it. Theres no other way of putting it. I Connected a battery and checked everything. Everything thats been wired works. turbo timer to brake lights. The car is so close yet so far.
also slapped my black air dam on so it wouldn't be taking up space in the garage while I'm gone.
I also finally got my adapters for the oil cooler. NOT from summit though. Screw summit.
So now whats left? I've got a tiny bit of wiring, the coolant lines, the intercooler piping, and some clean up work here and there. The biggest thing is the flywheel screw up on my part.
My goal is to finish the wiring by september and put the dash back in. Then the car will sit until I have the funding to finish it. Theres no other way of putting it. I Connected a battery and checked everything. Everything thats been wired works. turbo timer to brake lights. The car is so close yet so far.

trying to decided if I should leave that air dam black or paint it silver. I'm heavily leaning towards painting it, but I'll get it fully mounted and all the fenders aligned and everything before I make a final decision. Also was able to pick up a factory skid plate and some random interior peices I was missing. Those will go one soon.
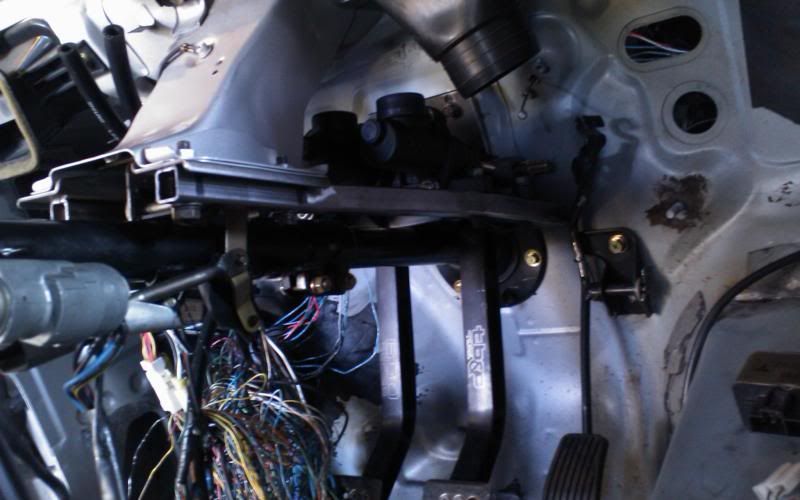
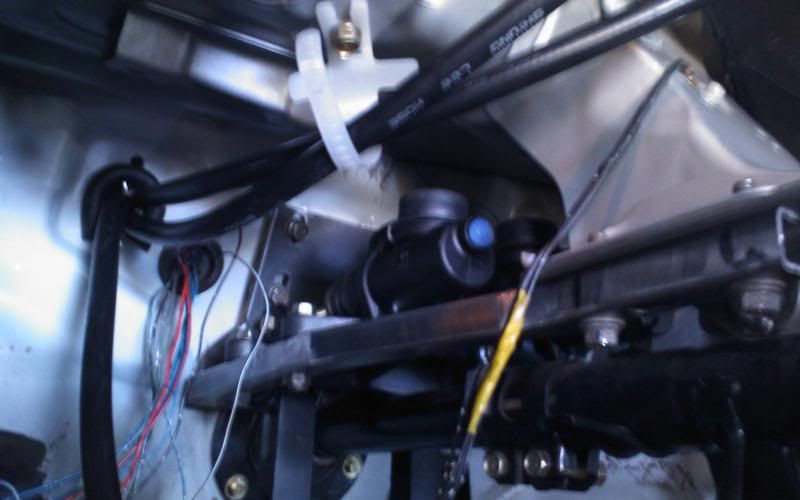
As for the car, I had the last welding I needed done to the jay racing water pump adapter, threw a -6 an fitting on it so my turbo coolant lines will be SS now. I've got everything coolant wise figured out except the thermostat housing. Going to try and weld something up for that. I need to make the oem unit about .5 inches slimmer than it is currently. Here are my under intake manifold pipes and how they will sit.

the skinny one on the bottom is the throttle body coolant feed, while the large one in the middle is the heater core and throttle body coolant return line. This will go over the front of the engine and into the jay racing adapter at the front. The large line on the top is the upper radiator hose obviously.
This is basically exactly how the oem set up is, except everything gets from point A to B taking different paths.
I ordered a bunch of stuff so I can complete my brake lines. I should have brakes and a clutch by next week. It will be nice knowing the car is so close to being done.
I've been researching some speedo options, as I don't currently have money for the long term solution I want to use. We'll see where it takes me.
so I plugged everything I could in today, hooked up jumper cables since I don't have a battery, and everything works. Dsmlink connects, etc...
the wiring is basically done except the wires for the transmission. I got a speedo wired up but I need a dakota digital for it to work correctly. Its an oem 2g speedo, so it will look kinda oem...
the wiring is basically done except the wires for the transmission. I got a speedo wired up but I need a dakota digital for it to work correctly. Its an oem 2g speedo, so it will look kinda oem...
-
Bill Hincher
- Donating Member
- Posts: 1625
- Joined: Thu Jun 22, 2006 8:57 pm
- Location: Toledo,Ohio
- Contact:
outstanding work brian, amazing attention to detail as well as the dedication and focus to your project, people loose site of how hard it is to remain 'on target'
I know you dont see the weather seasons we do, that kinda dictates the work routine here, its time for us here to get our winter projects inside so we can work during the winter
sooooooooooooo by the time your ready to get back to the project, I should have some ready made, long input shaft versions of the T 56 housings ready to exchange with you
I want to get that angle corrected as well as change the housing to accept the EVO 4through9
If your going to work that hard to get a nice finish, I can take a little time to get your housing perfect
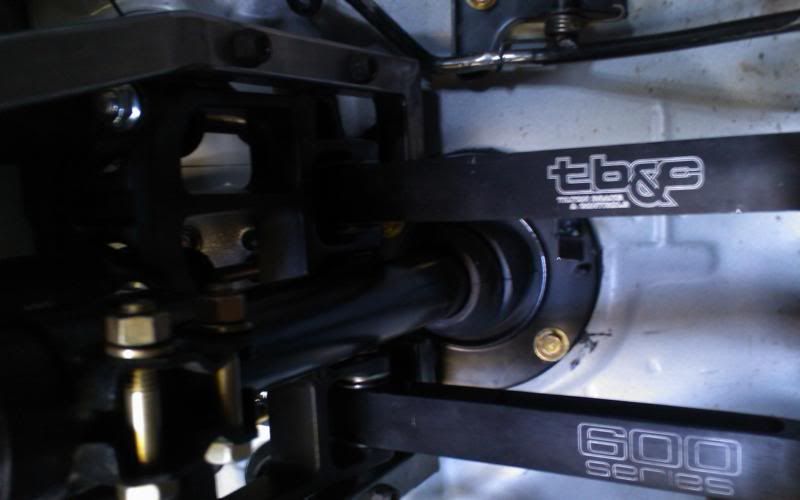
great to hear bill. That whole flywheel ordeal means I have one last trip down into the bell housing area anyways, so if you have it done by the time I get back to this project that will be great. I'm guessing you'll be able to do that since I'm starting school in a couple weeks which means the car gets locked up tight for a long snooze. Its a real shame because its got brakes now and wires, all it needs is that flywheel and some steering. I'm really leaning towards the s2000 steering rack because it would appear that my speedometer, ecu, and the electronic steering rack control computer uses the same pulses per mile input for vehicle speed, which means the wiring side of things will be cake. The biggest issue will be bump steer, and more importantly, the change in bump steer when I go to make a new subframe for this thing with longer LCA's with better roll centers. I like this idea better because it will reduce the anti dive, which will allow me to put more brake bias towards the rear and have less understeer on turn in under braking.
I guess I'll just have to make an adjustable bracket, HAHAHAH
I guess I'll just have to make an adjustable bracket, HAHAHAH
TsTKl wrote:got my kelford 272 cams and aem cam gears today. Just need to get some new lifters and rockers and then the cylinder head will be done....
with intake timing thingy installed...
too lazy to open the box and get oil everywhere....thats all you get to see for now.


Hey man looks like projects coming along real good! I just want to confirm a few things before i but some after market gears?
Im using the front cam sensor and ive just got mine running but im planning on doing a cam and cam gear change.
Im just not sure which cam gears i can use that are able to have the cam trigger wheel attatched to it? i love the look of your ones, just wanted to no how do you install the trigger wheel off the original gear as the new gear wont have the 4 screws like the original one cheers
going to refrain from adressing the third time that question has been asked.
ANYWAYS.
1 I am still alive
2 The car still exsists
3 School sucks
I've got a tiny update however. The last thing I was trying to do before I left for school this summer was get working brakes. All the parts are officially now in and I am one flare away from being able to fill her up with brake fluid and have working brakes.
Second. Remember that whole wrong flywheel deal?

solved. Now I just need to machine this bad boy and then swap it out for the one thats in there and i'll be able to start this beast up. There are still a lot of lose ends like cooling and such but those can be solved fairly easily. The car is almost in a running state so I'm pretty proud of that. I'll update later in the summer hopefully.
ANYWAYS.
1 I am still alive
2 The car still exsists
3 School sucks
I've got a tiny update however. The last thing I was trying to do before I left for school this summer was get working brakes. All the parts are officially now in and I am one flare away from being able to fill her up with brake fluid and have working brakes.
Second. Remember that whole wrong flywheel deal?
solved. Now I just need to machine this bad boy and then swap it out for the one thats in there and i'll be able to start this beast up. There are still a lot of lose ends like cooling and such but those can be solved fairly easily. The car is almost in a running state so I'm pretty proud of that. I'll update later in the summer hopefully.
-
PoorMans180SX
- Knowlege Seeker
- Posts: 9
- Joined: Mon Jan 02, 2012 3:42 pm
Unfortunately I basically built it straight on that bracket I took of the car so I dont really have dimensions. Heres the pedal assembly dimensions though:
http://www.tiltonracing.com/sites/defau ... erhung.pdf
http://www.tiltonracing.com/sites/defau ... erhung.pdf
just dont build the exact same car as mine and finish it before me. school sucks up so much time but I've got all the parts together to get the brakes finished and the flywheel in and everything. I still want to re-do the oil pan gasket and the valve cover, so I wont fill it up with oil or anything but it will be nice to bleed the brakes and see those work and everything.
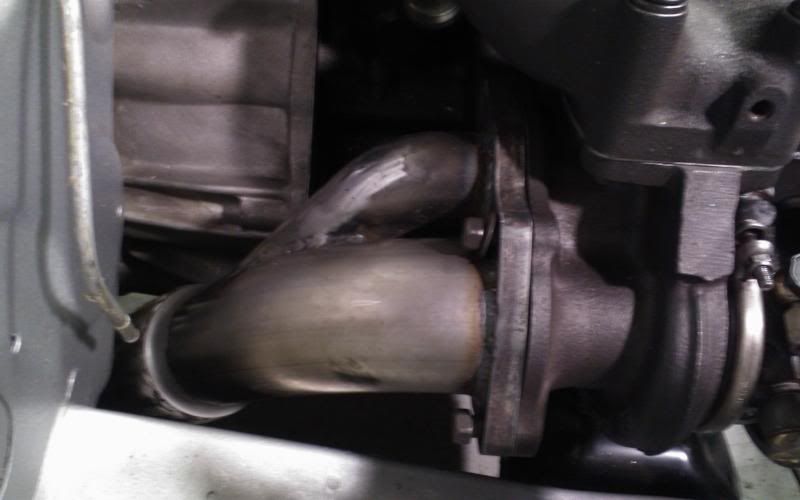
If you haven't already put the front end back together, I would really appreciate a lot of pictures showing how much room there is (or not) when you mount the exhaust manifold. With measurements between the frame of the car would be really appreciated.
I have checked every place I know of but all anyone ever says is there is plenty of room and you could even put a larger turbo. But how much room and how big of a turbo?
Thankx, David.
I have checked every place I know of but all anyone ever says is there is plenty of room and you could even put a larger turbo. But how much room and how big of a turbo?
Thankx, David.
WE HAVE BRAKES!!!!!!
Also for the turbo question, that completely depends on your motor mount choice, driveline angle, and the manifold you use. I could give you a rough estimate, but basically if you use a custom manifold you could fit any turbo in the world over there. Also I'm not sure what specifically you would want me to measure since the face of the exhaust manifold is not parallel to the ground and thus its not as smiple as measuring the height of the turbo or something
Also for the turbo question, that completely depends on your motor mount choice, driveline angle, and the manifold you use. I could give you a rough estimate, but basically if you use a custom manifold you could fit any turbo in the world over there. Also I'm not sure what specifically you would want me to measure since the face of the exhaust manifold is not parallel to the ground and thus its not as smiple as measuring the height of the turbo or something
I was more thinking from the exhaust ports of the head. This would give the amount of overall room to fit the manifold and the turbo. I was previously thinking about going with a HX40 with a twin scroll turbine but I have since changed my mind an bought an HE351VE. It's even bigger but it will be an easier manifold to builld give better spool and I only need one wastegate.


Well guys I finally have some updating to do again.
say it with me now, OOOOOOOOHHHHHHH SHINNYYYYY

That flange should have no problem at all sealing now, which is good since its going to sit so close to the fire wall. Anyways it turns out the welding screwed with the top flange enough to prevent the thermostat from being able to sit in the housing properly, so I'll have to do some touch up work on that as well.
On another note:


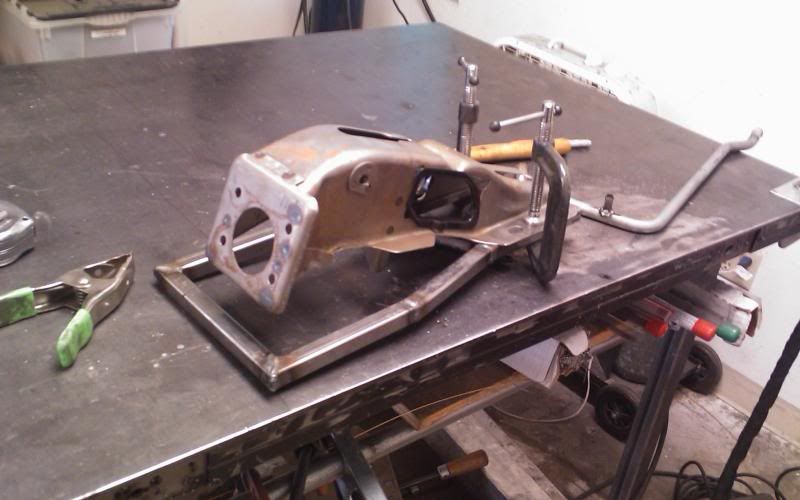
As you can see from these pictures, I've done some extensive modifications to my adapter which holds my tilton engineering internal throw out bearing. The last thing to do as far as this is concerned is speak to bill about the finalized version of this bell housing. It would appear that the input shaft isn't getting very much engagement on the pilot bearing, and this is something I would like to rectify. In my opinion based on the measurements I've taken, it would require an additional 11-15 mm of depth for the shaft to be fully on the pilot bearing. However, my pilot bearing has been pushed farther down into the crankshaft and could be moved back forward to rectify roughly 8mm of this. Obviously this effects the thickness of the spacer which I have made. Luckily removing material is MUCH easier than adding it. I will speak to bill and work out the finalized dimensions so that he can start making these for the mass public. Also I'll help people out with the adapter if they need it so they can use the tilton engineering internal throw out bearing.
say it with me now, OOOOOOOOHHHHHHH SHINNYYYYY
That flange should have no problem at all sealing now, which is good since its going to sit so close to the fire wall. Anyways it turns out the welding screwed with the top flange enough to prevent the thermostat from being able to sit in the housing properly, so I'll have to do some touch up work on that as well.
On another note:
As you can see from these pictures, I've done some extensive modifications to my adapter which holds my tilton engineering internal throw out bearing. The last thing to do as far as this is concerned is speak to bill about the finalized version of this bell housing. It would appear that the input shaft isn't getting very much engagement on the pilot bearing, and this is something I would like to rectify. In my opinion based on the measurements I've taken, it would require an additional 11-15 mm of depth for the shaft to be fully on the pilot bearing. However, my pilot bearing has been pushed farther down into the crankshaft and could be moved back forward to rectify roughly 8mm of this. Obviously this effects the thickness of the spacer which I have made. Luckily removing material is MUCH easier than adding it. I will speak to bill and work out the finalized dimensions so that he can start making these for the mass public. Also I'll help people out with the adapter if they need it so they can use the tilton engineering internal throw out bearing.
-
Bill Hincher
- Donating Member
- Posts: 1625
- Joined: Thu Jun 22, 2006 8:57 pm
- Location: Toledo,Ohio
- Contact:
I was wondering when we would get back to this >;o) life been a wild ride at this end when we first met my wife was first diagnosed with cancer, she is now in hospice and at the end of her life, but I do need to anwer all the questions with the T 56 trans
from what I have learned the input shaft is interchangeable in all but the very earist T 56 and that will allow me to stanadrize on bellhousing for all T 56 transmissions with one input shaft
I need to finish some work on the K 20 a and then build the T 56 dapater for 4 given engines
you can find me here anytime
http://www.facebook.com/yahoo#!/bill.hincher
Hey all. Finally got a tiny bit of work done on the car again. I'm hoping to have some projects done before I move back to the bay area and start working on this for real again. The thermostat is finally done (minus some re-tapping of some warped holes) as well as the modifications to the dip stick tube. I also began making the intercooler end tanks for my personal FMIC design and will be welding them up this week. I went with 0.090" thick 5052 aluminum and will be using some heat treatable welding rod so I can get this post treated before I put it on the car. I tried to minimize the welding since that is the weakest part of any intercooler.


So I've been working on the car more now that I've graduate. Putting time in here and there. The wiring is making good progress, and I finally got around to picking up the correct fitting for my turbo drain.
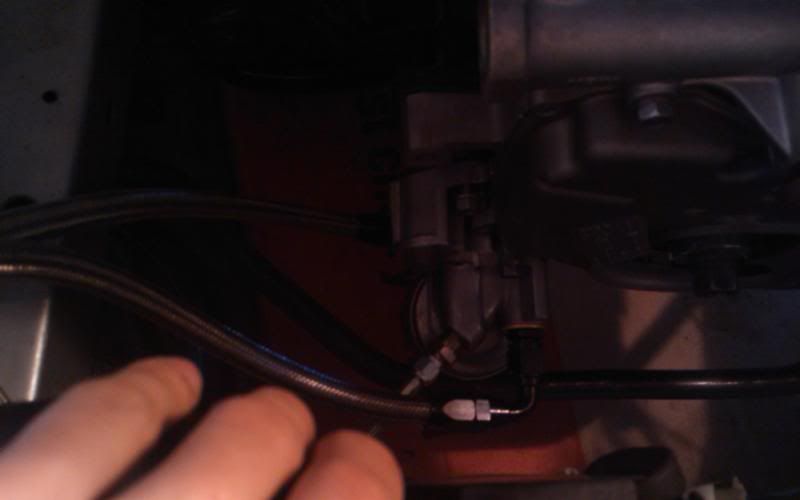
I thought I'd include a picture of some engine bay plumbing. I figured out the routing of the turbo outlet pipe to the intercooler, as well as a mount for the turbo oil feed and some other small details. The piping is unfortunately temporary.

I thought I'd include a picture of some engine bay plumbing. I figured out the routing of the turbo outlet pipe to the intercooler, as well as a mount for the turbo oil feed and some other small details. The piping is unfortunately temporary.