Mad Menace's Mighty Max, 11/8/2010 Take 2: Stock short block

Swaps in Progress, on the Road and on the Track.

Moderators: DJpowerHaus, mattmartindrift

Mad Menace
Addict
Posts: 214
Joined: Wed Nov 11, 2009 10:11 pm
Location: Colorado

Mad Menace's Mighty Max, 11/8/2010 Take 2: Stock short block

Post by Mad Menace »

Ok Heres the Truck as she sits today:
ImageImageImageImageImage
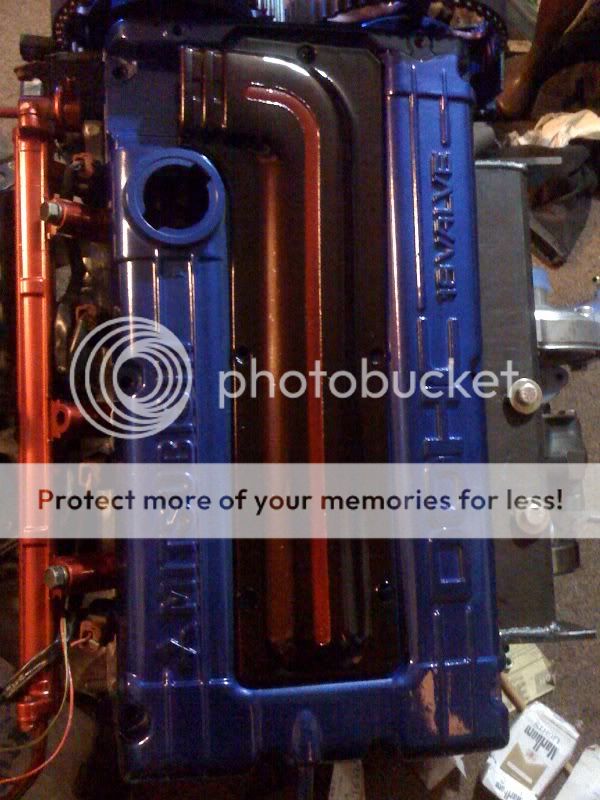
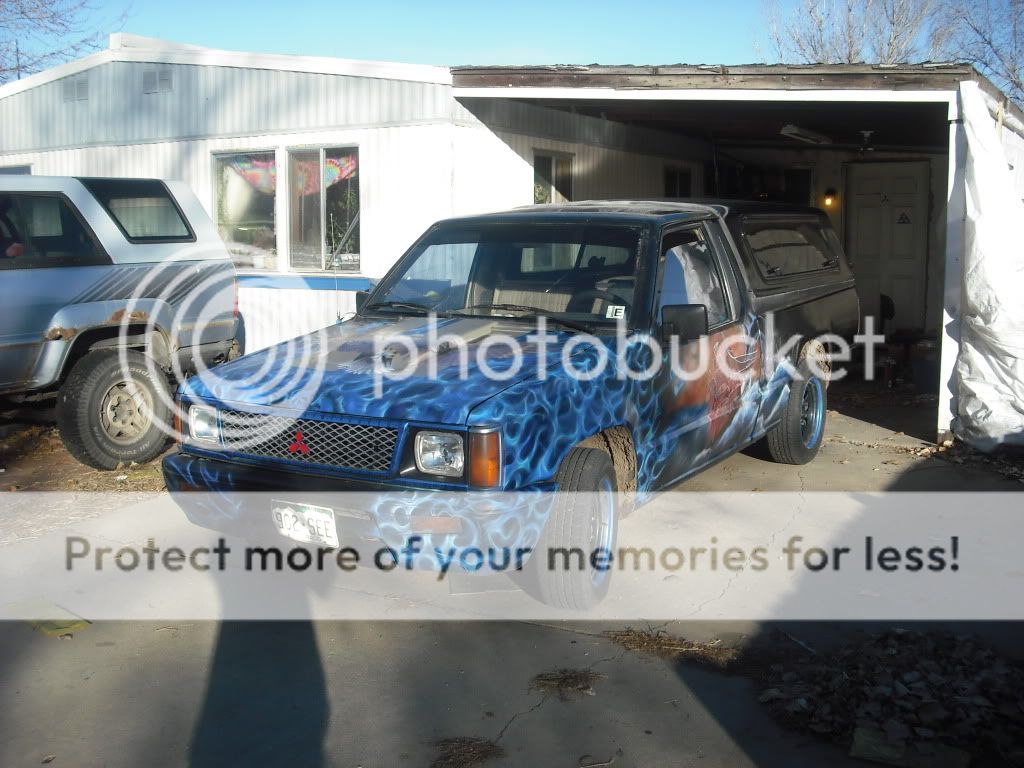
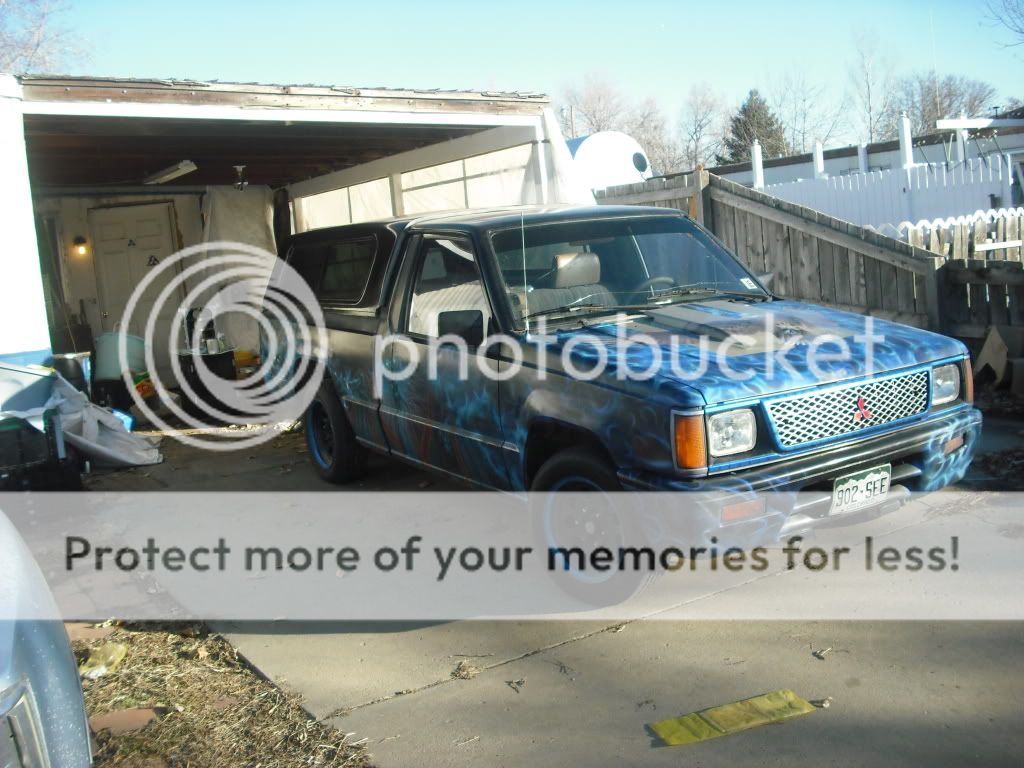
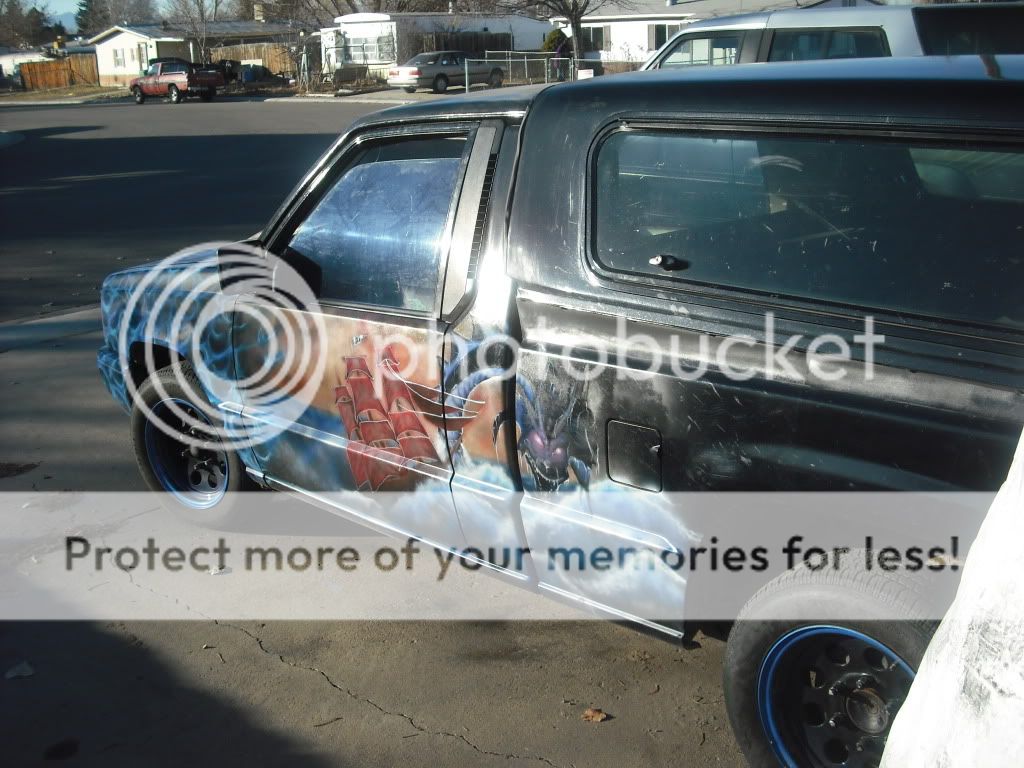
I did all that Airbrush work too BTW. I can do some for you guys too if anyone's interested.
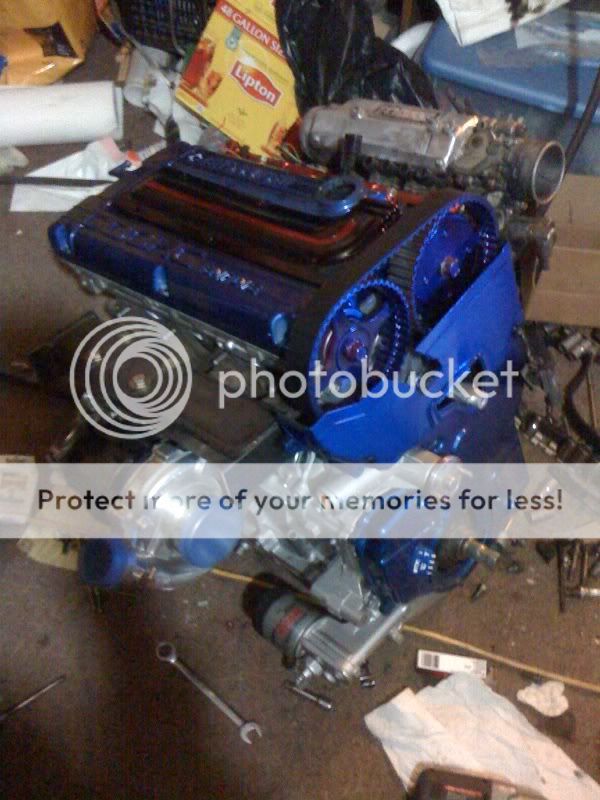
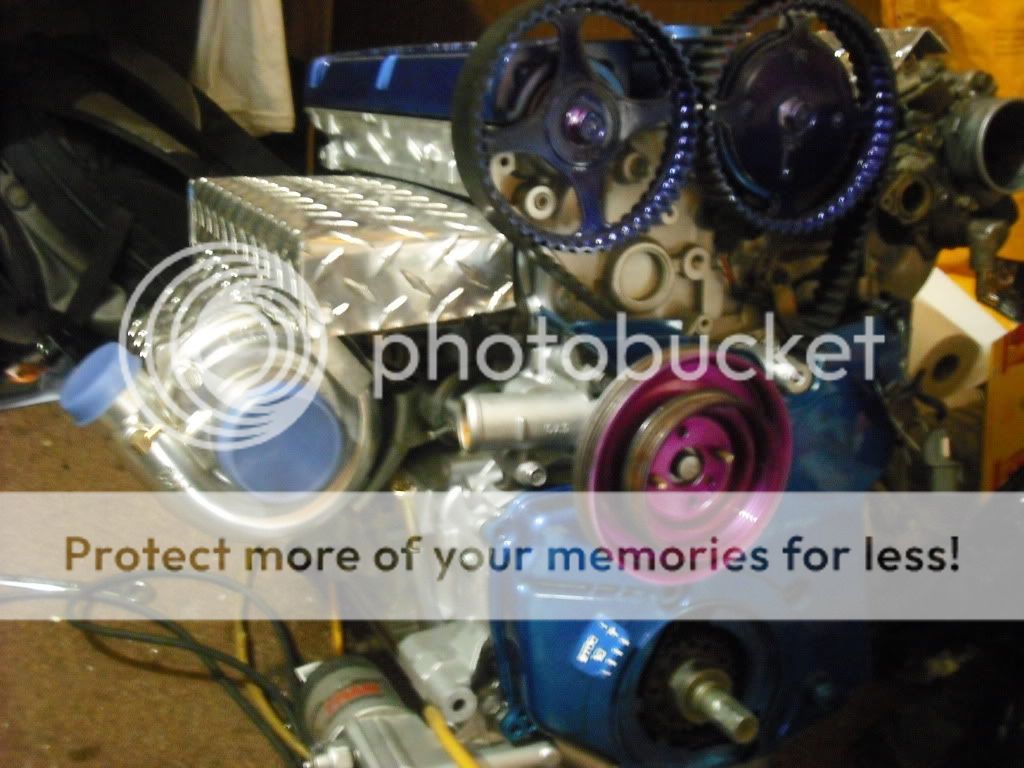
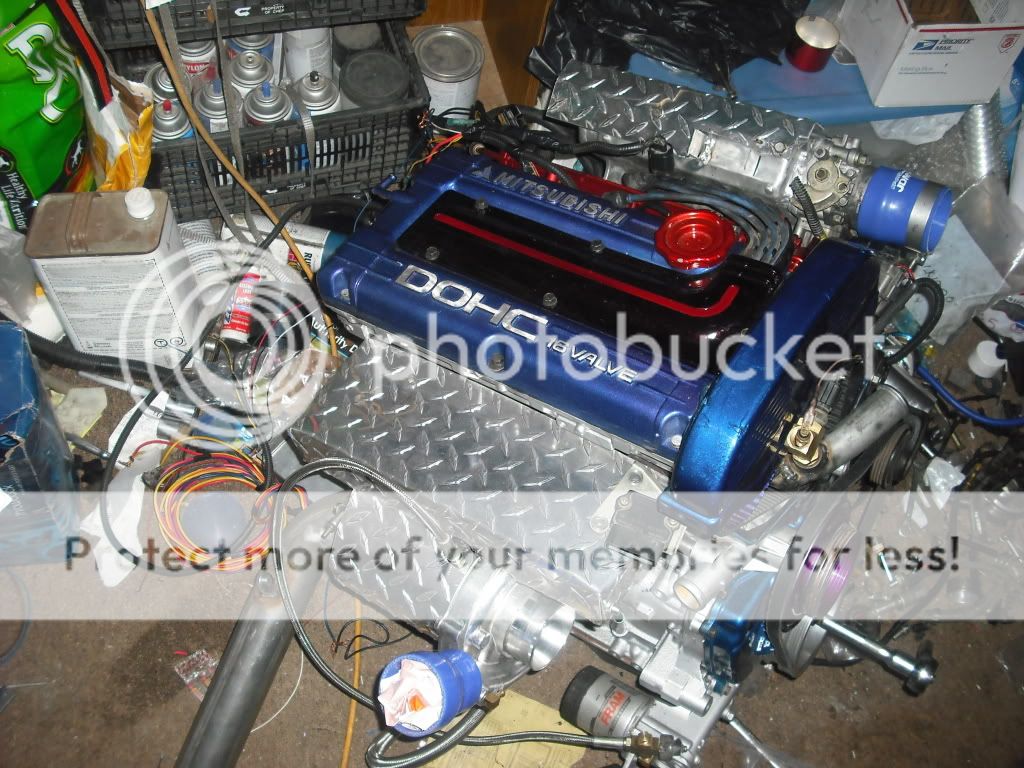
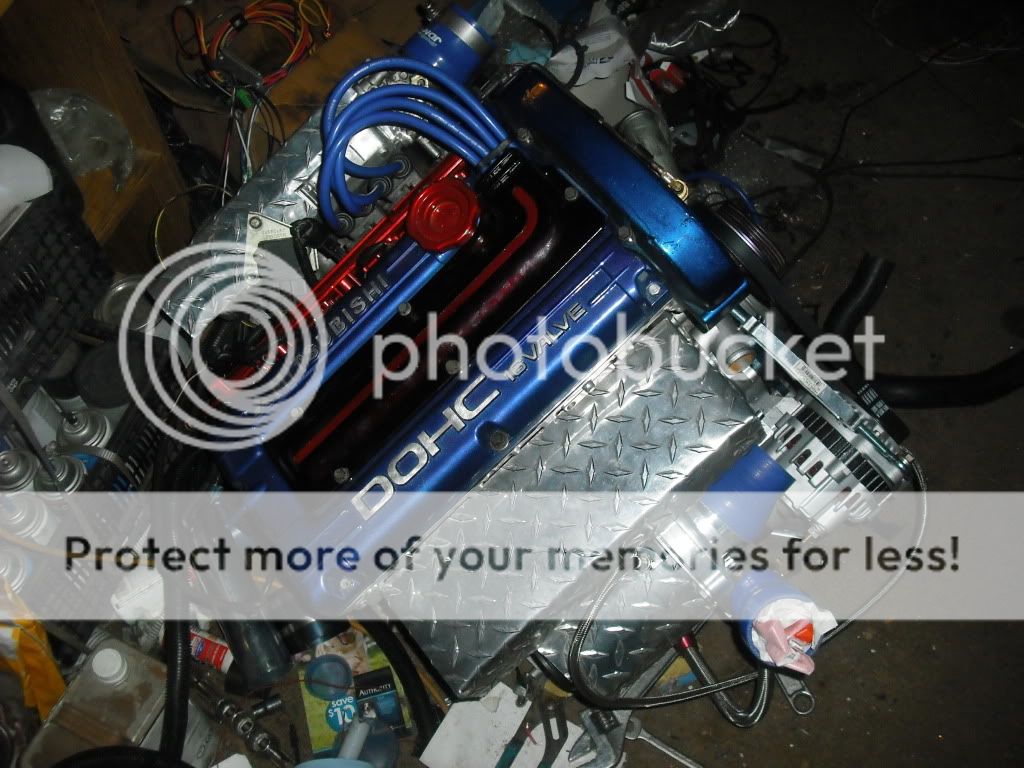
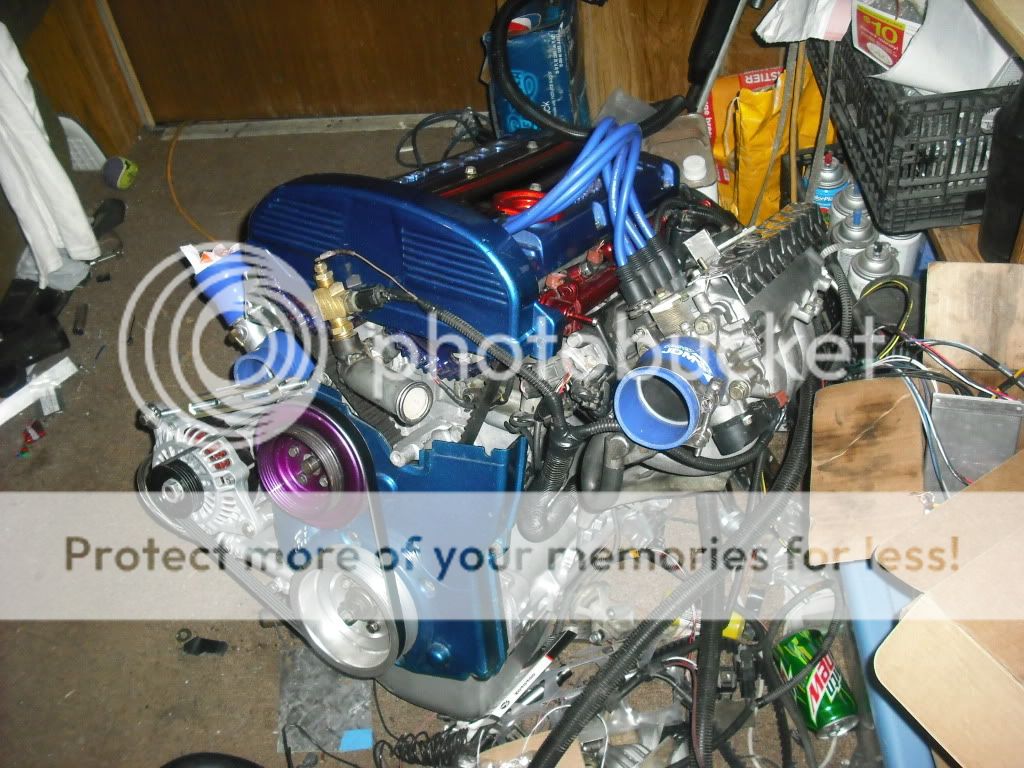
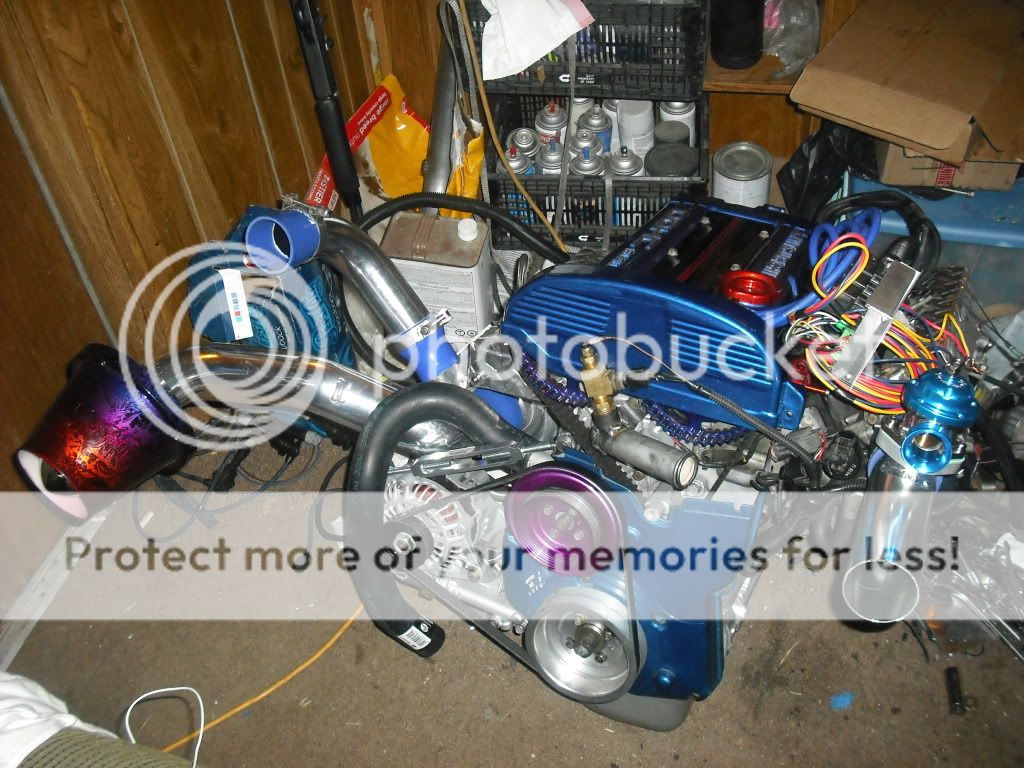
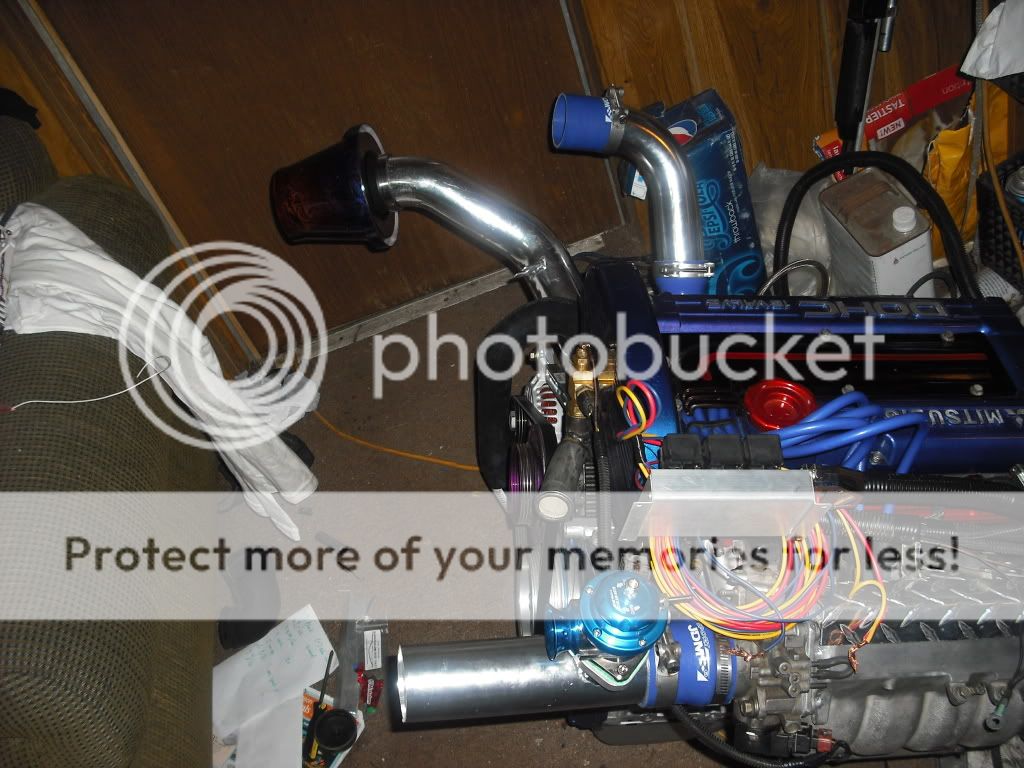
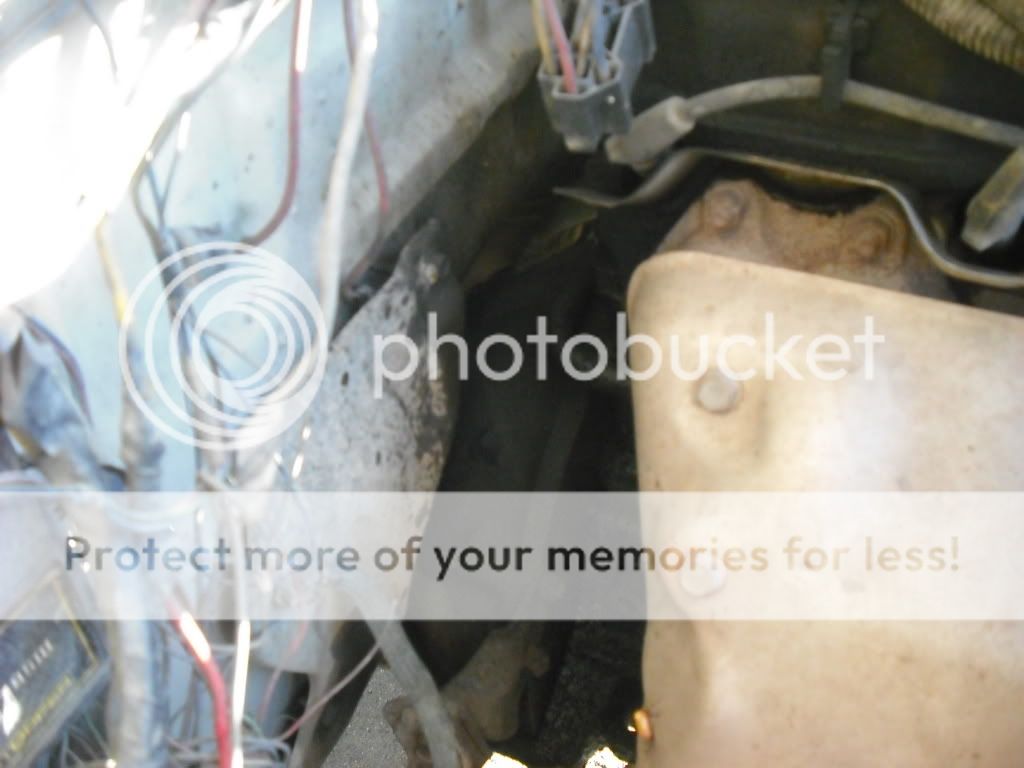
Under the Hood As-Is:
ImageImage
Here's the results of the Rear Main Leak,
ImageImage
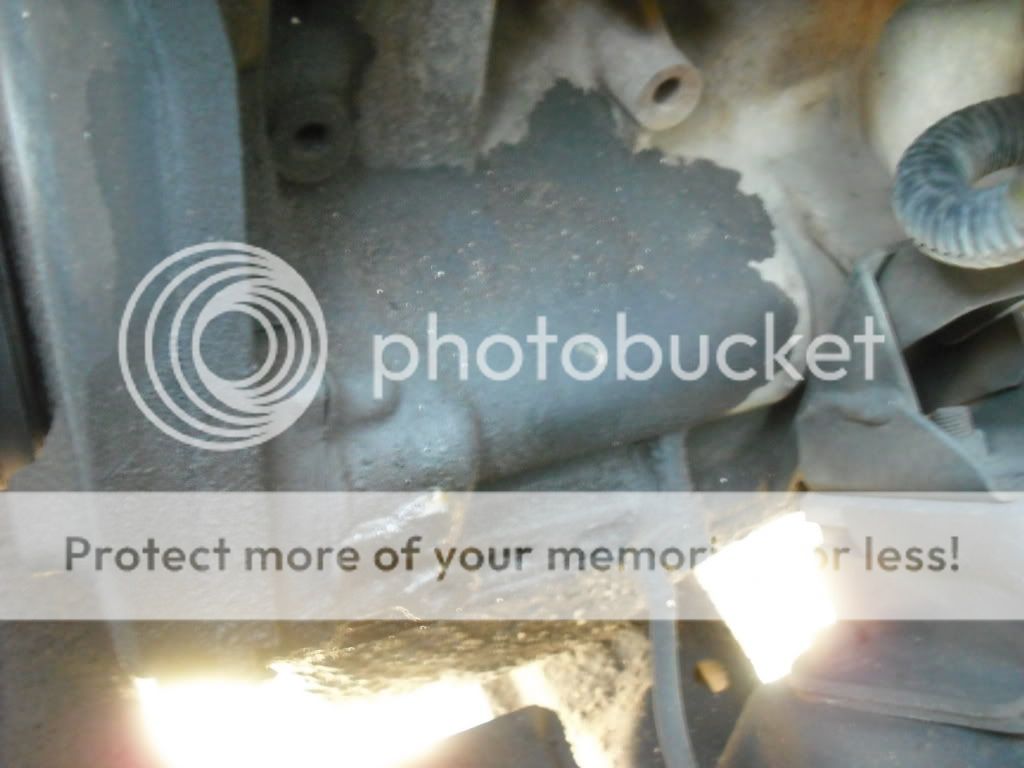
And the Front Cam seal leak,
ImageImage
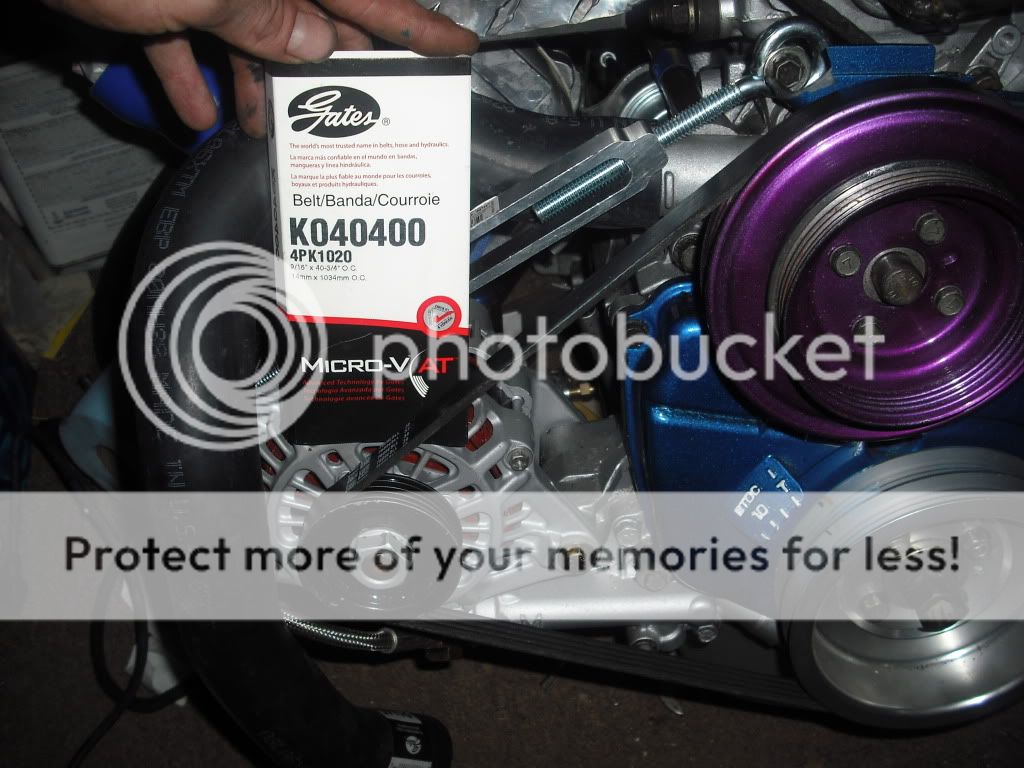
But all of this is going to be going away soon, hopefully directly after the 1st of the year 2010, I got a slew of parts coming this week, Gasket set, Pistons and Rings (.020" over) Connecting Rods, bolts and pins, Connecting Rod and Main Rod Bearings (.020" over), Turbo, Timing Belt and Tensioner and a few other small parts here and there.
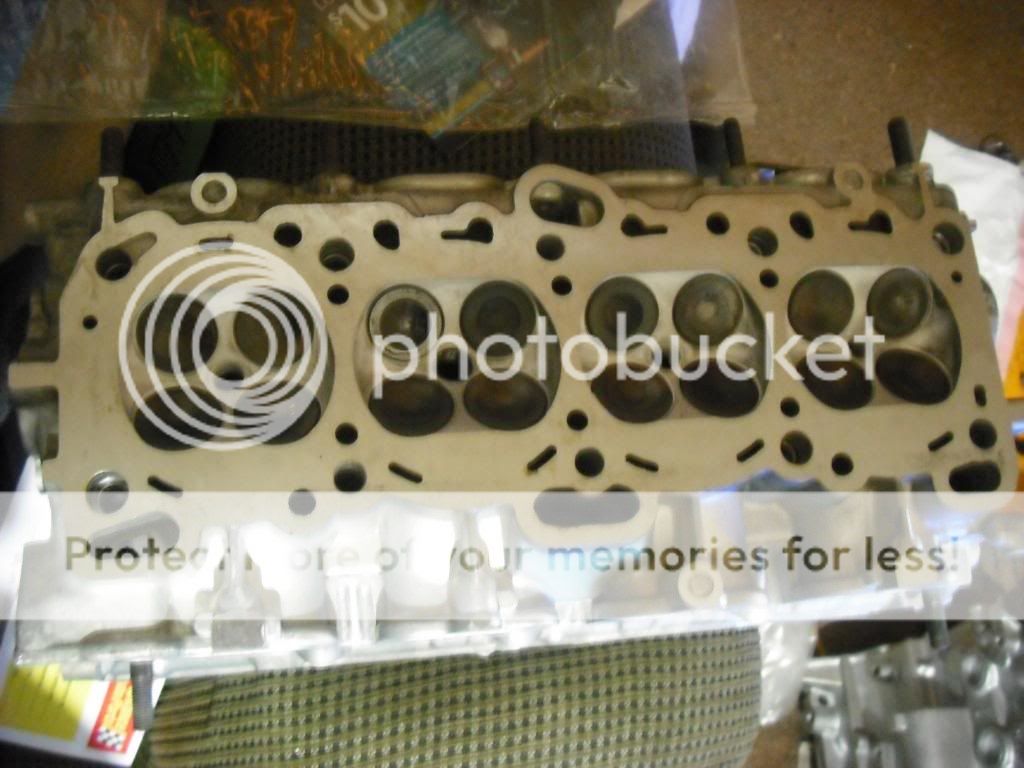
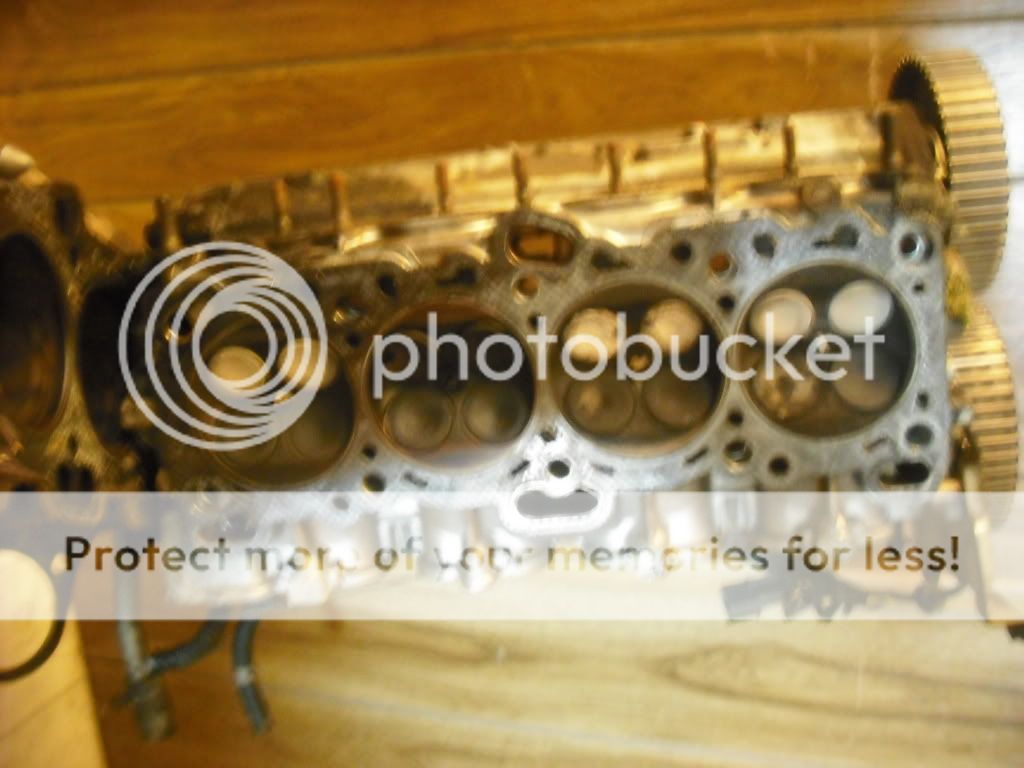
Right now I have my Crank shaft and full DOHC head assembly in the shop having the Crank worked and re-surfaced, And the head is having a full 16v Stainless Steel Valve and Guide job done, 3-step seat grinds, a good jet/hot tank cleaning and a re-surfacing. I should also get those back next week.
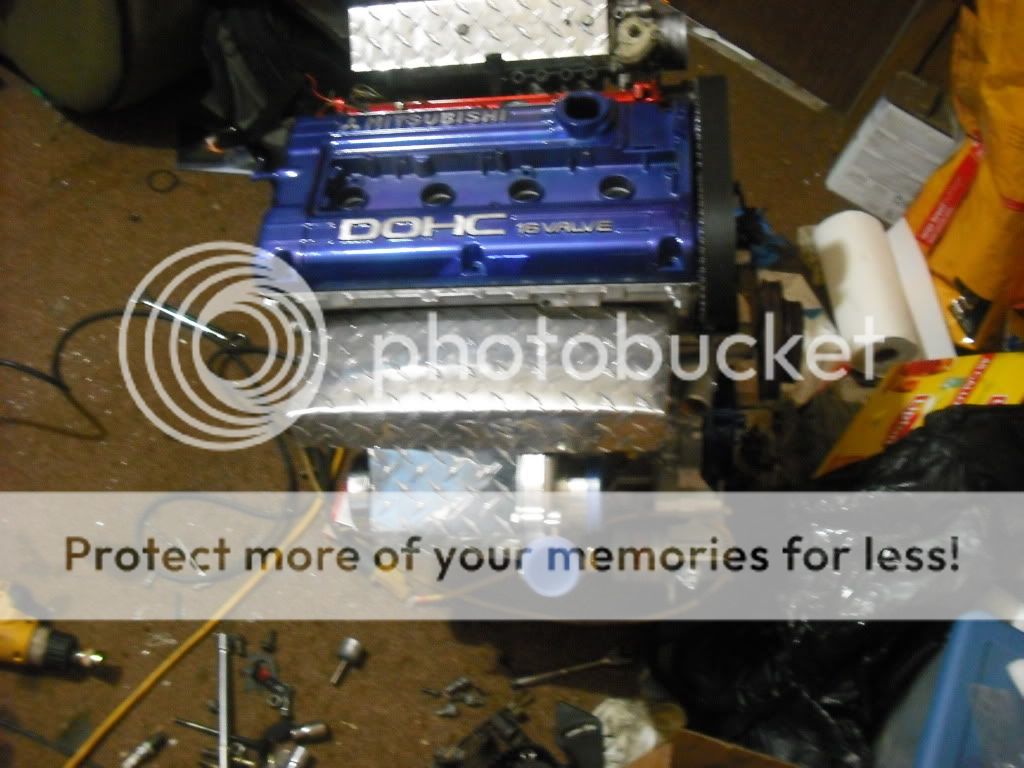
Here it is after I divorced it from it's Ex-block (funny how the junk yard guaranteed this engine unless I split it :roll: ) See the DESTROYED valve in #3, and the black...
Image
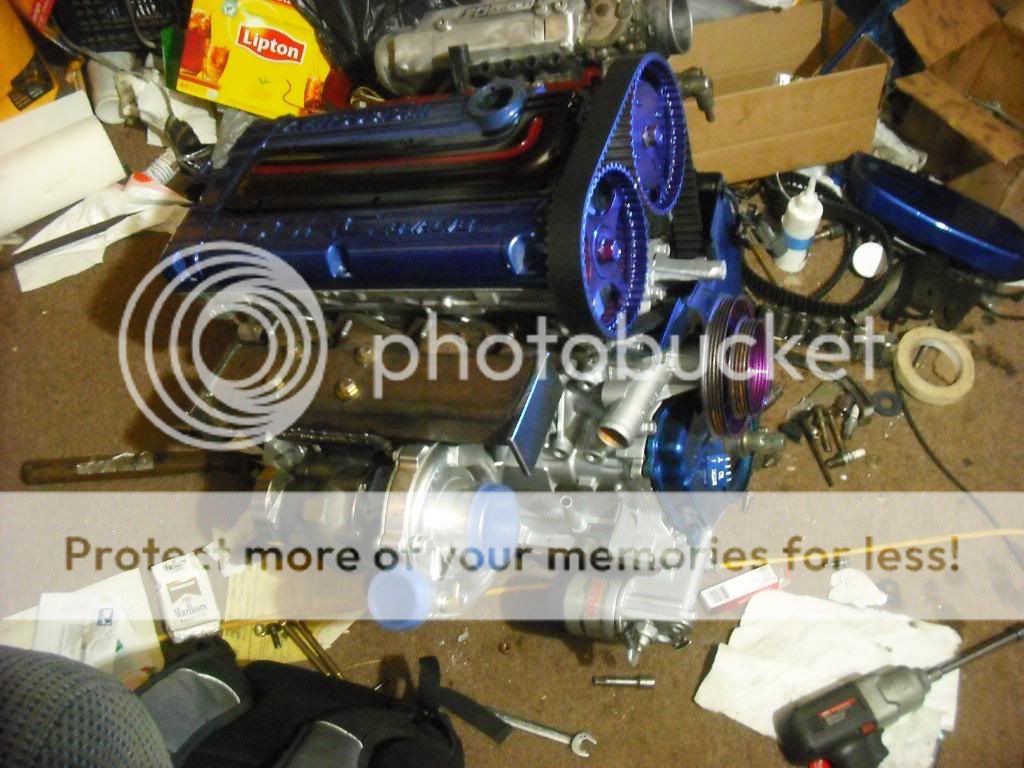
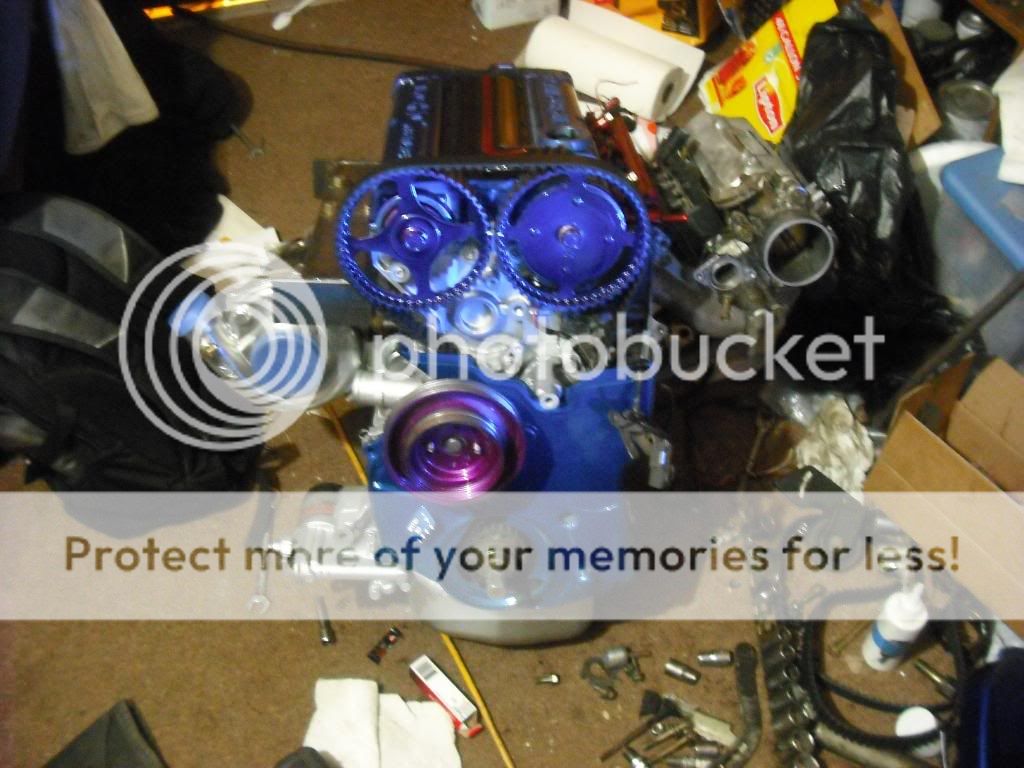
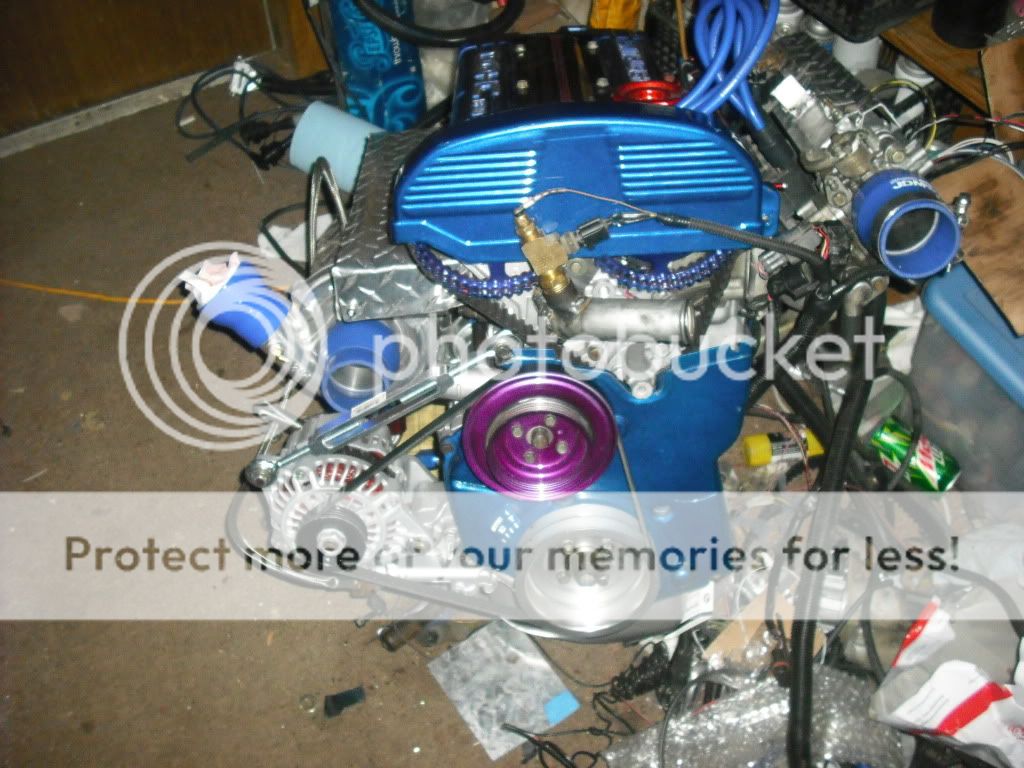
I got my block back from the shop today, they did a full bore and hone, Line bore plus resurfaced the head and oil pan surfaces, jet/hot tank cleaning and even a nice new Aluminum finish (easy to spot oil leaks early on)
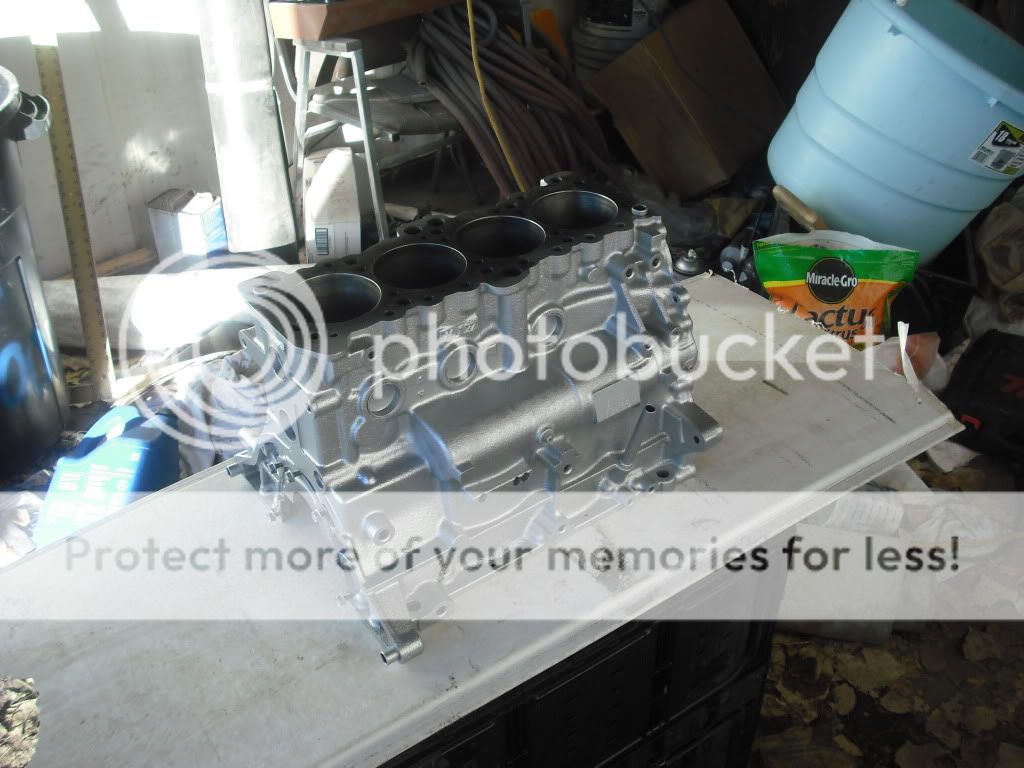
ImageImageImage
Pretty Snazzy huh?

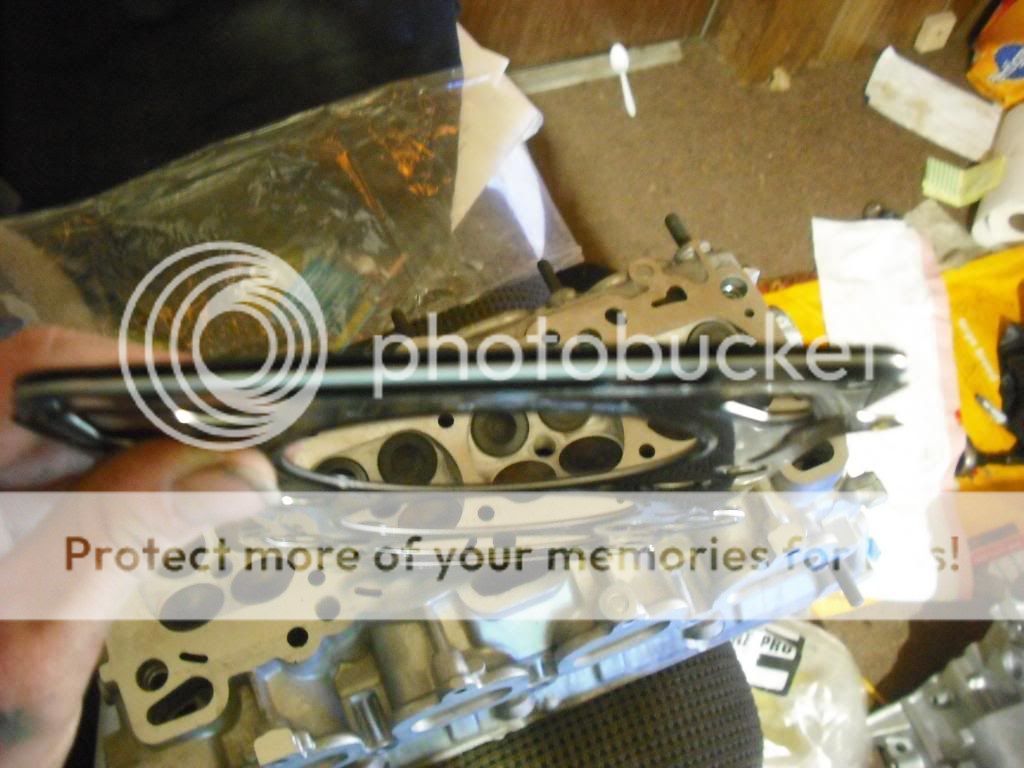
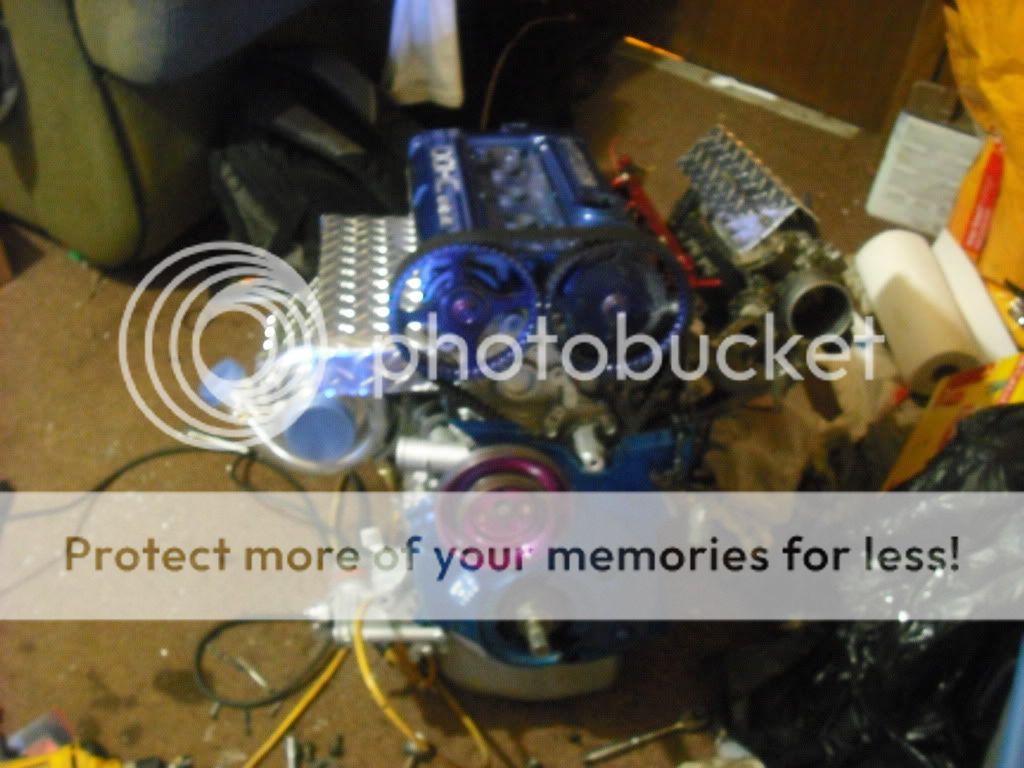
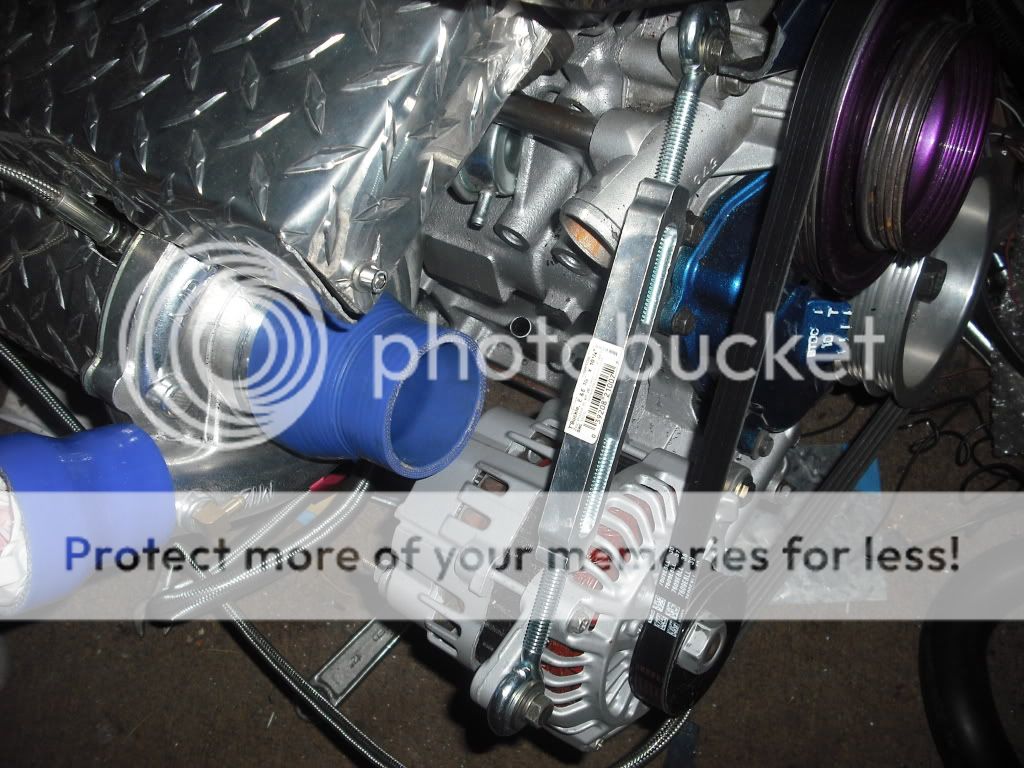
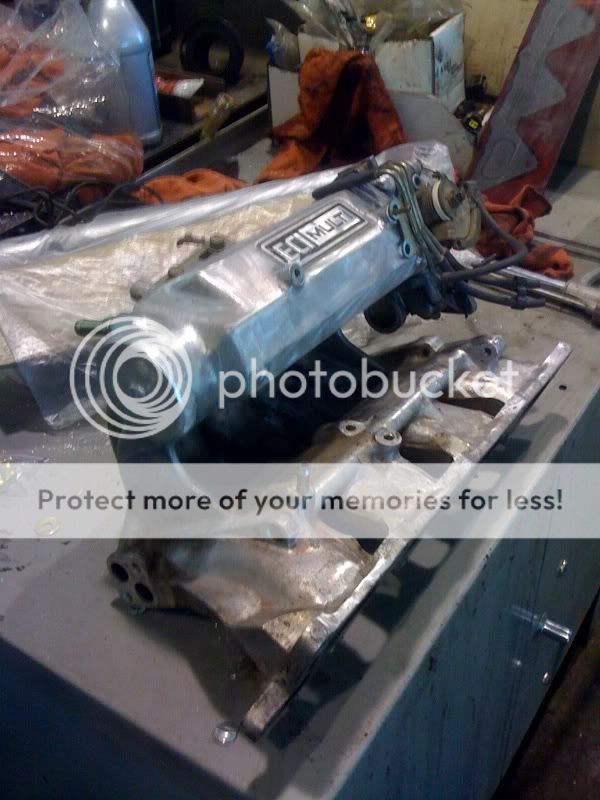
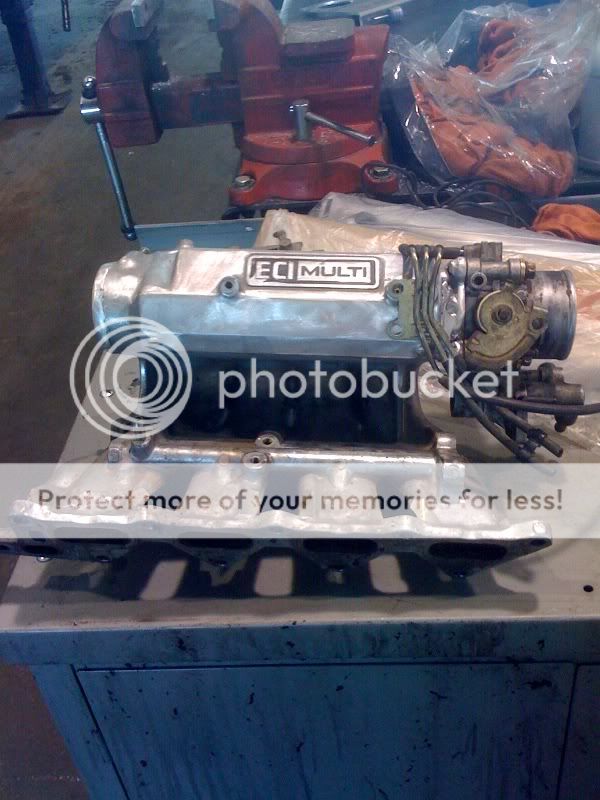
I got my Intake manifold Modified for RWD last week (Thanks to Bill for the inspiration and picture I needed!!!) So that's ready to go....
ImageImage
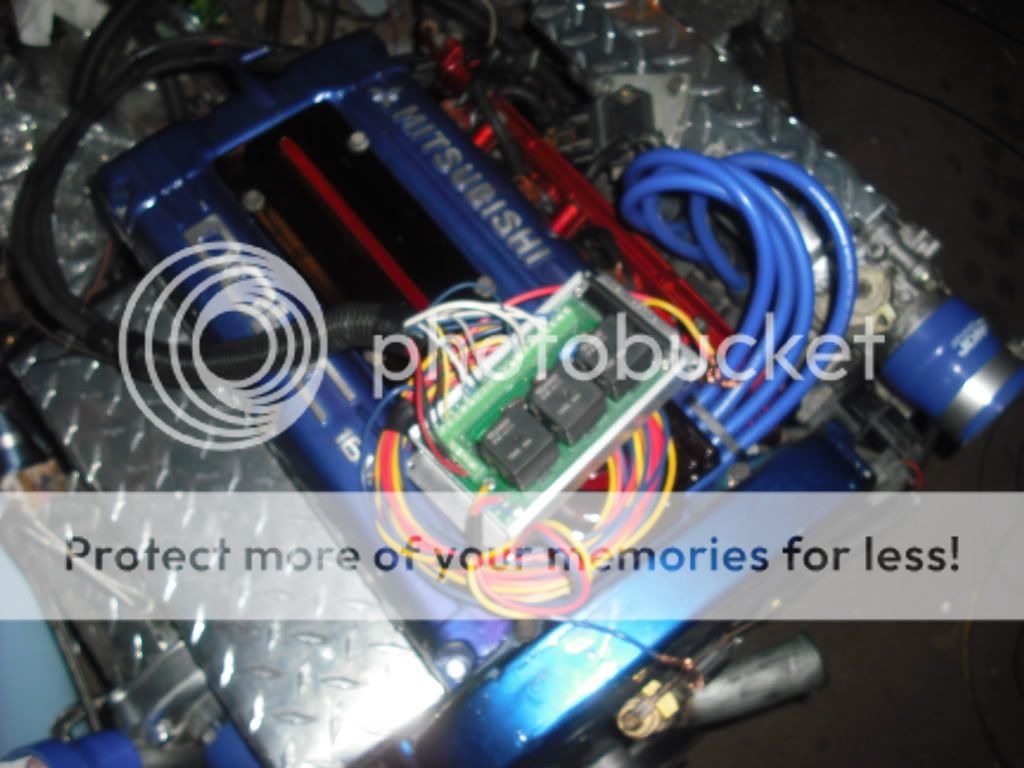
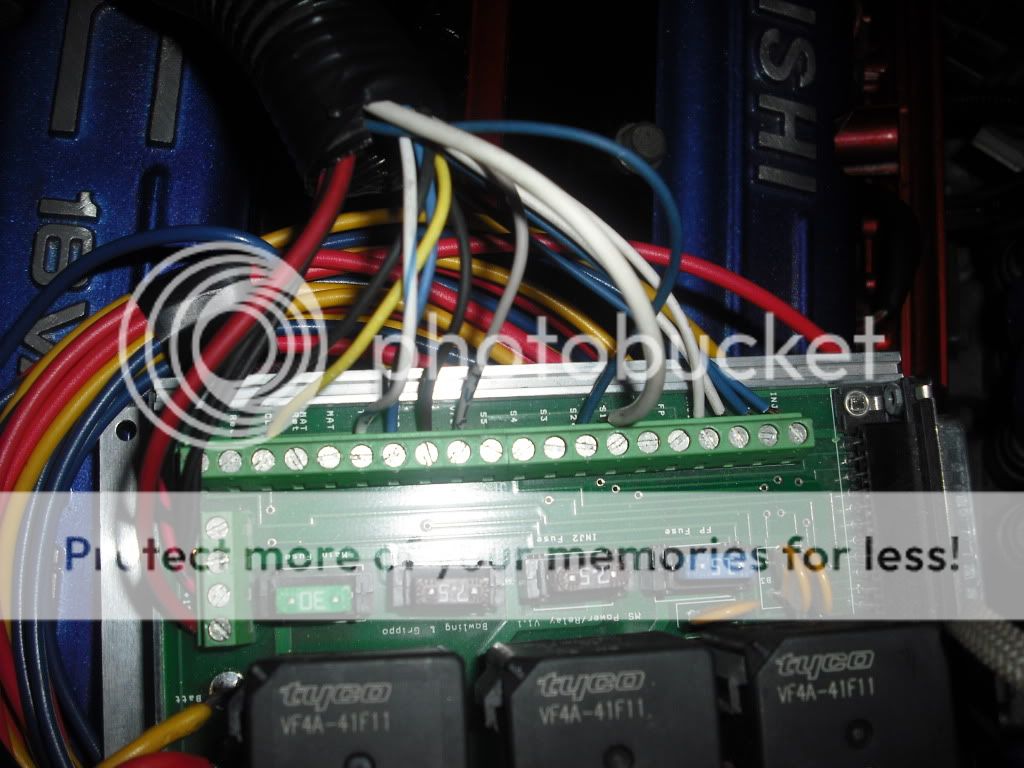
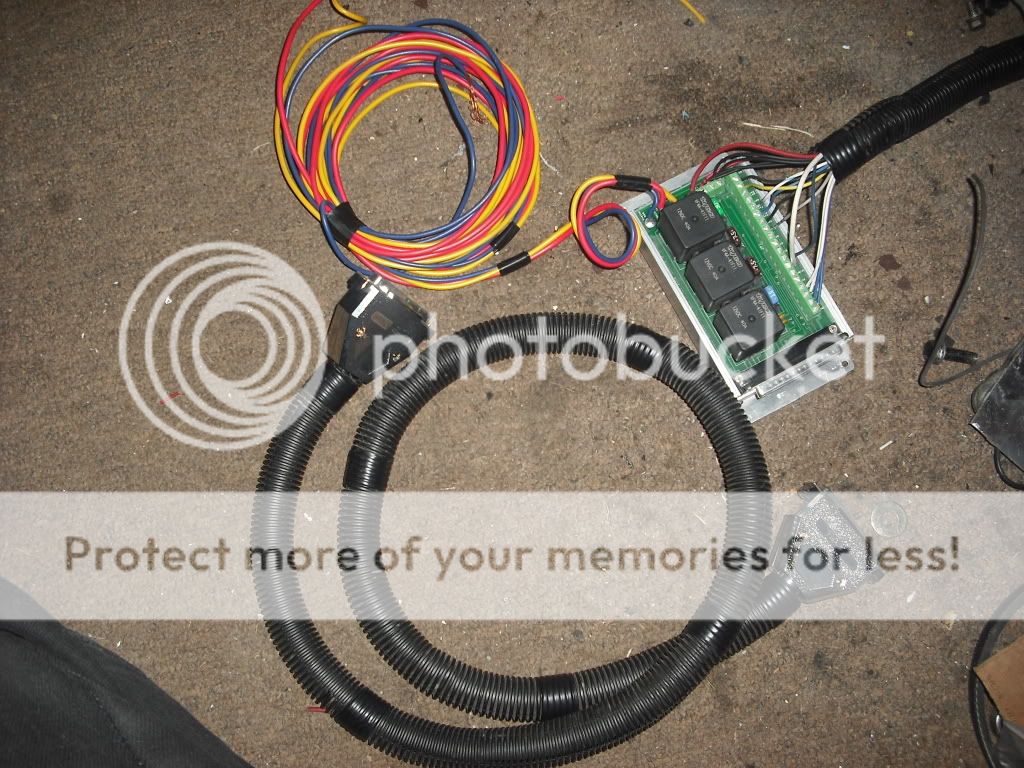
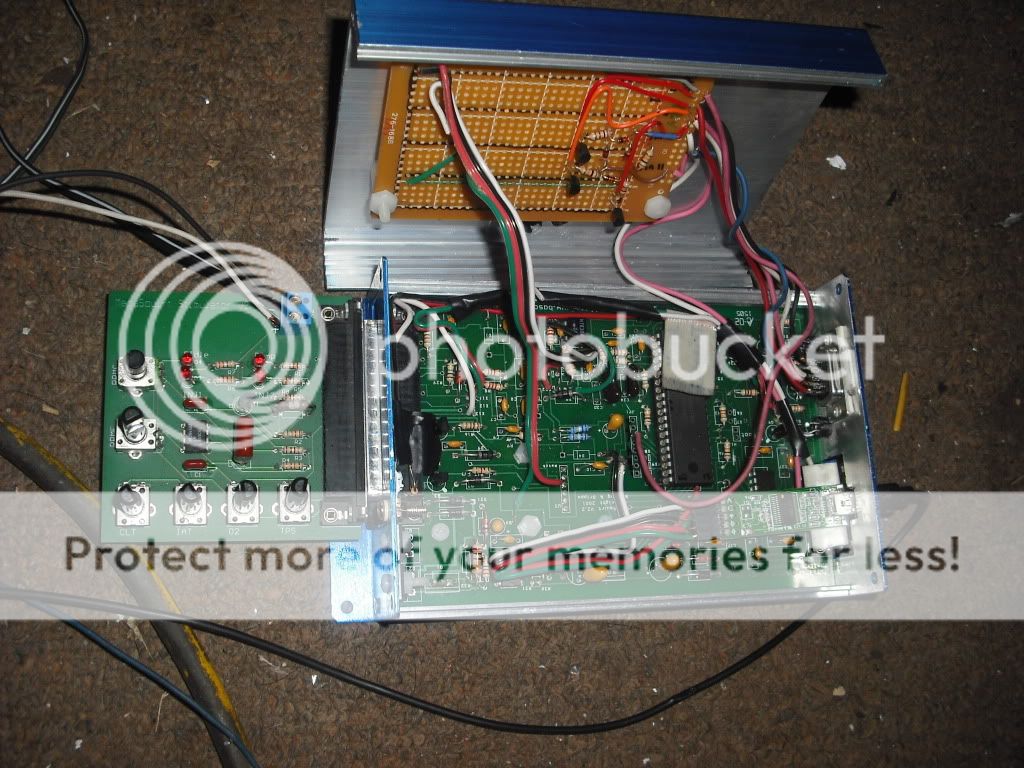
I got my Megasquirt v2.2 and got MSNS-E running on it ( I hope I can program this thing, I am more of a hardware guy than a software guy )

Now what am I forgetting....? What I have spent....
Short Block 7bolt Wideblock $250.00 (Local Craigslist)
Long Block 7bolt Narrow Block (2g) $650.00 (Short Block FOR SALE!)
Gasket kit $86.00 (Ebay)
Main/Connecting rod Bearings $180.00 (Ebay)
Megasquirt, Relay board, Stim $200.00 (Local Craigslist)
Machine Shop Work to date $500.00 (Local Reputable Machine Shop)

And I am sure I have forgotten something along the way here, so feel free to ask Questions if you want. There are still a few more modifications that need to be made to the head in regards to the water/thermostat location, the engine needs to be built and wired to the Megsquirt and basically 100% ready to go before I can pull my truck into the garage and begin the swap, This is my Daily Driver and i have to absolutely Minimize Down time so I dont have to blow all my Vacation time doing an Engine Swap that can easily be done in a few hours if I were simply swapping in another Stock replacement.
Last edited by Mad Menace on Mon Nov 08, 2010 11:44 am, edited 6 times in total.
Arktis
Addict
Posts: 65
Joined: Sat Oct 25, 2008 11:41 pm

Post by Arktis »

oldcolt75 wrote:and whats with the paint? it is kinda crazy looking !
I call it an "artistic license"

As long as it's not a 3 wolf moon shirt replica.
Mad Menace
Addict
Posts: 214
Joined: Wed Nov 11, 2009 10:11 pm
Location: Colorado

Post by Mad Menace »

No destroker, just a DOHC swap in my mind... and a turbo and a standalone... I'm not really looking for a 12k redline... that just seems stupid to me in a daily driver, so Im basically going with "slightly better than stock" parts on my rebuild and adding in a little fun.
The paint is a second passion of mine really... actually the first, see I am professionally employed as a Tattoo artist and I also do about as much Airbrush work as I do tattoos.
But the truck was hammered after having been thru my teen years and early 20's with me so I decided to paint it in July, then I began airbrushing it and never finished, then when my Dog got ran over and I drove the truck like I stole it to get him to a vet I blew the seals and I am sure that I jumped a few teeth on the timing belt, messed something up, cause it smokes like an airport smoking lounge and it's just time to put the engine I want in it this year too since I plan on owning this truck till I die anyway.

But I do plan on rebuilding the original matching numbers engine once it comes out, then I have no quams with blowing this one up while road raging or something. I really dont know what I will do with it quite yet but probably all forged components, DOHC, not sure really, I know its easier to acquire a forged crank for a 4g63 than it is for a 4g64, so who knows which way I will go.
Arktis wrote:
oldcolt75 wrote:and whats with the paint? it is kinda crazy looking !
I call it an "artistic license"

As long as it's not a 3 wolf moon shirt replica.
Nope, It's all 100% Original Artwork done by me.
jeffball610
Too Much Time on His Hands
Posts: 619
Joined: Wed Feb 22, 2006 5:29 am
Location: Las Vegas, NV

Post by jeffball610 »

Don't forget to get the proper 4G64 cam gear so you don't ruin that new engine. The DOHC 4G64 has a different cam gear due to the taller deck height. Running the 4G63 unit will result in bent valves.
Do it in a Datsun!
1972 Datsun 510
7-bolt 4G63T, EVO 9 pistons and rods, Garrett GT3076R, "flipped" stock intake, Toyota R154, Z31 R200 w/ CVs
Mad Menace
Addict
Posts: 214
Joined: Wed Nov 11, 2009 10:11 pm
Location: Colorado

Post by Mad Menace »

Just bought a nice new 18b Turbo off a buddy for $150.00. I love Christmas time sometimes.
Don't forget to get the proper 4G64 cam gear so you don't ruin that new engine. The DOHC 4G64 has a different cam gear due to the taller deck height. Running the 4G63 unit will result in bent valves.
Way ahead of you buddy, If you'd have read carefully thru my shopping list you would have seen that I happen to have a head from a long block OE 4g64 from a 94 Galant GS, so the cam gears and all are correct for the application, Thanks for the reminder tho, its good to keep pertinent information all in 1 place for the next guy looking to do this build.
89coltgt
Too Much Time on His Hands
Posts: 584
Joined: Wed Apr 11, 2007 2:50 am
Location: Ste Genevieve, MO

Post by 89coltgt »

Looks like you are off to a great start, keep us updated :)
Gentleman Rogue
Addict
Posts: 165
Joined: Wed Feb 06, 2008 7:37 pm

Post by Gentleman Rogue »

to be honest, im not a big fan of the airbrushed flames and pirate ship, but other than that, sounds like youve got a pretty decent foundation going. keep us posted.
Mad Menace
Addict
Posts: 214
Joined: Wed Nov 11, 2009 10:11 pm
Location: Colorado

Post by Mad Menace »

Gentleman Rogue wrote:to be honest, im not a big fan of the airbrushed flames and pirate ship, but other than that, sounds like youve got a pretty decent foundation going. keep us posted.
You guys really need to see it in real life before you knock it, theres a lot the camera isn't showing you, but I dont care... it's my truck and I like it and thats all that matters
93' Max, 4g64, 16v DOHC, 18G Turbo, Walbro 255L, 27" FMIC, 2.5" Exhaust, Aero Exhaust, AEM C2DI w/COP, 510cc Injectors, Running on Megasquirt 3-X.

Videos as soon as it's 100% up and running.
Gentleman Rogue
Addict
Posts: 165
Joined: Wed Feb 06, 2008 7:37 pm

Post by Gentleman Rogue »

i didnt knock it in my post- just said i wasnt a fan. you are right- its your truck, do as you wish.
Mad Menace
Addict
Posts: 214
Joined: Wed Nov 11, 2009 10:11 pm
Location: Colorado

Post by Mad Menace »

Wrist pins are a PITA to remove, especially if you were wanting to keep the piston heads.
I actually tore down 8 pistons from the connecting rods today...
First I tried the hammer and pin method, broke a piston head right away. (good thing i didnt need them)
Second I tried the good ol Press... piston slipped and shattered the head under the pressure.
So I resorted to the good ol Vice and Air hammer method... hammer slipped, brother in law took a chunk out of his finger between the piston and head of the air hammer... lol
broke just about every piston head while removing the pins, but the Air hammer worked like a charm... In my opinion anyway.
I think I will opt to have a machine shop press them back together with the new pistons so I dont accidentally mess up a NEW piston that I actually want.

Looking in the manual tho it goes to explain how theres 4 different part numbers for the wrist pins... whats with that? out of 8 connecting rods it looks like I have 3 different casts or something because the markings on a few of them match then theres like 2 odd balls, 4 matching came from 1 engine and 2 matching and 2 oddballs came from another. Whats the difference if any?
93' Max, 4g64, 16v DOHC, 18G Turbo, Walbro 255L, 27" FMIC, 2.5" Exhaust, Aero Exhaust, AEM C2DI w/COP, 510cc Injectors, Running on Megasquirt 3-X.

Videos as soon as it's 100% up and running.
DoubleJ
Addict
Posts: 109
Joined: Thu Jun 26, 2008 4:13 pm

Post by DoubleJ »

Mad Menace wrote:
Gentleman Rogue wrote:to be honest, im not a big fan of the airbrushed flames and pirate ship, but other than that, sounds like youve got a pretty decent foundation going. keep us posted.
You guys really need to see it in real life before you knock it, theres a lot the camera isn't showing you, but I dont care... it's my truck and I like it and thats all that matters

nobody will care about the pirate ship when u are boosting past them lol
Project: 4G240. 4G63 in a 89 240sx Coupe
Gentleman Rogue
Addict
Posts: 165
Joined: Wed Feb 06, 2008 7:37 pm

Post by Gentleman Rogue »

that's like saying, "no one will care if you're gay if you can kick their ass in a fight". on the same note, i'd take my truck running 12's over a 9 second honda any day- because other than that little bit of racing, you still have to be seen in that Honda everywhere else...

on the piston/pin issue; did you try heating them at all? i dont have expirience doing it, but it does seem logical
Mad Menace
Addict
Posts: 214
Joined: Wed Nov 11, 2009 10:11 pm
Location: Colorado

Post by Mad Menace »

I thought about it, but i think oxy acetylene would have been over kill and all iI had at the time.

Lol, I saw a single gay guy kick 3 guys a$$es once out in front of a club, he then got ushered away by about 60 hot chicks... I think noone "would" care if you were gay but could kick their butt.

Also theres more than just a pirate ship on there, noone sees the dragon? what about the lich and dragon on the other side? or the dragon on the back? or the eagle on the hood?
I got some other pics somewhere.
93' Max, 4g64, 16v DOHC, 18G Turbo, Walbro 255L, 27" FMIC, 2.5" Exhaust, Aero Exhaust, AEM C2DI w/COP, 510cc Injectors, Running on Megasquirt 3-X.

Videos as soon as it's 100% up and running.
DoubleJ
Addict
Posts: 109
Joined: Thu Jun 26, 2008 4:13 pm

Post by DoubleJ »

Gentleman Rogue wrote:that's like saying, "no one will care if you're gay if you can kick their ass in a fight". on the same note, i'd take my truck running 12's over a 9 second honda any day- because other than that little bit of racing, you still have to be seen in that Honda everywhere else...

on the piston/pin issue; did you try heating them at all? i dont have expirience doing it, but it does seem logical
tru.
good point.


I wouldnt put it on my car. but the airbrushing is pretty sick dude.
Project: 4G240. 4G63 in a 89 240sx Coupe
Mad Menace
Addict
Posts: 214
Joined: Wed Nov 11, 2009 10:11 pm
Location: Colorado

Post by Mad Menace »

Well see, think about what you WOULD put on your car.... then come talk to me.
I have been airbrushing since I was 6, so it was only a matter of time before the truck became canvas.
It's not like I hadn't already painted my Computer(s) Phones, keyboard, mouse, and anything else I could get my hands on...lol

Anyway, Status Update, I got my pistons and connecting rods connected today, and now that I am home it's time to take a break from work and driving, then the build up shall commence, well the piston rings, pistons, bearings and crank tonight probably anyway, the rest of the parts are still at the shop, like the oil pump cover and well I guess thats it really for the lower end sitting at the shop... The head is done at the machine shop too, but for the next few days I gotta wait out the paycheck.

I get the turbo tomorrow, gotta get/build my Exhaust manifold. I got my Megasquirt harness plugs today in the mail, so I can finally get started on that too.
93' Max, 4g64, 16v DOHC, 18G Turbo, Walbro 255L, 27" FMIC, 2.5" Exhaust, Aero Exhaust, AEM C2DI w/COP, 510cc Injectors, Running on Megasquirt 3-X.

Videos as soon as it's 100% up and running.
Mad Menace
Addict
Posts: 214
Joined: Wed Nov 11, 2009 10:11 pm
Location: Colorado

Post by Mad Menace »

Just a warning to those who do not do their own machine work:
I had my block, crank and head worked in the same machine shop, and a Locally Reputable one at that, when I received the crank back everything looked good, and the man at the Machine Shop told me that I would need bearings that were .020" over.
I ordered myself a set of ACL Race bearings (Main and Rod) at .020" over (.50 mm)
I dropped in the Main bearings and torqued the bearing caps to proper torque, No problems, crank spun VERY smoothly, but when I installed the pistons and connecting rods and connecting rod bearings and torqued them all to spec. I could no longer spin the crank, so I tried a step torque starting at 25 ft. lb. but still couldn't spin the crank even at that torque.
CONCLUSION:
They only turned the main bearing surface and none of the connecting rod bearing surfaces, and did not inform me that I would need Standard connecting rod bearings and .020" over Main bearings.
When I called them just now they stated that it's not a "common practice" to turn the connecting rod surfaces :roll: So now the build is at a dead hault until I receive my new set of Standard connecting rod bearings in the mail.
93' Max, 4g64, 16v DOHC, 18G Turbo, Walbro 255L, 27" FMIC, 2.5" Exhaust, Aero Exhaust, AEM C2DI w/COP, 510cc Injectors, Running on Megasquirt 3-X.

Videos as soon as it's 100% up and running.
Mad Menace
Addict
Posts: 214
Joined: Wed Nov 11, 2009 10:11 pm
Location: Colorado

Post by Mad Menace »

Pricing Updates...
Short Block 7bolt Wideblock $250.00 (Local Craigslist)
Long Block 7bolt Narrow Block (2g) $650.00 (Short Block FOR SALE!)
Gasket kit $86.00 (Ebay)
Main/Connecting rod Bearings $100.00 (Ebay)
Billet Pistons $140.00
Megasquirt, Relay board, Stim $200.00 (Local Craigslist)
18g Turbo $150.00 (local buddy)
Flux Capacitor $ Priceless!
Machine Shop Work (Greeley Automotive Machine Racing)
Block:
Align bore $140.00
Cylinder Bore and Hone $100.00
Resurface Head and oil pan Locations $65.00
Hot Jet Cleaning and Aluminum finish $60.00
Cylinder Head:
Cleaning, Magnaflux check before work $50.00
Complete Valve Job $265.00
(includes R&R of all valves, 3 angle seat grinds, 3 angle valve grinds to new valves, New Valve Guides, Warpage straightening, Resurfacing, Hot Jet cleaning and Reassembly)
Crank:
Grind and Polish $105.00 (included cleaning)
"J" bend mandrel 2.75" $30.00 Ebay
Electric Cooling fan 14" $25.00 Ebay
Intercooler Kit $190.00 Mirage Power.com
Meziere Hi-Flow Inline thermostat housing $70.00 tognottisAW.com
Meziere Hi-Flow thermostat 170 degree $20.00 Jegs.com
10.2 mm High Performance spark plug Wires $53.00 Ebay
Ractive Heat Shield Air intake filter $35.00 Dale Wilich Racing.com
Turbo Feed/Return oil line kit $62.00 Ebay
Electronic Turbo boost controller for Megasquirt $45.00 DIYAutoTune.com
12' Wire loom for Megasquirt $40.00 DIYAutoTune.com
Timing Belt $30.00 Ebay
Alternator 90 Amp $110.00

for a grand total so far of: $3071.00 $ Give or take,
Probably going to be a $3000.00 - $3500.00 project in the end... and worth every penny of it the first time the turbo kicks in!!!
Last edited by Mad Menace on Tue Jan 12, 2010 10:03 pm, edited 3 times in total.
93' Max, 4g64, 16v DOHC, 18G Turbo, Walbro 255L, 27" FMIC, 2.5" Exhaust, Aero Exhaust, AEM C2DI w/COP, 510cc Injectors, Running on Megasquirt 3-X.

Videos as soon as it's 100% up and running.
Mad Menace
Addict
Posts: 214
Joined: Wed Nov 11, 2009 10:11 pm
Location: Colorado

Post by Mad Menace »

Since it's all Mighty Max's all at the top of the forum today, whats a better time to update my thread with my progress.
Image
Got the head from the shop finally, it sat there a while waiting on me.... my bad... anyway
Image
And I got my High Performance Cometic 3 layer head gasket
Image
Then, because I am who I am, and I do what I do, I decided to dress up the engine with some nice colorful flare... basically I went all Need for Speed Underground on it, and I painted the Valve cover, water pump pulleys, timing cover, fuel rail, and spark plug wire cover with some awesome Pearlescent Anodized Candy Reds, Purples and Blues to match the truck.
ImageImage
ImageImage
That last one really shows you what a candy and pearl paint has to offer.


Now Im just waiting on a few parts to show up, and just 3 more things I have to get.
On the way I have, 1 tach'd speedo cluster, 1 set of oil lines, feed and return, 1 Polished billet Aluminum crank pulley, a Meziere enterprizes Thermostat housing, DIY Auto tune Electronic Boost Controller and mod kit, wiring loom 12' and Internal USB upgrade for the Megasquirt.

I just need to get an intercooler kit, Spark plug Wires and for good measures a new set of motor mounts.
93' Max, 4g64, 16v DOHC, 18G Turbo, Walbro 255L, 27" FMIC, 2.5" Exhaust, Aero Exhaust, AEM C2DI w/COP, 510cc Injectors, Running on Megasquirt 3-X.

Videos as soon as it's 100% up and running.
Gentleman Rogue
Addict
Posts: 165
Joined: Wed Feb 06, 2008 7:37 pm

Post by Gentleman Rogue »

that's quite an exhaust manifold you've got there- did you make that guy?
Mad Menace
Addict
Posts: 214
Joined: Wed Nov 11, 2009 10:11 pm
Location: Colorado

Post by Mad Menace »

YEAH, its actually just a piece of 3" steel channel, but with the Huge 18b turbo I wanted to make sure that it would stay connected to the engine so I fabbed up this for now... I am sure i will hate it and get a real header.

plus side is that I bet i dont have any problems getting that heat to the turbo, downside is probably gonna be spoiling fresh air charges in non-sister cylinders... but we will see

Plus last night I played dressup with the engine and some Polished Aluminum tread plate, I covered the intake manifold, exhaust manifold and turbo exhaust housing and must say that it looks totally sweet... I will upload a pic of it when i get home.
I just ordered a bad a$$ Ractive super flow air intake filter too
93' Max, 4g64, 16v DOHC, 18G Turbo, Walbro 255L, 27" FMIC, 2.5" Exhaust, Aero Exhaust, AEM C2DI w/COP, 510cc Injectors, Running on Megasquirt 3-X.

Videos as soon as it's 100% up and running.
mr.andaya
Addict
Posts: 76
Joined: Fri Oct 24, 2008 1:40 pm

Post by mr.andaya »

i looked at your price list, what are these billet pistons for $140?


lmk
-joe
Mad Menace
Addict
Posts: 214
Joined: Wed Nov 11, 2009 10:11 pm
Location: Colorado

Post by Mad Menace »

I got them from the same machine shop that did all of my machine work... I see know that I forgot to mention that up there, they are into building race engines specifically, they are technically a "Custom build" and I do not think that they have a true name brand, tho he did verbally compare them to Weisco without the production problems associated with Weisco at this moment... but I do know that they are machined from billet aluminum rather than being cast like stock. They were ordered "to spec" basically by measurements of the radius and height, they were also dished out just a little compared to the stock ones... but I started with a set of 12v pistons with flat tops and 3 valve spots and a set of valve hammered stocks from the Galant block, which are the ones we actually went with for measurement purposes, and since they had good markings on top where the valves struck they recommended dishing a little more than stock to reduce the interference factor common with these motors unless destroked, plus it effectively reduced my compression ration to 9.1:1 which is a little better for the turbo'd engine... they also had to bore the piston pin location for stock sized piston pins... The guys down there pretty much were my parts guys and knowledge toward horse power for good cost.
I bet any race oriented engine machine shop would be able to pull down the same job for a comparable price.
93' Max, 4g64, 16v DOHC, 18G Turbo, Walbro 255L, 27" FMIC, 2.5" Exhaust, Aero Exhaust, AEM C2DI w/COP, 510cc Injectors, Running on Megasquirt 3-X.

Videos as soon as it's 100% up and running.
mr.andaya
Addict
Posts: 76
Joined: Fri Oct 24, 2008 1:40 pm

Post by mr.andaya »

wow that is a amazing deal, so there 6061 t6? or is the materal compareable to wiseco's material? what is your piston to wall clearance going to be?
mr.andaya
Addict
Posts: 76
Joined: Fri Oct 24, 2008 1:40 pm

Post by mr.andaya »

also are you using stcok rods? press style pins?
mr.andaya
Addict
Posts: 76
Joined: Fri Oct 24, 2008 1:40 pm

Post by mr.andaya »

no comment? =)
Mad Menace
Addict
Posts: 214
Joined: Wed Nov 11, 2009 10:11 pm
Location: Colorado

Post by Mad Menace »

Sorry man I've been out for the count with the flu for nearly 2 weeks... I think I am getting better now.
As for the rods/pins... yeah its all stock sizes and yeah I used stock rods since I was conscious of the rod angle clearance in the 4g64's and yeah its all press in style.

As for the material of the pistons I will have to phone the shop again and ask, all I actually know is that they are Billet aluminum of some sort, and since the guy really only verbally compared them to weisco it may have just been a sales pitch, tho I have seen a lot of complaints recently of the poor quality and craftsmanship coming from weisco recently since their outsourcing to china/japan.

Also to note wall clearances... i had the cylinder walls bored from 86.5mm to 87.00mm and the same shop did all the work on the head, block and pistons and I never checked the clearances myself, but I presume that it is rather minimal all in all.
93' Max, 4g64, 16v DOHC, 18G Turbo, Walbro 255L, 27" FMIC, 2.5" Exhaust, Aero Exhaust, AEM C2DI w/COP, 510cc Injectors, Running on Megasquirt 3-X.

Videos as soon as it's 100% up and running.
mr.andaya
Addict
Posts: 76
Joined: Fri Oct 24, 2008 1:40 pm

Post by mr.andaya »

some people perfer .003-.0055, just wondering what they told you.

glad to hear your doing better.

-joe
Mad Menace
Addict
Posts: 214
Joined: Wed Nov 11, 2009 10:11 pm
Location: Colorado

Post by Mad Menace »

After having about a 2 hour conversation on the phone with the shop and the technician about wall clearances specific to my engine we came to the ultimate conclusion that it had been too long since the work was done for the technician to accurately remember the specifics but was probably within the range of 0.004-0.0045.

It was part intake day here as well today. I got my 14" electric cooling fan, Intercooler, Blow off Valve, Intercooler piping kit, Mandrel bent 2.75" J pipe for use as down pipe, Meziere Hi-Flow Inline thermostat housing and High Performance 10.2mm Spark plug wires.

Now I am literally down to minor purchases and a few more minor mods/fabrications to get this thing to 100% ready to run. I need an alternator and to fab up a bracket to relocate it to the drivers side, buy and plumb all the coolant hosing which will be pretty straight forward as I believe I will be eliminating the stock Fast idle valve (since i dont have one and cant seem to locate one in the salvage yards), Plumb the Vacuum lines for the Wastegate and Blow off valve, Fab up my Down pipe by welding on the V-band flange and O2 sensor bung, take a few days Vacation time off work and Install the new engine 100% ready to run.

I have not forgotten to mention, I was merely saving the best for last.... The Megasquirt Unit...
The Megasquirt, as confusing as it may seem at first was a totally 100% straight forward deal to wire up to the stock 2G sensors, Injectors and Ignition setup, I have the whole thing, Engine, ECU, Relay board and everything minus fuel sitting here in my living room connected to an extra car battery and the home Computer to make sure that everything is up to snuff and in working order. I have tested all the systems from Fuel Injection (injectors, wiring) to Ignition (Ignition coils, transistors, plugs and wiring) to the Main sensors (Crank Position, Coolant temp, Intake air temp, Throttle position, and O2) Once I get it installed in the truck and connected to some fuel, Thanks to Robbie and the MSQ he provided me for a base map of a 4g63t I should be able to simply crank it over and see if she runs then dial it in on the fuel, boost and spark maps for the increased displacement of the 4g64 and take her for a drive like it was something simple to do.... :lol:

That was a mouthfull !!!
93' Max, 4g64, 16v DOHC, 18G Turbo, Walbro 255L, 27" FMIC, 2.5" Exhaust, Aero Exhaust, AEM C2DI w/COP, 510cc Injectors, Running on Megasquirt 3-X.

Videos as soon as it's 100% up and running.
Egoinstigator
Addict
Posts: 88
Joined: Fri Oct 02, 2009 10:54 am

Post by Egoinstigator »

Man, I am so excited for you. You got it together way better than I do and mine is a kick in the ass for sure!

I am going to retune for my 750cc's when I install them this weekend. I already max my 510cc yellow tops and can only manage 13.0:1 afr at 6500 and get worse up to 7200.

Best of luck!
Gentleman Rogue
Addict
Posts: 165
Joined: Wed Feb 06, 2008 7:37 pm

Post by Gentleman Rogue »

save some money on the alternator relocation and do what i did; use your old A/C mount. heres the thread with pics:

http://projectzerog.com/forum/viewtopic.php?t=1478
Mad Menace
Addict
Posts: 214
Joined: Wed Nov 11, 2009 10:11 pm
Location: Colorado

Post by Mad Menace »

I edited my Price list so far and I am up to $3071.00 give or take a few bucks... probably give more than take...
Egoinstigator wrote:Man, I am so excited for you. You got it together way better than I do and mine is a kick in the ass for sure!

I am going to retune for my 750cc's when I install them this weekend. I already max my 510cc yellow tops and can only manage 13.0:1 afr at 6500 and get worse up to 7200.

Best of luck!
Hey thanks Rob, at the moment i have 24 Lb/hr or 252 cc/min but I am contemplating ordering a set of these beautiful 1400 cc/min ones I found for a good deal (as far as injectors go)

GR - I gotta look and see if I have an old A/C bracket, but I was seriously just gonna make one up myself from an old bit of steel laying around
Last edited by Mad Menace on Tue Jan 12, 2010 10:04 pm, edited 2 times in total.
93' Max, 4g64, 16v DOHC, 18G Turbo, Walbro 255L, 27" FMIC, 2.5" Exhaust, Aero Exhaust, AEM C2DI w/COP, 510cc Injectors, Running on Megasquirt 3-X.

Videos as soon as it's 100% up and running.
Mad Menace
Addict
Posts: 214
Joined: Wed Nov 11, 2009 10:11 pm
Location: Colorado

Post by Mad Menace »

I actually do have the power steering bracket laying around.... now to just get an alternator... $110.00 Ebay for the 90 amp model

Today at work in a few of my free minutes I managed to fab up my down pipe and now that I am at home an have test fitted it, I almost cannot believe how good it looks and how well it all fits together when all i had to go on at work was my memory, no actual measurements. and as it looks I will be running a 2.75" Exhaust turbo-back, I think I will be going with an Aero Turbine Muffler, but I really just want straight pipe, but dont want the attention that would draw (like I'm not in a High Profile vehicle as it is)

The transplant date is set too, I will be making my swap on the 29th, 30th and 31st of this month... and maybe even the 1st If it dont start right up right away due to the Megasquirt tuning, but i have a super high feeling that it will.
93' Max, 4g64, 16v DOHC, 18G Turbo, Walbro 255L, 27" FMIC, 2.5" Exhaust, Aero Exhaust, AEM C2DI w/COP, 510cc Injectors, Running on Megasquirt 3-X.

Videos as soon as it's 100% up and running.
Gentleman Rogue
Addict
Posts: 165
Joined: Wed Feb 06, 2008 7:37 pm

Post by Gentleman Rogue »

the alt bracket made from the P/S bracket looked like hell- believe me, use the A/C bracket and some angle iron; it tucks the alternator in a lot tighter to the motor....
Mad Menace
Addict
Posts: 214
Joined: Wed Nov 11, 2009 10:11 pm
Location: Colorado

Post by Mad Menace »

I am actually looking at it all right this very moment... getting my keyboard dirty...lol
I also dont have an alternator handy and Im not sure which bracket I really have, its tucked down low and looks like the one in the lower pics with the angle Iron, so Im probably on the right track till I get an alternator... which I already ordered

also what belt am I going to need? cause neither of the 2 I have are going to be right by any means.
93' Max, 4g64, 16v DOHC, 18G Turbo, Walbro 255L, 27" FMIC, 2.5" Exhaust, Aero Exhaust, AEM C2DI w/COP, 510cc Injectors, Running on Megasquirt 3-X.

Videos as soon as it's 100% up and running.
Gentleman Rogue
Addict
Posts: 165
Joined: Wed Feb 06, 2008 7:37 pm

Post by Gentleman Rogue »

i wrote down the part numbers, and cant find them now. if i remember right, its a 28-29" long 6 rib belt(from memory). go to a parts store, ask for the stock belt to see how wide you need. then get one that width, but a few inches longer than stock. no worries.q
Mad Menace
Addict
Posts: 214
Joined: Wed Nov 11, 2009 10:11 pm
Location: Colorado

Post by Mad Menace »

4 rib belt... 2g
93' Max, 4g64, 16v DOHC, 18G Turbo, Walbro 255L, 27" FMIC, 2.5" Exhaust, Aero Exhaust, AEM C2DI w/COP, 510cc Injectors, Running on Megasquirt 3-X.

Videos as soon as it's 100% up and running.
Mad Menace
Addict
Posts: 214
Joined: Wed Nov 11, 2009 10:11 pm
Location: Colorado

Post by Mad Menace »

It may not be the prettiest thing but today I modified a shift tower to be my new short shifter, it was actually a lot easier than I had originally figured it would be, and only took 20 minutes. I merely cut the ball off the end and welded in a 1-1/4" L x 5/16" bolt, did a little grinding and voila, half a short shift kit, now I gotta make a mount tower for it, but I figure that will be rather easy as well, since its just a 1-1/4" block with 4 holes in it, 3 of which can be copied from the original spacer... time is counting down and I am getting ancy... It's kind of like having money burning a hole in your pocket


T - 15 days and counting...
93' Max, 4g64, 16v DOHC, 18G Turbo, Walbro 255L, 27" FMIC, 2.5" Exhaust, Aero Exhaust, AEM C2DI w/COP, 510cc Injectors, Running on Megasquirt 3-X.

Videos as soon as it's 100% up and running.
Egoinstigator
Addict
Posts: 88
Joined: Fri Oct 02, 2009 10:54 am

Post by Egoinstigator »

Just a couple things I did...

1. Make sure to set base timing to 15 degrees and follow the MS how to on http://diyautotune.com for the 4g63 ...

2. I Used a 2.5" exhaust. put a Flowmaster super 40 on it with a turn down just before the axle. Sounds really nice and doesn't have Fart can quality at all.

Get you some video / Photos!
Mad Menace
Addict
Posts: 214
Joined: Wed Nov 11, 2009 10:11 pm
Location: Colorado

Post by Mad Menace »

Oh I will definately get the photos/videos... enter a few car shows, waste a few v-8's on the track....

You gotta get up some more videos than the 1 too my man.
93' Max, 4g64, 16v DOHC, 18G Turbo, Walbro 255L, 27" FMIC, 2.5" Exhaust, Aero Exhaust, AEM C2DI w/COP, 510cc Injectors, Running on Megasquirt 3-X.

Videos as soon as it's 100% up and running.
77amc
Too Much Time on His Hands
Posts: 455
Joined: Wed Jun 06, 2007 1:41 am
Location: N-W Mississippi, Under Memphis

Post by 77amc »

SO, are you happy with the Mega-squirt set up so far?

It's a toss up for me still. I have a 90 talon harness and a 89 colt harness and am just scared of wiring. 89colt (john) said that he'd help me out but with the orig stuff but if ANYTHING could make it easier it would help.

E
Mad Menace
Addict
Posts: 214
Joined: Wed Nov 11, 2009 10:11 pm
Location: Colorado

Post by Mad Menace »

I was impressed at the ease of installation of the megasquirt (I am NOT afraid of wiring of any sort) and the fact that I decided to use the stock 2g sensors vs swapping to the 1g like has been covered in all the install articles, I had a lot of "unexplored" territory so I just began one day and finished it all up in about 3 hours, and If i had fuel running to it right now, I would try to run it outside the truck.

As far as megasquirt goes, order the 12' wiring loom and everything is literally as simple as Coolant wire goes to coolant, o2 wire goes to o2, Inj 1 & 4 and 2 &3 and so on... self explanatory, or take it 1 step easier and order the relay board and premade wiring loom for it, as well as the 12' labled wire loom ant everything input, output or otherwise is labled right on the board for an even easier installation.

Egoinstigator hooked me up with a MSQ file for my fuel and spark maps, I adjusted for my setup (different sensors, injectors and such) and am now confident that it will run as it sits.
93' Max, 4g64, 16v DOHC, 18G Turbo, Walbro 255L, 27" FMIC, 2.5" Exhaust, Aero Exhaust, AEM C2DI w/COP, 510cc Injectors, Running on Megasquirt 3-X.

Videos as soon as it's 100% up and running.
Egoinstigator
Addict
Posts: 88
Joined: Fri Oct 02, 2009 10:54 am

Post by Egoinstigator »

This is some good stuff. Glad we can all share and pull in one direction.

I will have more video footage after this long weekend.


The original MSQ I used to fire mine the first time was way more out of wack than the one Menace got from me, and it started on the first turn over ad idled! ... granted it was at 2000 rpm, but it did!

As far as doing the wiring, the best advice is to take it one sensor hookup at a time and do not think of it is one big project. It is a few small connections you break into groups. As you chew through them, you realize it is not THAT difficult as long as you keep focused and do not jump around.
Mad Menace
Addict
Posts: 214
Joined: Wed Nov 11, 2009 10:11 pm
Location: Colorado

Post by Mad Menace »

If you could rob, since I just got mine today, can you post up something about how you wired your fast idle or Idle air valve? ... the one under the throttle body next to the coolant lines, unless you dont have one.

Today I was looking around for something to make my lower spacer plate for my short shifter.... I needed something that was 1" - 1.5" thick to drill my 4 holes in, and while I kept looking i kept not finding what I needed until I randomly looked up on a shelf where I spotted an extra type RS blow off valve and weld in flange that was about 1.25" tall with 2 holes in it and a large hole in center... turns out that this BOV Flange design just so happens to have the perfect size hole in the center for the shift tower, so I ran the front bolt thru 1 of the holes and just placed the other 2 outside it, with the original 1/8" spacer on the bottom, which lined up all the bolt holes... so I bolted it on and my first thought was "Wow!!! that is WAAAY to damned short, and a little stiff" but still I started up the truck and took her for a drive.... I friggin LOVE the throw on it, and actually I rather like the stiffness as well.
To clarify completely here, I merely cut the ball from the lower end of the shifter and welded in a 1.25" x 5/16" bolt, and ground everything back down to size. I did NOT shorten the top half of the shifter (at least not yet I havent)
Before I installed the new shifter and spacer, I measured my throw horizontally in the Neutral position at roughly 6.75" and Vertically from 1st gear to 2nd gear at roughly, nearly 7.5"....
After I installed the new shifter I did the same thing, measuring Vertically at roughly 2.25" and Horizontally at about 2" or less.... I actually quit paying attention after I saw the 1st to 2nd measurement.
So if anyone out there was to make one of these I would suggest adding 1.25" to the lower end of the shifter and a similar sized spacer... I makes for a GREAT throw, and If you were to shorten the top of the shifter to accomodate the new height the throw will shorten significantly more. (too short can be a bad thing too)
When I remove it from its temporary spacer (if I change it) I will take pics of what I did and post them for anyone else looking for a short shifter for these transmissions that no aftermarket company makes or sells...
93' Max, 4g64, 16v DOHC, 18G Turbo, Walbro 255L, 27" FMIC, 2.5" Exhaust, Aero Exhaust, AEM C2DI w/COP, 510cc Injectors, Running on Megasquirt 3-X.

Videos as soon as it's 100% up and running.
Egoinstigator
Addict
Posts: 88
Joined: Fri Oct 02, 2009 10:54 am

Post by Egoinstigator »

As I understood it, the Megasquirt could not manage the IAC on the throttlebody I have. It has too many wires.

I ended up making a block-off plate for the IAC, and drilling a 1/8" hole in my throttle plate. Further adjustment is done with the Idle air screw.

This was the simplest and cheapest way I could get away with. If there is a better way, I am all ears!
Mad Menace
Addict
Posts: 214
Joined: Wed Nov 11, 2009 10:11 pm
Location: Colorado

Post by Mad Menace »

Thats what I thought you were gonna say... I guess one of the 2 of us needs to man up and purchase the Megasquirt 2 processor and see if its worth the recommendation to the other... but I will be happy if it runs peroid...

And It's funny how I have already done all this:
"I ended up making a block-off plate for the IAC, and drilling a 1/8" hole in my throttle plate. Further adjustment is done with the Idle air screw."

Except the hole drilling part... Question is, where did you make the actual block off? at the IAC itself or did you remove that whole lower part of the throttle body and block that? eliminating the coolant lines of course...

I chose the latter with the eliminating the coolant lines, and clearing off the what is now the front of the intake manifold.

and btw, did you ever fool around in the dual fuel tables on the MSQ you hooked me up with? VE Table2 (DT) specifically?
Cause that thing is WAY WAY out of whack... have a look...lol
Image
93' Max, 4g64, 16v DOHC, 18G Turbo, Walbro 255L, 27" FMIC, 2.5" Exhaust, Aero Exhaust, AEM C2DI w/COP, 510cc Injectors, Running on Megasquirt 3-X.

Videos as soon as it's 100% up and running.
Mad Menace
Addict
Posts: 214
Joined: Wed Nov 11, 2009 10:11 pm
Location: Colorado

Post by Mad Menace »

Hey Rob, I was just browsing the forum a bit and found this:
Egoinstigator wrote:I am prepping mine for the same thing...

I have a few tried and true things I am doing to maximize my traction and launch ability.

1. You MUST eliminate axle wrap to maintain traction and not break u-joints or worse. So, I am running the low buck option of traction bars snubbed and shimmed correctly.

2. Largest Drag radial / ET street tire you can fit.

3. Launch control installed on my Megasquirt to build boost off line.

4. Flat-shift Mod on Megasquirt for no lift shifting

5. New sport shocks...wish I could afford adjustable ones, but good ones are better than busted ones.

6. PRACTICE!!!!!!!!!!!!!
I have a few megasquirt questions from this statement.
1. Are you using the stock Neutral safety switch as your clutch switch?
2. How do you like these options/mods now that your up and running?

I'm in my final days of preperation in anticipation of my few days vacation time to make this swap and I am running thru all my bases here making sure that everything is 100% ready to go, I have ran thrugh with a torque wrench, set of sockets and the torque spec sheet to make sure that all of the nuts and bolts are tightened properly, I have checked all of the engine systems of the megasquirt as well as I can in my living room to make sure that the TPS, CTS, ATS, CKP, and O2 sensors are working, I have verified that all injectors are firing, and all plugs are firing, all I have left as far as the engine is getting the alternator and building a relocation bracket... alternator is on its way... and I was thinking about a set of new injectors.
But as far as the Megasquirt goes... I dont know if I have everything up to snuff and or the way I want it... I plan on running table switching for tunes for E-85 and Gasoline, Electronic boost control, Sequential shift light perhaps, and I was contemplating on the Flat shift and Launch Control but also figured that I could easily Install that at any given time I wanted after the engine was in, and that it didnt necessarily need to hold up the project if it didnt work right away.
93' Max, 4g64, 16v DOHC, 18G Turbo, Walbro 255L, 27" FMIC, 2.5" Exhaust, Aero Exhaust, AEM C2DI w/COP, 510cc Injectors, Running on Megasquirt 3-X.

Videos as soon as it's 100% up and running.
Egoinstigator
Addict
Posts: 88
Joined: Fri Oct 02, 2009 10:54 am

Post by Egoinstigator »

Let me see if I can address all the questions....

In regard to the IAC, I removed the whole lower part with it and the water lines. Then, I made an aluminum plate and blocked off the whole thing. The hole was drilled in the lower throttle plate midway between the edge and the bar.

I really like all the modifications on the Megasquirt... I used the stock switch on the clutch to work with the launch control, and it is my favorite out of all of the changes.

Flat shift is almost not worth the trouble with my small turbo because it get's into boost so fast, but it would be VERY important on a bigger setup and I just leave it on in case....

The Secondary Fuel table is really dicked up because I do not use it and the wonky numbers are a direct result of a botched initial import on my part... All you have to do is copy/paste a good table into it and make sure your X and Y ranges are set like you want. I will use it when I setup my Nitrous or run E85, but I have no plans in the near future for that...

The only other mod I plan on doing for certain is the EBC with fast acting solenoid. From all sources I have read, this is absolutely the best mod you can do for the money to make your boost stay exactly where you want it when you want it.

OH! and be sure to do yourself a favor and use the overboost protection in MS to keep mad spikes from chucking something. It should be set to 21psi in the MSQ I gave ya.

One last thing,.. When you do get everything running you may possibly get some noisy signals from any one or more of your sensors... including the CAS signal. If you see crazy readings in your logs, there are fixes you can apply to clear it up, but not everyone has the issues.

Keep it greasy side down!
Mad Menace
Addict
Posts: 214
Joined: Wed Nov 11, 2009 10:11 pm
Location: Colorado

Post by Mad Menace »

The standard alternator belt is a 39" 4 rib belt. I found that even without relocation of the alternator in My particular case that changing up to a 39.75" 4 rib belt (a 40" is just a tiny tad too long) and a 10" turnbuckle instead of the stock upper bracket that I would just be able to drop the alternator out farther to the side away from the block toward the oil filter housing and clear the turbo intake pipe and coolant hoses.

Gates Part # K040400
Gatorback Part # 4040400
I bought the Gates belt myself but I thought I'd note that specifically.

I also got my VisionMotorWorks 10.2mm Blue Racing Spark Plug Wire set and Man I gotta tell you.... these things are HUGE! and Comparable in price vs. Stock wires purchased from CSK or NAPA or the likes... I made my EGR blockoff plate for the back of my intake manifold.

Short story too... Remember me making and installing my short shifter? well last night on my way home from work I began thinking "I wonder how much abuse this thing can take?" so I slammed it around a little bit, and made some fast, hard shifts to test it out, I beat it to hell and it took all of it.... This morning on my way to work, 20 mile drive 1 way, 17 stops (lights and signs) 12 turns, 13 turns into the parking spot.... at about 19.8 miles, after the last stop, down shifting for the 12th turn from 3rd to 2nd.... Never made it to 2nd, the stick fell to the front of the seat limp, so I rolled about 0.2 miles around the corner, into the parking lot and into My parking spot and quickly tore it apart to find that I had broken the upper weld, so later I ground it down on both sides to almost a needle point and welded it all together again and put it back together... I think I am going to rethink the physics and design of the shift tower and make a better one all together or buy and adapt something different for now until I ultimately end up swapping transmissions.

I have an Idea for an adjustable short shift towerthat woula allow everything from "stock" shift length of 7"+ to perhaps as small as 2" or less, (I am just over 2" right now) It would require 2 adjusters of sorts, 1 for the outer Height adjustment, and 2 for the length of the stick below the fulcrum point. If both of these 2 criteria were to be met, with a reasonable design, one would be able to make any adjustment desired ABOVE the sealed point to the transmission with say a 15mm wrench and a big Cresent wrench... One could even design and incorporate this very same Idea into Bill's Remote Mount Shifter that is floating around the forum for those Rx7 transmission swapped guys.
93' Max, 4g64, 16v DOHC, 18G Turbo, Walbro 255L, 27" FMIC, 2.5" Exhaust, Aero Exhaust, AEM C2DI w/COP, 510cc Injectors, Running on Megasquirt 3-X.

Videos as soon as it's 100% up and running.
Mad Menace
Addict
Posts: 214
Joined: Wed Nov 11, 2009 10:11 pm
Location: Colorado

Post by Mad Menace »

All those pictures I have been promising... Here they are
ImageImageImageImageImageImageImageImageImageImageImage
The Megasquirt with extra mods.
ImageImageImageImage
Ready to go into the truck in 7 days.
ImageImage
93' Max, 4g64, 16v DOHC, 18G Turbo, Walbro 255L, 27" FMIC, 2.5" Exhaust, Aero Exhaust, AEM C2DI w/COP, 510cc Injectors, Running on Megasquirt 3-X.

Videos as soon as it's 100% up and running.
Mad Menace
Addict
Posts: 214
Joined: Wed Nov 11, 2009 10:11 pm
Location: Colorado

Post by Mad Menace »

The truck has been be-headed today... the engine is swinging on the hoist right now until I can get someone here to help me carry the new one out side. I spent maybe an hour and a half pulling the engine with basic hand tools. Pics coming soon.

The new engine WILL be installed today/tonight before I go to bed and hopefully it will start first time on the megasquirt tune that Egoinstigator provided me with.
93' Max, 4g64, 16v DOHC, 18G Turbo, Walbro 255L, 27" FMIC, 2.5" Exhaust, Aero Exhaust, AEM C2DI w/COP, 510cc Injectors, Running on Megasquirt 3-X.

Videos as soon as it's 100% up and running.
Post Reply