My 4g Mighty max project

Swaps in Progress, on the Road and on the Track.

Moderators: DJpowerHaus, mattmartindrift

boise-nic
Addict
Posts: 220
Joined: Mon Feb 09, 2009 8:15 pm

My 4g Mighty max project

Post by boise-nic »

Well I figured if I actually started a project log I could rely on you people to prod and poke me into finishing it. This probably won't be the most detailed of all project logs but I'll be sure to snap some good pics.

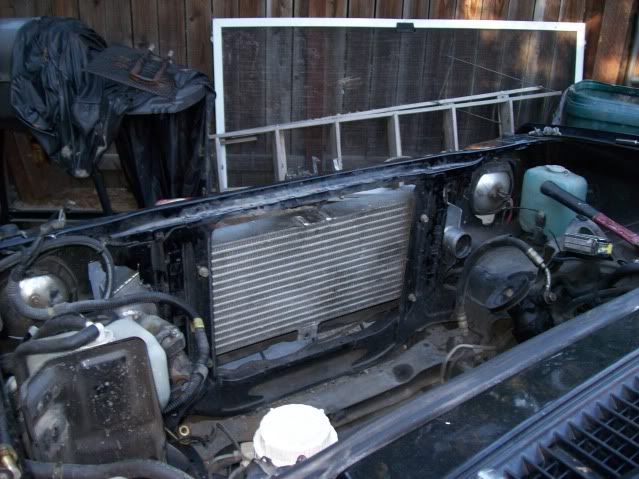
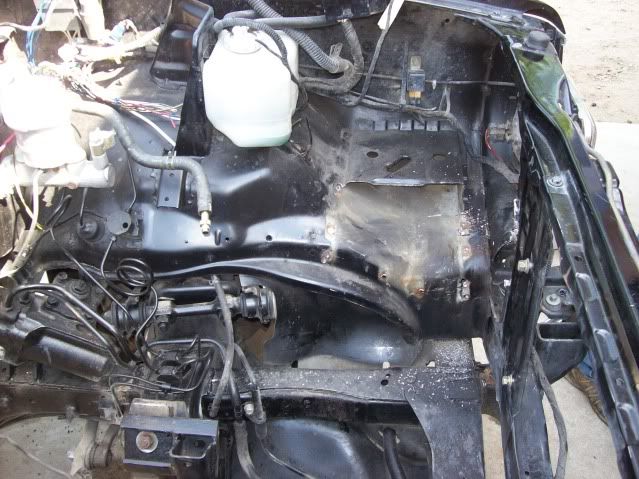
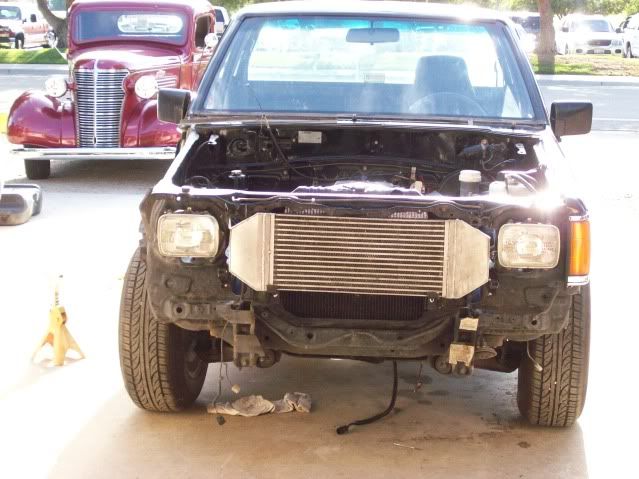
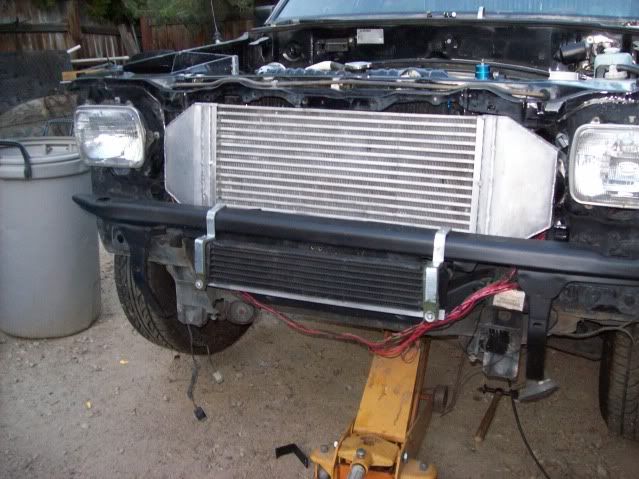
My goal is to have a totally streetable, fast, reliable truck that I can drive daily. I'm not going to go with anything larger than a 16g since I value quick spool and a big power curve over peak power. The tranny will like it better too. The truck I picked up from a buddy is already black and I'm thinking about just repainting it satin black. Here's the truck...

Image
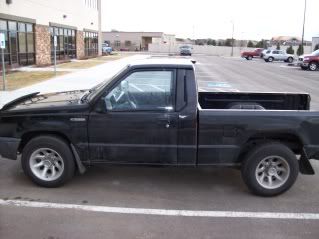
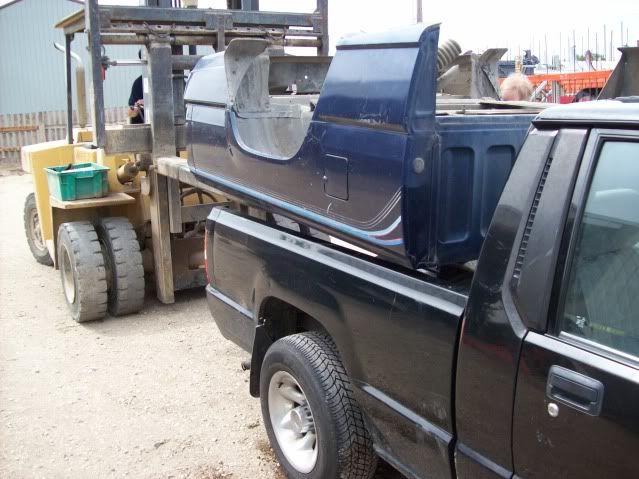
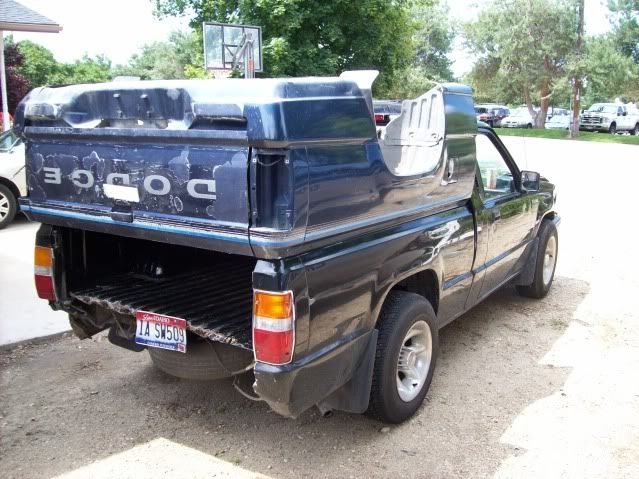
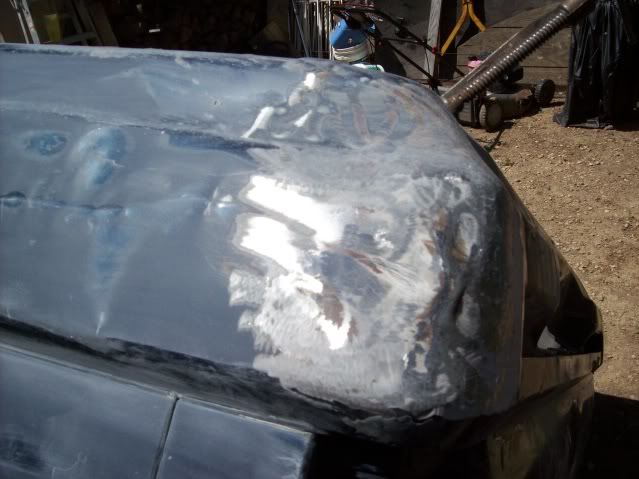
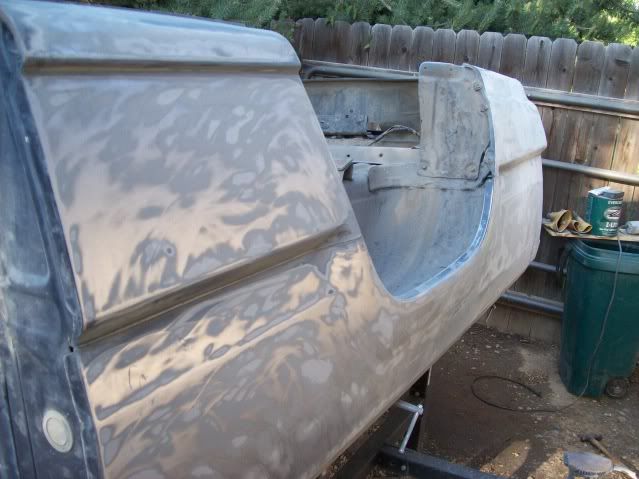
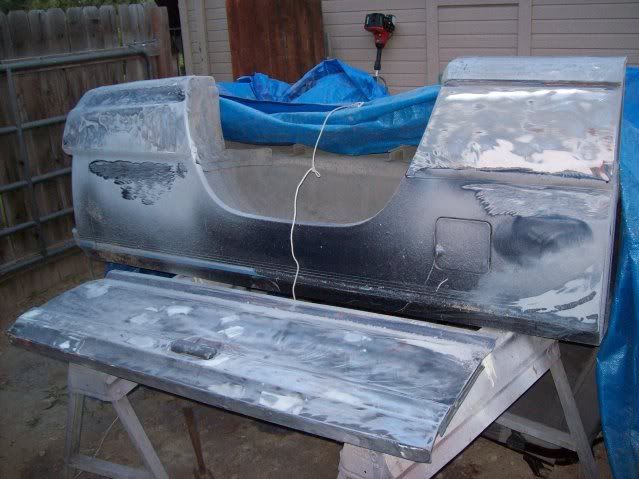
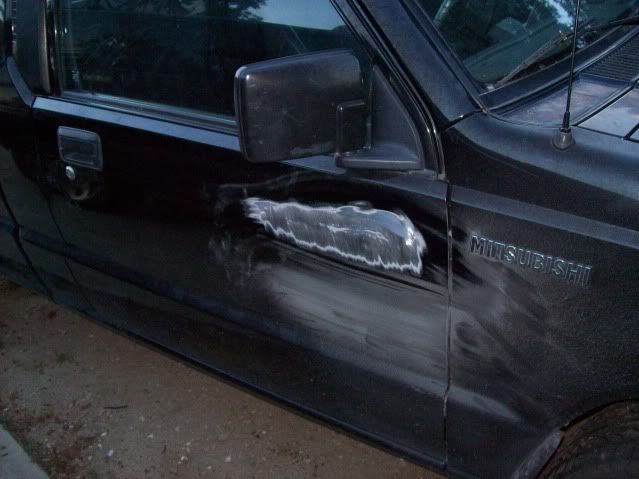
The truck is a 95' with only 120,000 on it. the bad news is it got hit in the rear end so I have to do some body work or just find a new bed since I will be painting it anyway.

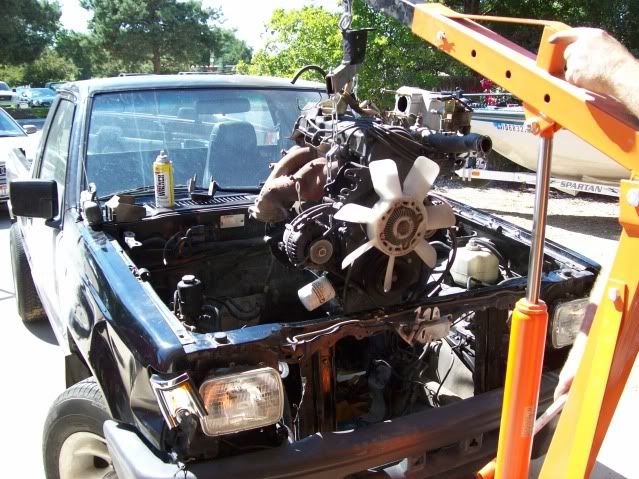
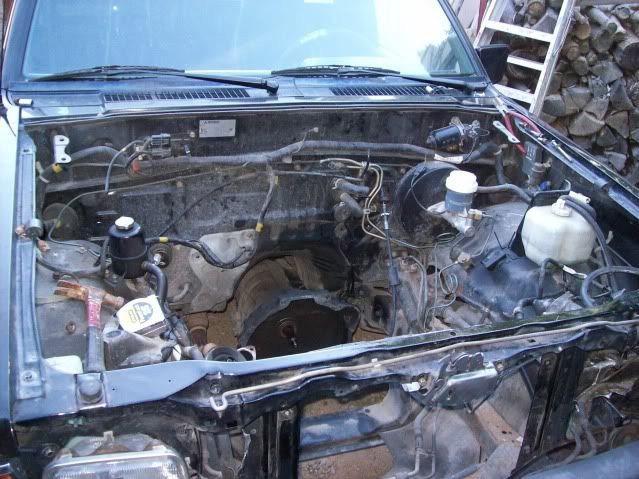
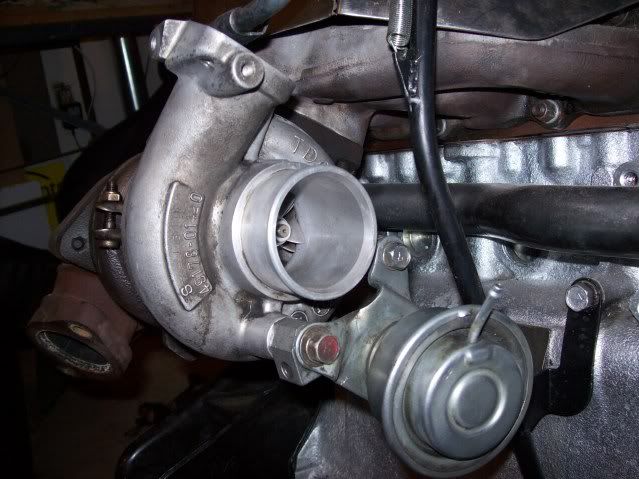
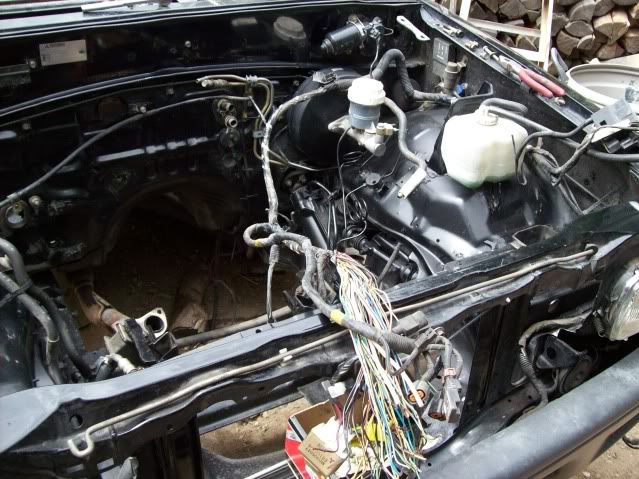
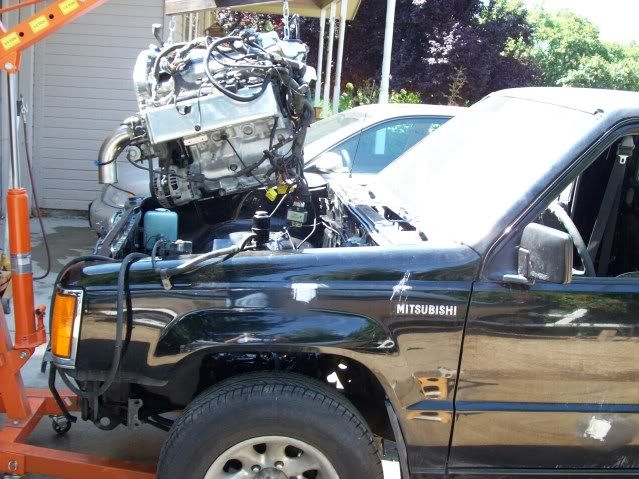
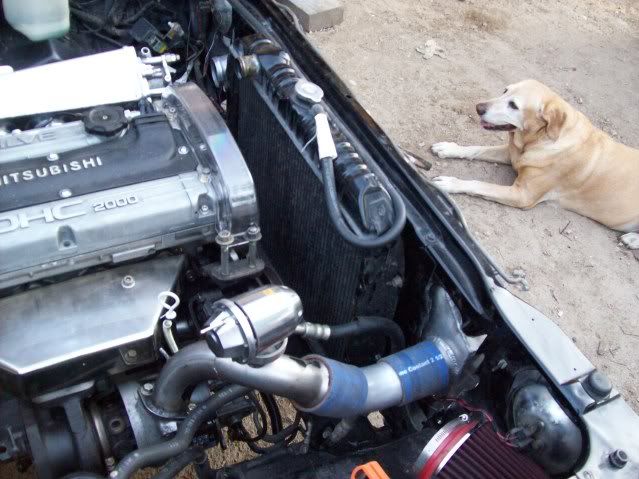
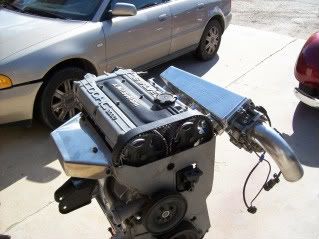
The engine I'm working on was out of my 1990 talon tsi awd. I had this car for about seven years and it was begining to feel its age. I just wasn't feeling the love for the DSM chasis anymore. But I did love that motor so I decided to find it a new home and I wanted a unique sleeper with some utility. My daily driver is a 350z and I can't stand the fact that I can't put anything in it like a bike. Anyways, got the truck and now the motor needs to come out of the car. Time for some transplant surgery.

Image

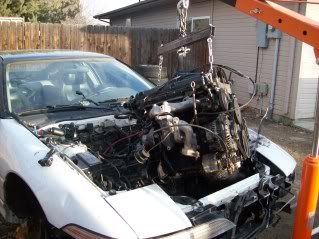
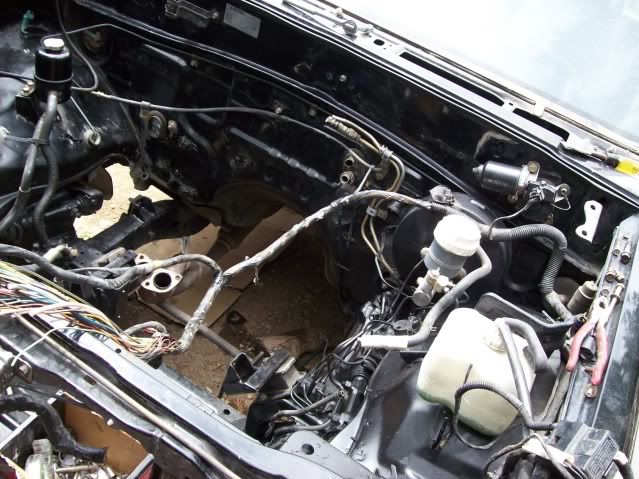
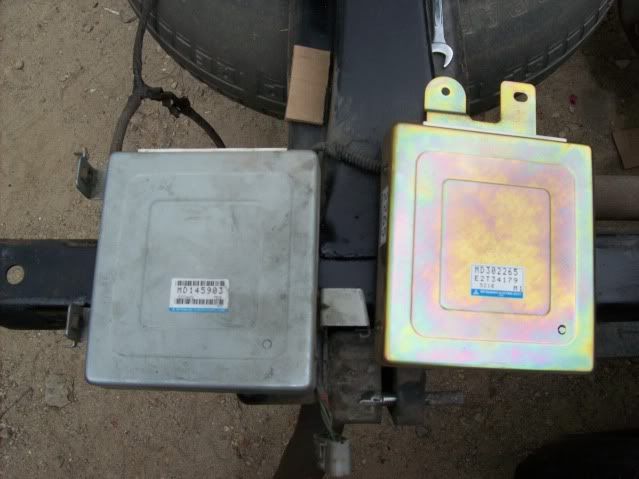
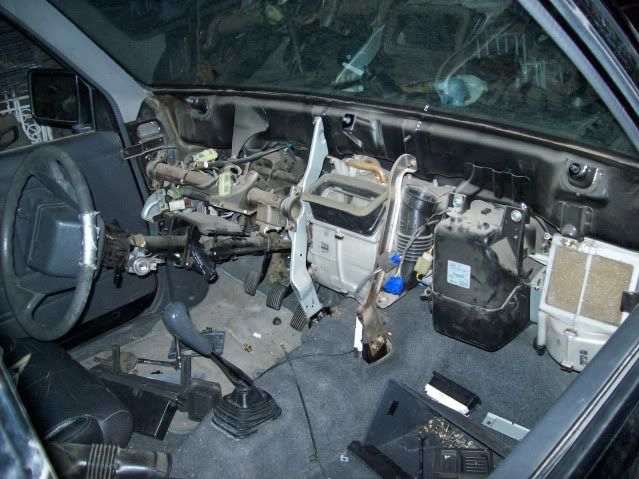
By by car...I was sad to see it go but I knew the motor it will have a better life in the new truck...What you need rolling away is just the shell. I got the engine, AWD tranny, wiring harness, ECU, black leather seats, and exhaust out of it before hand.


Image

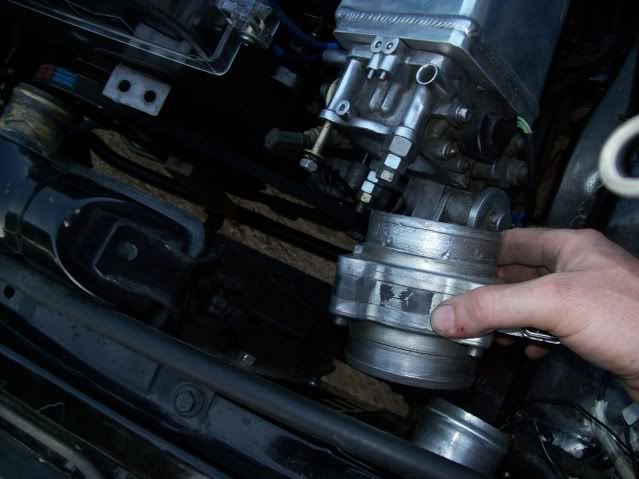
Once the engine came out, I noticed just a few things like an oil leak that was so bad for so long that it was forming stalagtites on my engine block...

Image

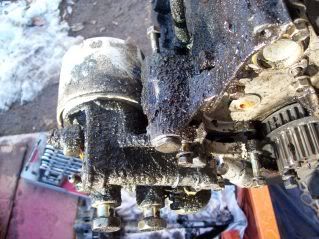
Getting everything ready for the machine shop was a biatch. I went though a TON of degreaser and once the engine went finally got to the shop, he went though another ton of degreaser. Did I mention it was greasy? I did find some interesting stuff too...

Image
^I have no idea what that originally was but I'm glad there is a screen!

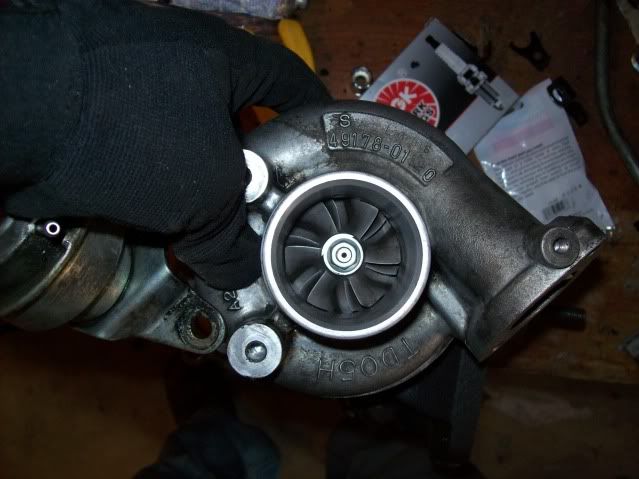
I took the shortblock down to the machine shop for a rebuild. I was curious to what the head looked like so I disassembled it and it wasn't in the best shape...

Image

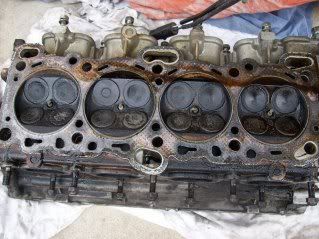
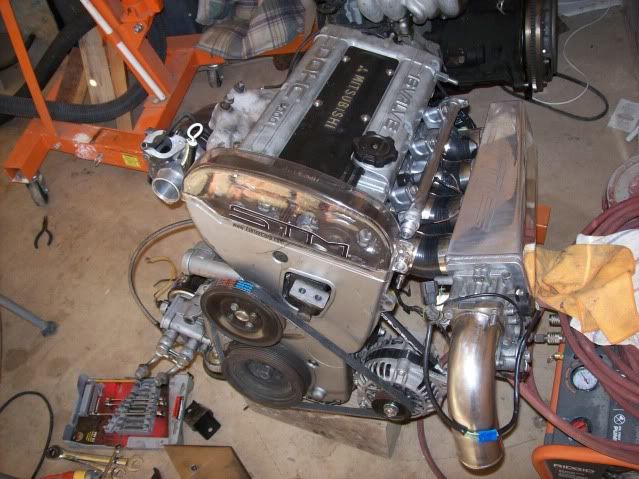
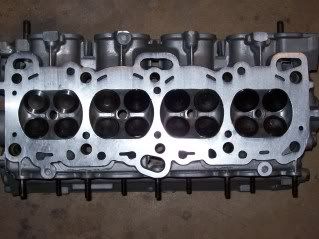
The machinist told me the head spent 2 days in the solvent tank and he still had to ship out all the crap that was built up in the ports. I also had two bent valves and very leaky valve seals. This starts to explain why the car started to feel slower over the years... I got the engine back and here is what the head looks like now...

Image

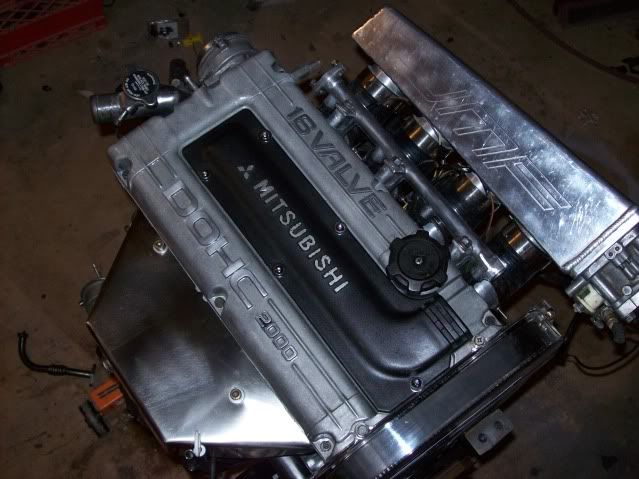
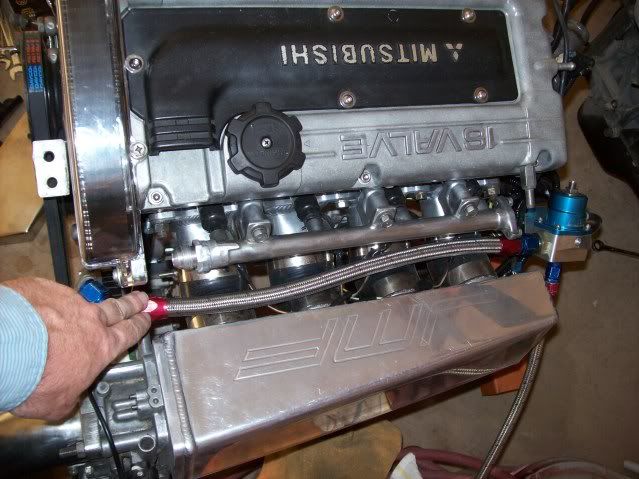
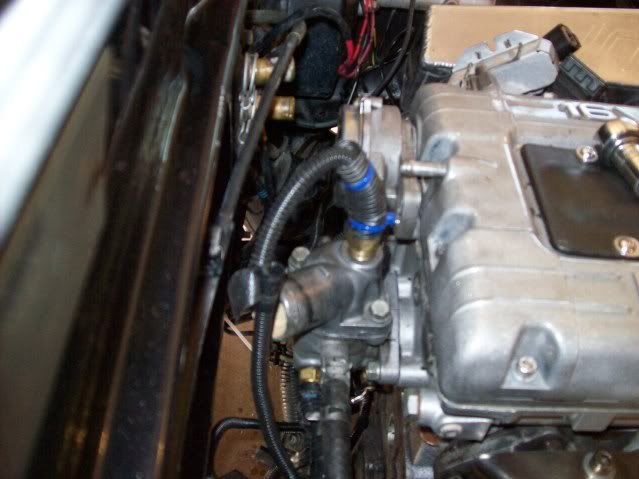
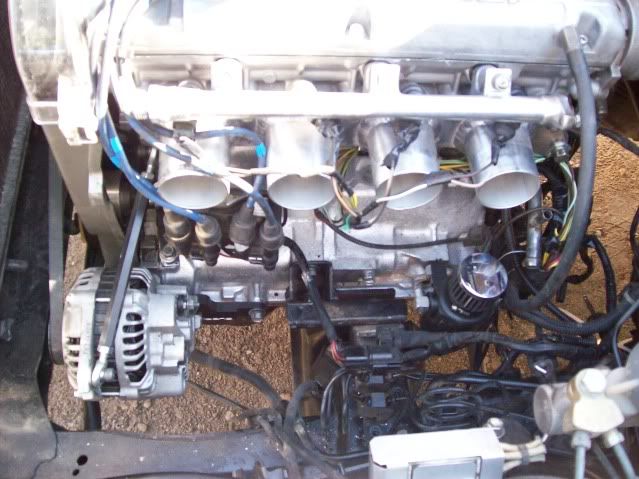
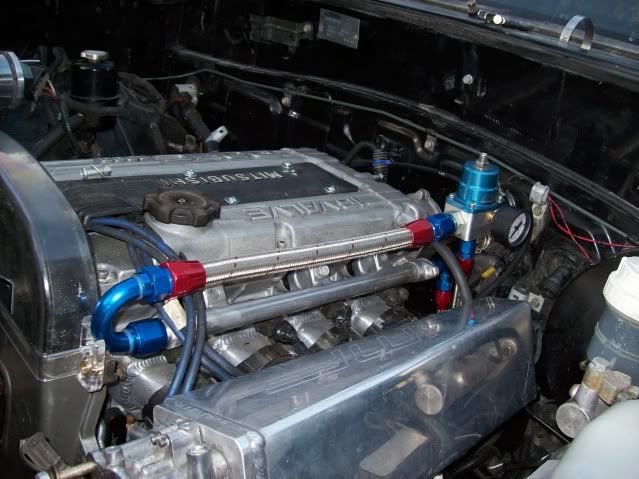
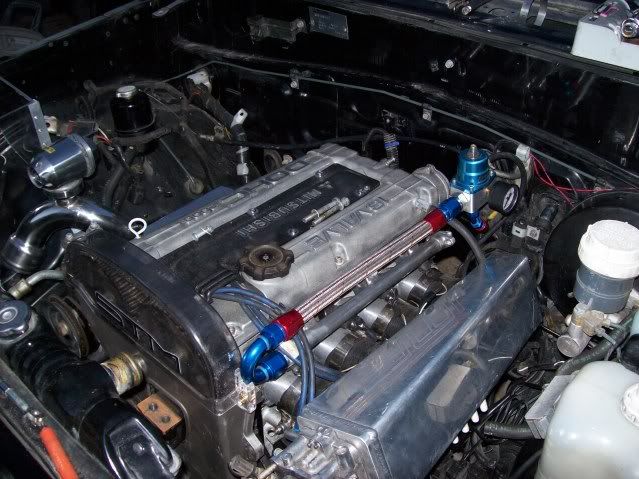
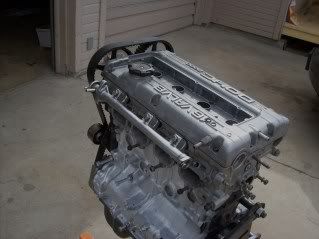
Completely rebuilt and just waiting on a few parts to arrive. In the meantime I've been fixing somethings that I don't like...

Image

Image

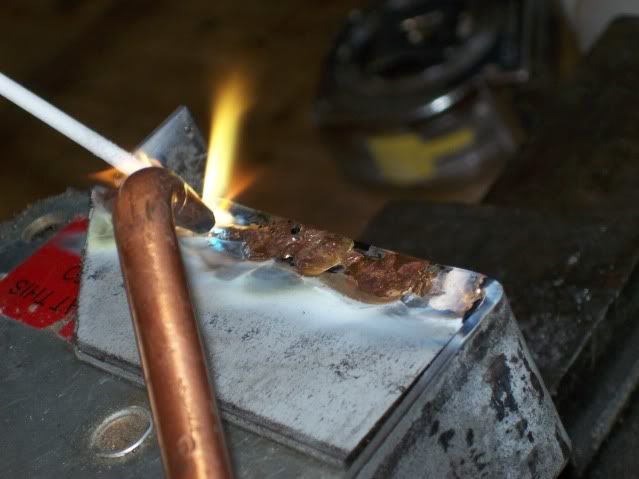
The CAS sensor wires have been sitting in a oil leak for a long time and the wires are exposed. I want to do this swap right and I don't want to take any half-ass, good enough aproaches so I decided to do some resoldiering because I don't trust the connections anymore... It went from this...

Image 
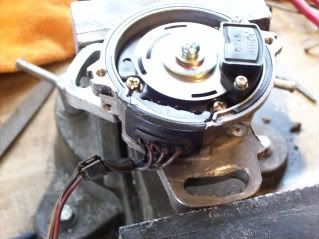
(notice the exposed and corroded wires) to this...

Image
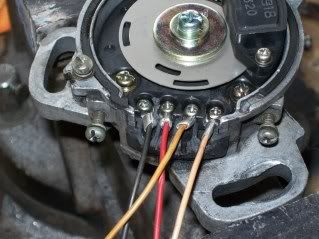
I sealed it up right with some good good quality electronic potting material. Should seal as well as the original.

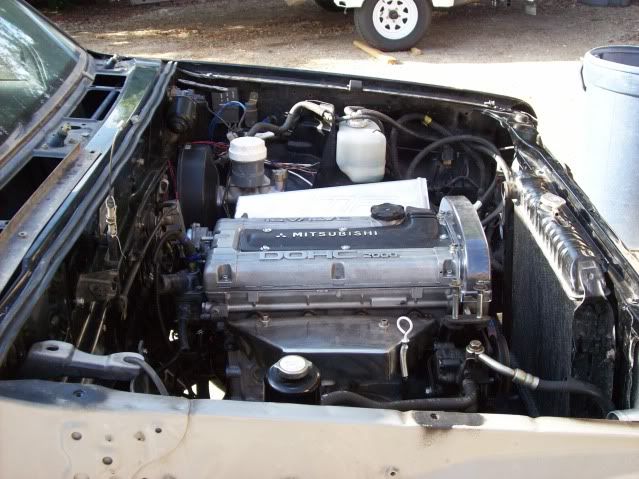
That's it for now. I'm having a lot of fun driving the truck as it is. Next weekend I plan on either mounting the tranny up to the engine or go junkyard hunting for a new shortbox. Let me know what you guys think.
89coltgt
Too Much Time on His Hands
Posts: 584
Joined: Wed Apr 11, 2007 2:50 am
Location: Ste Genevieve, MO

Post by 89coltgt »

Looks like you have a sound game plan. Good luck with it and keep the pics coming :)
boise-nic
Addict
Posts: 220
Joined: Mon Feb 09, 2009 8:15 pm

Post by boise-nic »

^Thanks. 4g63mightymax convinced me to not cut the firewall and move the engine forward 3 inches. I don't want to mess around with cutting holes in the firewall. Also I just wanted to say that his website was a HUGE help in getting me going. He has a very nice build log and it's one of my main resources for information. So thanks!

Here is the intercooler and oilcooler setup I plan on running.
Since its a 90, the oil filter already has oil cooler lines. I simply welded AN fittings onto the two lines. The intercooler is quite big, maybe too big for the application but it'll never get heatsoaked and it actually does fit ok. Well, there may be some dremel work involved but I think I can fit it in there. Both coolers will be painted a flat black to keep the sleeper look.

Image
ixnay
Knowlege Seeker
Posts: 26
Joined: Fri Apr 18, 2008 7:09 am

Post by ixnay »

Shaun your a mitsubishi forum hero! with the amount of projects you have going! :twisted:
boise-nic
Addict
Posts: 220
Joined: Mon Feb 09, 2009 8:15 pm

Post by boise-nic »

Speaking of projects, I got rid of an old e30 that had an engine fire before even thinking about doing something like this. Arg! Should of thought of it sooner because an 4g e30 would be sweet as it flew by a new M3 :)
ixnay
Knowlege Seeker
Posts: 26
Joined: Fri Apr 18, 2008 7:09 am

Post by ixnay »

did the mighty max utes get released in any other countries? and did they have different names?
NightlifeD50
Knowlege Seeker
Posts: 29
Joined: Mon Jul 12, 2004 5:26 pm
Location: Saskatoon, Saskatchewan, Canada

Post by NightlifeD50 »

plymouth arrow truck
Optimus Prime is my hero
boise-nic
Addict
Posts: 220
Joined: Mon Feb 09, 2009 8:15 pm

Post by boise-nic »

I need to start updating my project more frequently...

Since I've last posted this is the stuff I've gotten done...

As I had mentioned, the bed had taken quite a hit. I still cant get over how these trucks never really had bumpers in the back, just some stamped steel that mimicks a bumper I guess. So the first priority was to pick up a new bed from a junkyard...in true redneck fashion. I got a few looks on the way home...
Image
Image
Image


This bed was the best of the bunch at the junkyard but even it had some minor dents. Time for some sanding and bondo...
Image
Image
Image

I figured I'd start on preping the cab and getting some of the dents out since I had all my body work stuff out anyways. The cab was pretty clean except for a large scrape on the passenger side.
Image


I got bored with bodywork after a while so I decided to go back to the mechanical side of things. Having gotten the truckbed from the junkyard, the max's duty was fullfilled. It could now start to be reincarnated to something more fun. So out goes the wheezy little engine...
Image
Image
After a lot of power wasking and cleaning, the engine bay is nice and clean. Tranny is out at this point.
Image
I moved the engine mounts about 3" forward. They are beefy little bastards made from 1/8" plate steel. I put a gusset on each side just in case and well because...welding is fun. They should hold up fine. They tranny mount is not done yet but I'll throw up a pic when they are...
Image
Image

Having the engine bay semi clean, I could now start to remove the stock harness and ecu. I found out that mighty max's are way easier than a DSM to take the harness out. Its located right in front of the passenger door. What's even cooler is (something everyone on here knows) that the guts from the DSM's ECU will drop right into the MM's casing which means that the stock ecu mounting can still be used. Looks OEM.
Image

Now I am doing small tasks while I await some parts. I decided to take the AC out...
Image
Still debating if I should reuse and recover my stock 1g seats or get some nice aftermarket ones. I was just messing around at this point. I've have to fab up a braceket so the seats would be at the proper level no matter which ones I get. I could bet my buddy's seats out of an 05 sti. They are comfortable but I'm not crazy about the blue. Is there a way to dye it?
I fitted my intercooler. It should never ever heatsoak with the level of boost I'll run...
Image
It blocks a fair amount of air for the radiator but I think with a good electric fan it should still be fine.
Just picked this MHI turbo up of craigslist. All I was after was a 14b so when I went to pick it up i reached in to check it for shaftplay and there was none. It wasn't until I got it home that I found out it was a 16g and not a 14b. I can't get the 02 housing off to check which 16g that thing is but I thought it was a pretty sweet score for $100. I do plan on telling him what he had sold me just to be fair.
Image

Image
The oil cooler will be placed in the approximate location only recessed back more so its flush with the bumper. I'm sort of proud of this cooler. I got it from a turbo diesel merc for $10.
Image
After I found out why you must flip your turbo, I decided to man up and try to clock the turbo. I say "man up" because dealing with the ring clip was not an easy experience and I'll just leave it at that :). The best part about the ordeal was that I managed to modify the stock wastegate to work fine even with the new rotation of the compressor housing. A few trips to the vice and bend the bracket and a couple spacers later and the thing actually works. I hooked it up to the air compressor so make sure that wastegate still have the full swing and it worked prefectly. The angle of the rod it still approximate to what it had been previously so there should be no binding either. I thought that this was going to be a headache because I know nothing about external wastegates and didn't want to weld one on to my manifold. Notice the spring on the dipstick?
Image

This is what the engine now looks like with all its pieces and parts on...Of course the intake pipe to the throttle body will have to be changed.
Image
Image
I would like to position the FPR on the firewall but that would require a 180 degree #10 an fitting which I'm not certain would clear but it would look cool to have the braided line loop back on top of the fuel rail with a couple bracekts to keep it straight.
Image


That gets you up to speed on where I am at right now. Now I am taking out the MM's engine wiring harness. I had started at the ECU side, disconnected the plugs and feed them though the firewall. Did I mention how much easier it was that on a DSM? So I thought I would just trace back all the wires from the engine harness and disconnect them all. Well, I ran into a small question that prompted me to stop what I was doing and seek some wisdom... The cut wires you see are the main plug to the ECU. I know I need to get rid of these anyways so I figured I could trace back each wire easier if I cut the plug. Problem is, the engine harness does not just end at the sensors and plugs; its wrapped into a loom with what looks to be the chasis harness. I can see things like lights and the wiper motor wires going into it. I thought that they would be seperate but it looks like at some point they come together.
Image
Image
89coltgt
Too Much Time on His Hands
Posts: 584
Joined: Wed Apr 11, 2007 2:50 am
Location: Ste Genevieve, MO

Post by 89coltgt »

Good stuff, looks like you have been busy :)
boise-nic
Addict
Posts: 220
Joined: Mon Feb 09, 2009 8:15 pm

Post by boise-nic »

The entire DSM ECU is on the 4G motor and intact. I didn't have to cut 1 wire so I assumed the MM's would be the same too but it's somehow integrated with the chassis harness? All I know it it was a good time to stop and ask some Q's to you guys. This is a shot of the 4G hanress and ECU. The three plugs I am holding up are the only wires that must be spliced into from the MM's chasis harness to the 4G's ECU. Correct me if I am wrong though. Ignition, timing, and fuel pump perhaps? I have to read up a bit more...
Image
89coltgt
Too Much Time on His Hands
Posts: 584
Joined: Wed Apr 11, 2007 2:50 am
Location: Ste Genevieve, MO

Post by 89coltgt »

All of your external connections for power and ground(other than the grounds that are already on the harness) can be made through these connectors.
boise-nic
Addict
Posts: 220
Joined: Mon Feb 09, 2009 8:15 pm

Post by boise-nic »

^ok cool. I was more worried about taken out something else other than the engine harness. I think I can handle that.

Next question...After clocking the turbo and rotating it...what are people doing for the oil return line to the pan? It's low pressure but still pretty high heat so I was wondering if it'd be better to modify the stock one and extend it or cut it and insert a piece of high temp rubber line with some clamps. The later seems more prone to leaking though. Advice?
89coltgt
Too Much Time on His Hands
Posts: 584
Joined: Wed Apr 11, 2007 2:50 am
Location: Ste Genevieve, MO

Post by 89coltgt »

The cheapest/reliable option imo would be to cut the ends off a stock return line and clamp a piece of ss braided line to the stock ends. I am sure high temp rubber hose would work as well, just make sure it can handle oil.
boise-nic
Addict
Posts: 220
Joined: Mon Feb 09, 2009 8:15 pm

Post by boise-nic »

Got some more stuff done this week...

Here is my new trany mount (exteneded by 3")...
Image

The intercooler piping was going to hit the battery holder. I fugured being a low compression 4 banger, I wouldn't need a super high CCA battery to start the thing. I think I'll run with a compact battery similar to the size of a garden tractor battery. I've seen people do it and it seems to work great, even in winter. So anyways, I cut half the bracket off. This was a PITA because of all the tack welds...
Image

Finally, in she goes!
Image


Plenty of room...
Image
Image
Image

On my old dsm, I've always disliked how the intercooler would wiggly and feel loose. I decided that I want to make this one more stout so I fabed some intercooler brackets...
Image
I found this awsome adhesive lining tape that should prevent any abrasion from vibration from occuring...
Image

How it sits now...
Image
Image
The hot rod behind it is my dad's. We've got a drag race comming up soon. :) That's it for this week. Too damn hot now (over 100).
89coltgt
Too Much Time on His Hands
Posts: 584
Joined: Wed Apr 11, 2007 2:50 am
Location: Ste Genevieve, MO

Post by 89coltgt »

Looking good. I had to trim up the battery bracket on my first swap as well, but not quite as much due to me using a stock intake manifold.
boise-nic
Addict
Posts: 220
Joined: Mon Feb 09, 2009 8:15 pm

Post by boise-nic »

thanks. It's actaully starting to feel more like a whole car instead of a bunch of parts. I really like the JMF intake. I got it used, the previous owner cut the tubes to avoid hitting the brake cylinder in a BMW. I'm not sure if I want to reweld it and make it straight. I am running a GM-MAF and I can't figure out how to make it work for the blow thru design. There just isnt a lot of space to work with between the intercooler and the intake. I might have to put it upstream of the turbo which I don't like as well.
89coltgt
Too Much Time on His Hands
Posts: 584
Joined: Wed Apr 11, 2007 2:50 am
Location: Ste Genevieve, MO

Post by 89coltgt »

One thing you may be able to try is, run a 3" cold ic pipe, weld the gm maf directly to the pipe, this will avoid having to use couplers that would take up the extra space. If that does not work, you would have to do a draw-through setup like you said, or go speed density.
boise-nic
Addict
Posts: 220
Joined: Mon Feb 09, 2009 8:15 pm

Post by boise-nic »

89coltgt wrote:One thing you may be able to try is, run a 3" cold ic pipe, weld the gm maf directly to the pipe, this will avoid having to use couplers that would take up the extra space. If that does not work, you would have to do a draw-through setup like you said, or go speed density.
Good idea. I'd probably want to have it done by a good welder, or at least a better one than me. I wouldn't want to cook the MAF too much when welding. I'm looking forward to only having about 3 feet of intercooler piping to mess with. I hated boost leaks on my talon. Going to a blow thru MAF was the best thing I had ever done to it.

Still research speed density. I know nothing about it yet.
boise-nic
Addict
Posts: 220
Joined: Mon Feb 09, 2009 8:15 pm

Post by boise-nic »

I was playin around with making a mockup of my intercooler / exhaust pipe routing. The bad news is I'll definately need a custom 02 housing. I can get the flange and some piping but I haven't seen a kit for rwd 4G's that discharge it straight down (assuming the turbo if flipped for RWD). I can buy the flanges and such but I would just rather buy the whole thing.
The good news is I'm stoked to have figured out a reall cool way of routing my intake and intercooler piping. I'll have a total of about 2' of piping! :)
boise-nic
Addict
Posts: 220
Joined: Mon Feb 09, 2009 8:15 pm

Post by boise-nic »

Did a bit more on the truck. Trying to stick with the clean look I made some brackets for the catch can and the ignition coil pack. These should work fine where they are unless someone knows otherwise. Catch can might be hard to empty but that's all I can think of.
Image

I was happy to finally figure out a good routing for the compressor outlet to the intercooler. Funny enough all I did was cut the j-pipe on my talon at the elbow, rotate, and put back together. It makes an almost perfect bend. I didn't want to be all hardpiped with one coupler because of engine flex with such a short run to and from the intercooler seems like a recipe of blown pipes and boost leaks. I'm looking forward to only having 3' of intercooler piping though. :) What do you guys think of the BOV position? Should be close as possible to the turbo I believe? That's my helper in the back, she doesn't do much except eat and sleep - totally useless.
Image
boise-nic
Addict
Posts: 220
Joined: Mon Feb 09, 2009 8:15 pm

Post by boise-nic »

The other side of the intercooler might be more of a challenge. There is very little room to place the MAF sensor between the intercooler outlet and the throttle body. Image

I may have to do something like an 'S' bend. It might be ugly but it would work. I feel confident in making my own custom silicon couplers with some floral foam and a few things from McMaster Carr so that is another option. I've got a lot of other things to do so I'm just thinking of my option right now. If you guys have any ideas lemme know.
89coltgt
Too Much Time on His Hands
Posts: 584
Joined: Wed Apr 11, 2007 2:50 am
Location: Ste Genevieve, MO

Post by 89coltgt »

Looking good. It looks like the diy couplers may be your best bet for the gm maf connections, if you get them nice and smooth, it should turn out well and be the smoothest transition for your setup.
Arktis
Addict
Posts: 65
Joined: Sat Oct 25, 2008 11:41 pm

Post by Arktis »

Are you keeping the stock rear end?

I've heard Ford Explorer 9" rear subframes bolt right up with no welding or cutting.
89coltgt
Too Much Time on His Hands
Posts: 584
Joined: Wed Apr 11, 2007 2:50 am
Location: Ste Genevieve, MO

Post by 89coltgt »

Arktis wrote:Are you keeping the stock rear end?

I've heard Ford Explorer 9" rear subframes bolt right up with no welding or cutting.
Explorers do not have rear subframes or 9" rears, however, they come with the 8.8 rear and they require only slight modifications to swap into the trucks.
Gentleman Rogue
Addict
Posts: 165
Joined: Wed Feb 06, 2008 7:37 pm

Post by Gentleman Rogue »

they will still be too wide- i did a lot of reading on it. even if you manage to find a Ranger 8.8, it will still be about 1-2" wider than the stock one.
89coltgt
Too Much Time on His Hands
Posts: 584
Joined: Wed Apr 11, 2007 2:50 am
Location: Ste Genevieve, MO

Post by 89coltgt »

Gentleman Rogue wrote:they will still be too wide- i did a lot of reading on it. even if you manage to find a Ranger 8.8, it will still be about 1-2" wider than the stock one.
A ranger 8.8 would work out, just need different oiffset wheels.
Gentleman Rogue
Addict
Posts: 165
Joined: Wed Feb 06, 2008 7:37 pm

Post by Gentleman Rogue »

im not sure how- the stock D50 wheels are already 90% backspacing. im not saying you can't bolt it in there- just saying it'll look like shit and youd end up looking like a mexican hotrod...
89coltgt
Too Much Time on His Hands
Posts: 584
Joined: Wed Apr 11, 2007 2:50 am
Location: Ste Genevieve, MO

Post by 89coltgt »

Gentleman Rogue wrote:im not sure how- the stock D50 wheels are already 90% backspacing. im not saying you can't bolt it in there- just saying it'll look like shit and youd end up looking like a mexican hotrod...

It has already been done and it looked just fine.
boise-nic
Addict
Posts: 220
Joined: Mon Feb 09, 2009 8:15 pm

Post by boise-nic »

From what I've found online, it seems like a chore to swap out the open diff for a LSD out of a montero or raider. Special tools, backlash and tollerances to be set etc. etc... Maybe I just don't know enough about it.

I do know that I could easily swap the whole rear axle (one with an LSD) in its place and it would be fairly straightforward to do. No cracking open of the diff would be a big plus in my book. I'll have to visit the local junk yard and compare the widths of some solid axles with LDSs. Most SUVs (like jeeps and explorers) should be LSD in the rear I believe. Maybe I'm wrong.
4g63mightymax
Addict
Posts: 91
Joined: Fri May 26, 2006 8:43 am
Location: MA
Contact:

Post by 4g63mightymax »

If you swap the whole axle to one from a different make, you also have to have a custom driveshaft made to mate up to it. So I guess you just have the pick your battle. I didn't think swapping the LSD into my rear differential was difficult, but I could see how it looks that way. Either way works, pick whatever one is cheaper for you!

-Jeremy
boise-nic
Addict
Posts: 220
Joined: Mon Feb 09, 2009 8:15 pm

Post by boise-nic »

4g63mightymax wrote:If you swap the whole axle to one from a different make, you also have to have a custom driveshaft made to mate up to it. So I guess you just have the pick your battle. I didn't think swapping the LSD into my rear differential was difficult, but I could see how it looks that way. Either way works, pick whatever one is cheaper for you!

-Jeremy
Yeah I hear that. I have to the driveshaft lengthened by 3" anyways so it not any more effort really. I'll let ya guys know what I find.
Gentleman Rogue
Addict
Posts: 165
Joined: Wed Feb 06, 2008 7:37 pm

Post by Gentleman Rogue »

89coltgt wrote:
Gentleman Rogue wrote:im not sure how- the stock D50 wheels are already 90% backspacing. im not saying you can't bolt it in there- just saying it'll look like shit and youd end up looking like a mexican hotrod...

It has already been done and it looked just fine.
pics?
89coltgt
Too Much Time on His Hands
Posts: 584
Joined: Wed Apr 11, 2007 2:50 am
Location: Ste Genevieve, MO

Post by 89coltgt »

Gentleman Rogue wrote:
89coltgt wrote:
Gentleman Rogue wrote:im not sure how- the stock D50 wheels are already 90% backspacing. im not saying you can't bolt it in there- just saying it'll look like shit and youd end up looking like a mexican hotrod...

It has already been done and it looked just fine.
pics?
Mighty Muah on mightyd50 swapped an 8.8, iirc it was out of an explorer, which are wider than the ranger 8.8, so I know it can be done. I will be swapping a ranger 8.8 into my d50.
Gentleman Rogue
Addict
Posts: 165
Joined: Wed Feb 06, 2008 7:37 pm

Post by Gentleman Rogue »

89coltgt wrote:
Gentleman Rogue wrote:
89coltgt wrote:
It has already been done and it looked just fine.
pics?
Mighty Muah on mightyd50 swapped an 8.8, iirc it was out of an explorer, which are wider than the ranger 8.8, so I know it can be done. I will be swapping a ranger 8.8 into my d50.
as will i- except i'm narrowing a passenger car 8.8- i hate the look of all the back spacing and no dish...
boise-nic
Addict
Posts: 220
Joined: Mon Feb 09, 2009 8:15 pm

Post by boise-nic »

Does anyone have any pics? How is the ratio of the 8.8 compraed to the stock one? I think it would be taller.
Gentleman Rogue
Addict
Posts: 165
Joined: Wed Feb 06, 2008 7:37 pm

Post by Gentleman Rogue »

most Explorer's ran 3.73-4.10's IIRC
boise-nic
Addict
Posts: 220
Joined: Mon Feb 09, 2009 8:15 pm

Post by boise-nic »

Progress has been a little slow this month so far. Something in the air blooms this time of year and knocks me on my butt. Then I was on vacation for a couple weeks. Now though, I'm home and starting to get back to it. Here's what I've accomplished...

Made a cool plexiglass / aluminum cold air box

Fabed up some oil cooler brackets

Worked on wiring (never ending)

Did some body work (bondo here...bondo there...sand, sand,sand)

I cut and rewelded the j-pipe from the turbo. Installed by HKS BOV and polished it up. Man, stainless steel loves to be wet sanded. The thing looks like a mirror now!

Completed the fuel system. Tonight I'll powerup the fuel pump to see if everything is working and nothing is leaking. I'm pretty proud of how clean it turned out... Heres a few pics...

Fuel system...
Image


Engine is dusty but you can see how the compressor outlet and BOV sit.
Image

New oil cooler bracket. It seems to fit nicely under the plastic bumper. I'll have to cut it a bit but should still have a stealthy look.
Image
89coltgt
Too Much Time on His Hands
Posts: 584
Joined: Wed Apr 11, 2007 2:50 am
Location: Ste Genevieve, MO

Post by 89coltgt »

Looks really nice. Is the afpr mounted to the engine or firewall?
boise-nic
Addict
Posts: 220
Joined: Mon Feb 09, 2009 8:15 pm

Post by boise-nic »

mounted to the engine.
boise-nic
Addict
Posts: 220
Joined: Mon Feb 09, 2009 8:15 pm

Post by boise-nic »

Engine bay is finished! I'm not saying its done yet because I'm sure there will be issues the come up that I haven't seen yet...leaks etc. But here she is...
Image

Still tweaking somethings though. I'd like the upper radiator hose to have a complete straight section by the vlave cover. Maybe later. I also need to get some heat reflective conduit for some of the lines near the turbo and exhaust before I drive it hard. Oh, also need a fan. Notice my custom homemade DIY silicon couplers for the intercooler pipes? Took a long time but it's something I wanted to try. They work great. Tested them to 50 psi.

I ditched the idea of using the mightymax tranny and got a W58 and billhousing for a sweet deal (call it a divorce sell).


Image

The person that sold me a 'fwd' flywheel really didn't...Doesn't even touch the starter teeth

Image

So as of now, I am waiting on my 8lb fidanza flywheel to get here so I can hook up the tranny and start it. Arg! Can't wait....

In the meantime, I decided I didn't like the chrome grill. I picked up this one at a junkyard. The thing looks new. Not sure if it is from a newer or later model than the chrome. It goes with my all black theme though...

Before...

Image

After...

Image
Sparkey_Max
Knowlege Seeker
Posts: 4
Joined: Fri Oct 30, 2009 8:30 pm

Post by Sparkey_Max »

So moved the engine forward 3", and the tranny 3" and have to lengthen the driveshaft 3"... so the shifter got moved forward 3". Hows that work out? Pics?
Verdad
Addict
Posts: 51
Joined: Sun Oct 11, 2009 8:34 pm

Post by Verdad »

awesome intercooler, do you remember where you got it, and if not, the size?
truck looks great
92 GSR-4
Knowlege Seeker
Posts: 39
Joined: Mon Aug 31, 2009 10:21 pm

Post by 92 GSR-4 »

I know you got your intake system finished but...

Why is the IC pipe to the Intake Manifold so complex? Is it because you put the MAF in that pipe?

A solution might be to run the MAF-T "Draw Through" style. As in: Put it where the stock MAF would be, on the intake pipe before the turbo. I actually talked to the owner of Full Throttle Speed about some choppy airflow signal I was having and he told me that the MAF-T was actually designed for draw thru use. Maybe that will help simplify the UICP.
89coltgt
Too Much Time on His Hands
Posts: 584
Joined: Wed Apr 11, 2007 2:50 am
Location: Ste Genevieve, MO

Post by 89coltgt »

92 GSR-4 wrote:I know you got your intake system finished but...

Why is the IC pipe to the Intake Manifold so complex? Is it because you put the MAF in that pipe?

A solution might be to run the MAF-T "Draw Through" style. As in: Put it where the stock MAF would be, on the intake pipe before the turbo. I actually talked to the owner of Full Throttle Speed about some choppy airflow signal I was having and he told me that the MAF-T was actually designed for draw thru use. Maybe that will help simplify the UICP.
This was discussed earlier in the thread and he decided to go with this route. That is one of the drawbacks of relocating the engine foward, less space to work with between the engine and rad/rad support.
89coltgt
Too Much Time on His Hands
Posts: 584
Joined: Wed Apr 11, 2007 2:50 am
Location: Ste Genevieve, MO

Post by 89coltgt »

oldcolt75 wrote:why cant you just put the maf after the bend off the throttle body inbetween the intercooler and the intake

Doesn't look to have enough space to do this.

Image
boise-nic
Addict
Posts: 220
Joined: Mon Feb 09, 2009 8:15 pm

Post by boise-nic »

Thats for the compliments guys, that actually keeps my motivation up since its getting cold out.

The maf is just a standard 3" maf. I think the perspective in the picture is a bit off making it look smaller than it is.
boise-nic
Addict
Posts: 220
Joined: Mon Feb 09, 2009 8:15 pm

Post by boise-nic »

The only area that I'm still not real happy about is the routing between the throttle body and the intercooler. Maybe if I go to speed density later, I can clean it up and get rid of the gm-maf.
DoubleJ
Addict
Posts: 109
Joined: Thu Jun 26, 2008 4:13 pm

Post by DoubleJ »

you could run the maf off of the turbo inlet. But i guess that depends on wether or not u are planning on venting the BOV. It wont meter the vented air from the BOV if you mount it off of the turbo.
Project: 4G240. 4G63 in a 89 240sx Coupe
boise-nic
Addict
Posts: 220
Joined: Mon Feb 09, 2009 8:15 pm

Post by boise-nic »

DoubleJ wrote:you could run the maf off of the turbo inlet. But i guess that depends on wether or not u are planning on venting the BOV. It wont meter the vented air from the BOV if you mount it off of the turbo.
Yeah I'm still an old ricer at heart 8)

I do get annoyed by all the srt4's and some of the dsms that have to allways do a bov salute but on a truck...somehow its different I guess. Maybe because it will be a sleeper and you don't expect a mightymax to have a bov.
boise-nic
Addict
Posts: 220
Joined: Mon Feb 09, 2009 8:15 pm

Post by boise-nic »

Just some new randomness...

Got the bumper put on (mostly)...Not to happy with how far out the oil cooler is sitting. I'm thinking of a way to slide it back about 1.5" but the lines would interfere with the cross brace. I like of like how it looks actually but I'm concerned with something kicking it.

Image

Looks like they are hanging in mid air but it actually a plexiglass mockup. I actually kind of like it and will probably keep it. Normally you can't see behind it, just the camera flash lighting it up.

Red button = airhorn
black button = not sure yet
Blue toggle (right side) = line lock
Blue toggle (left side) = high boost / low boost

Image

I plan on having a nice sound system and with all the new stereo stuff now, having a deck in the normal deck location isn't that critical. I'm moving the deck to the the new center council (going with some Brides, Recaros, or something nice like that) that I'll be making soon. Haven't worked out the details yet.
Post Reply