Page 1 of 1
Another D50
Posted: Wed Sep 16, 2009 10:29 pm
by shroder15
Well,
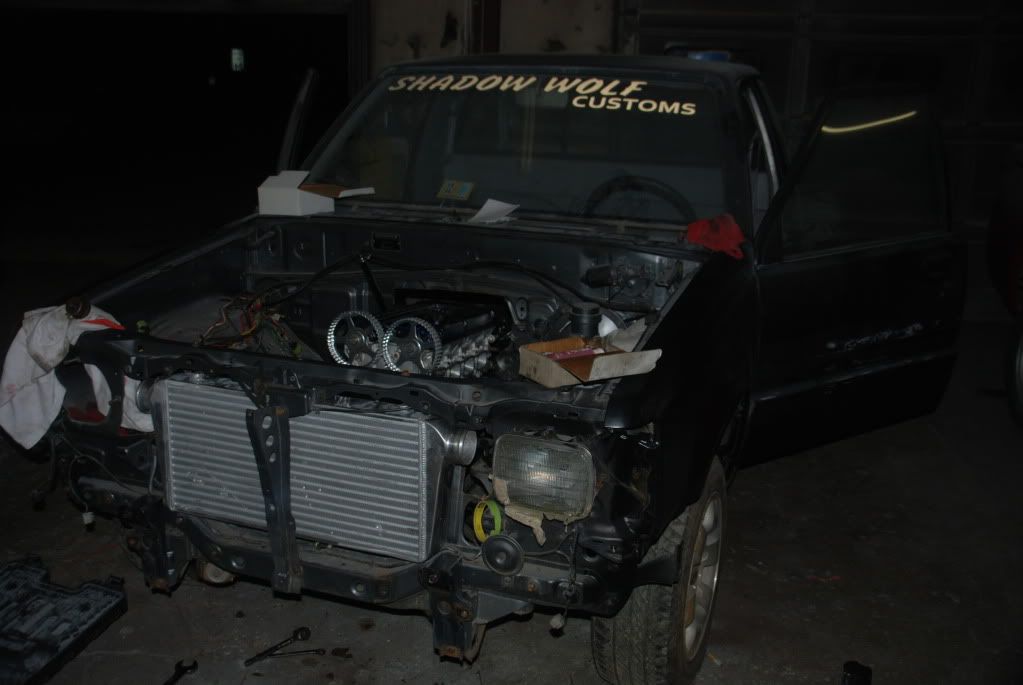
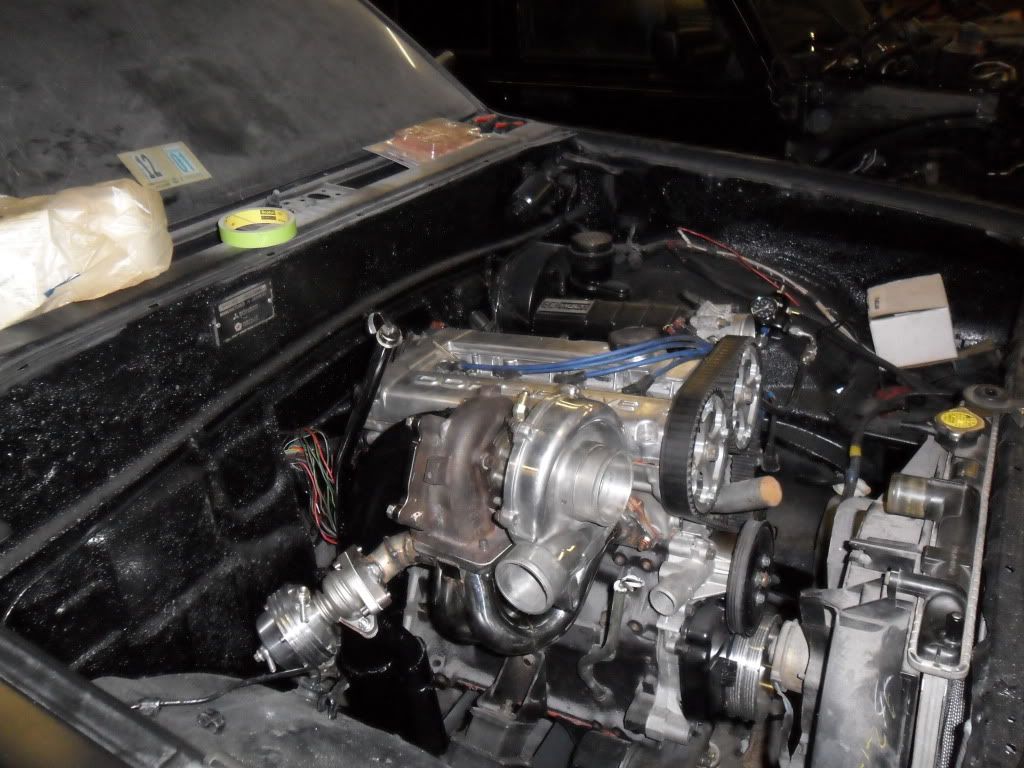
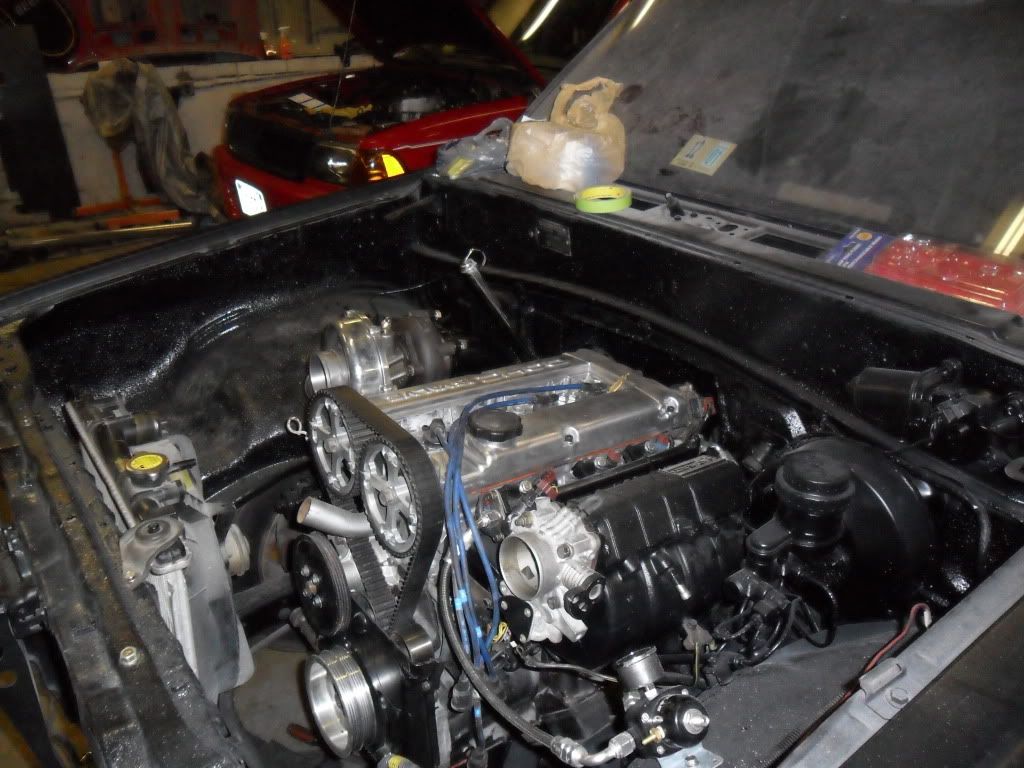
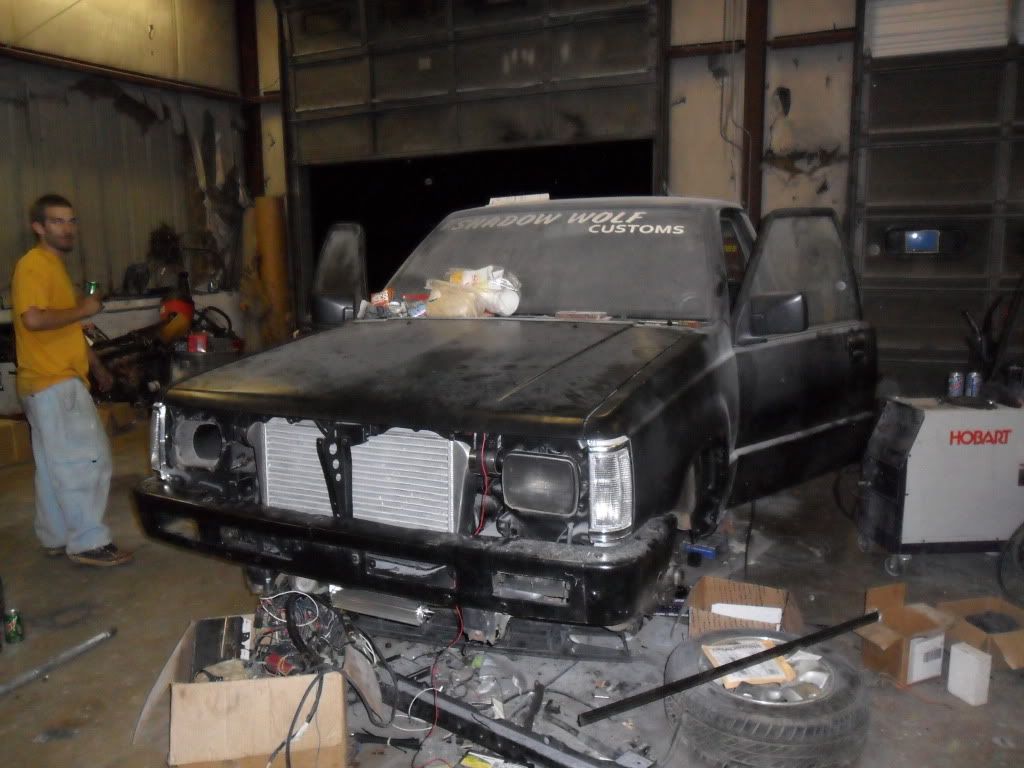
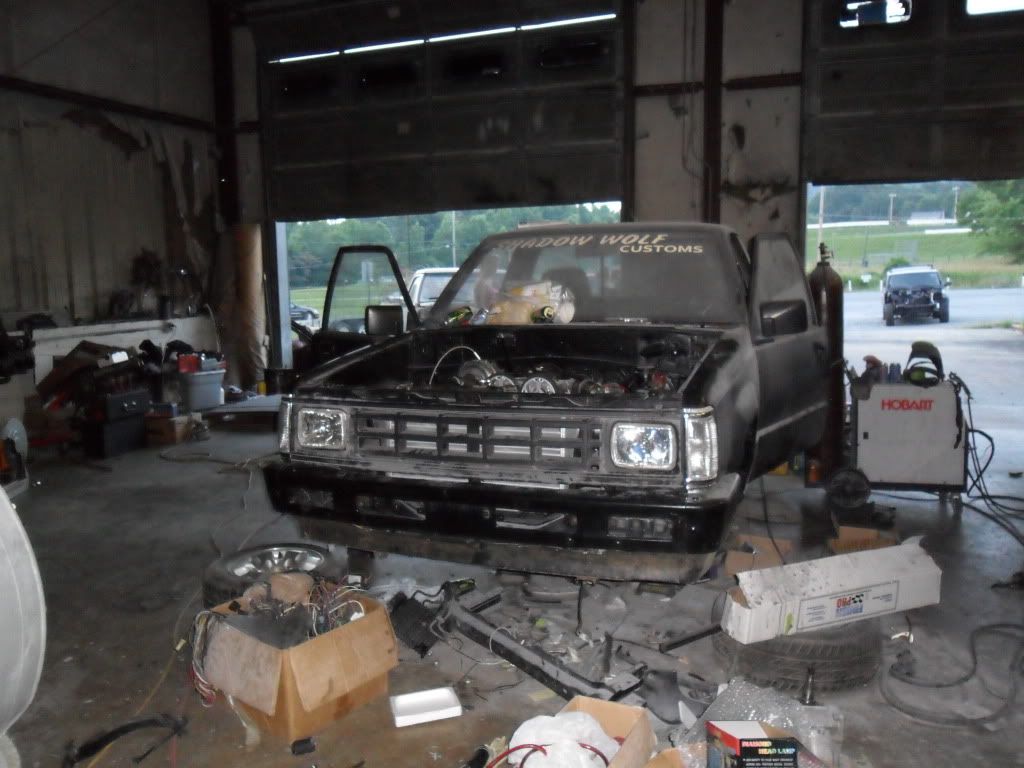
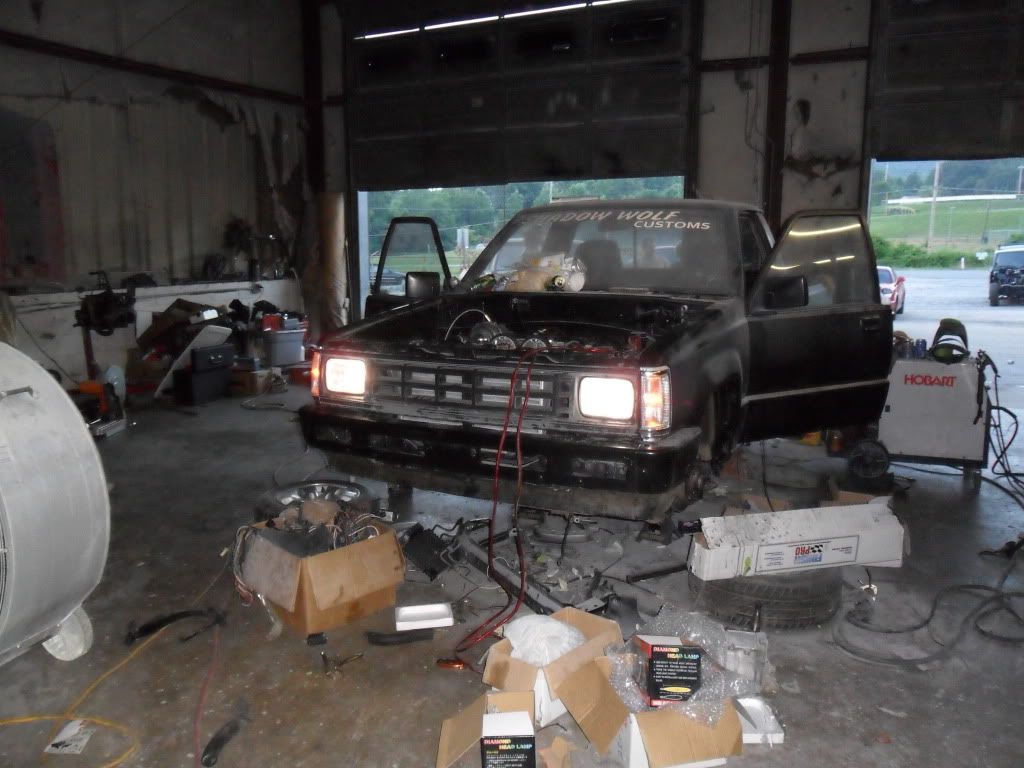
I've been working on the Dodge D50, 1987 model, for the past few months and have finally made some progress. Its assembled with stock cams, rebuilt ported/polished head, stock rebuilt longblock, modified 3g SOHC intake manifold, modified t3 flange turbo manifold (becoming top mount), borg warner turbo, 3" exhaust, BillHousing for my th350 trans, BM Z gate shifter, custom driveshaft, 3.9 LSD Rear from 88 Mighty Max, Izuzu Wheel (I think), SemiGloss black paint, custom painted hyundai valve cover, large Ebay intercooler, custom intercooler piping, transmission cooler, custom fitted gas tank with internal TRE 255 Fuel Pump, Fuel lab fpr...and Im sure Im missing some.
Posted: Thu Sep 17, 2009 7:17 pm
by boise-nic
very nice. The endtanks of the intercooler look to be pretty close to the headlight frames. Is that an issue? I'd like to hear some driving impressions with the th350 when you get it running.
Posted: Thu Sep 17, 2009 11:12 pm
by jeffball610
What's that SOHC intake look like? Might be an option if it's simple to work with. There has to be a million of those things in the junk yard.
It's nice to see a drag truck being built. I always thought a nice tube framed truck would make a nice, light drag vehicle. You could also make the wheel base just about anything you want with just a little fab work for great launches.
Posted: Fri Sep 18, 2009 7:02 am
by shroder15
From what Im told, there is just minor modification needed with the SOHC 3rd gen mani's on a 2g head, but I cannot confirm or deny. I know I had to modify the flange, but decided to cut and reweld because of how small it necks down to.
As far as the end tanks, they are very close, but if I have an issue with my couplers, Im just going to recess the intercooler about another half inch farther back, and find a way to remount the radiator. It should be fine as the headlight frames have actually been curled slightly outward to keep them from rubbing a hole in the couplers...but who knows.
Im hoping the truck should be fun to drive...Im looking at doing a manual valve body swap and upgrading the clutch packs in it this winter with a shift kit...Its already got a 3800 stall, so hopefully its all Im gonna need for now.
Posted: Fri Sep 18, 2009 10:05 am
by boise-nic
Man, that with that stall setup, it would be fun to mess with people at the stoplights! What turbo do you plan to run?
Posted: Fri Sep 18, 2009 5:50 pm
by shroder15
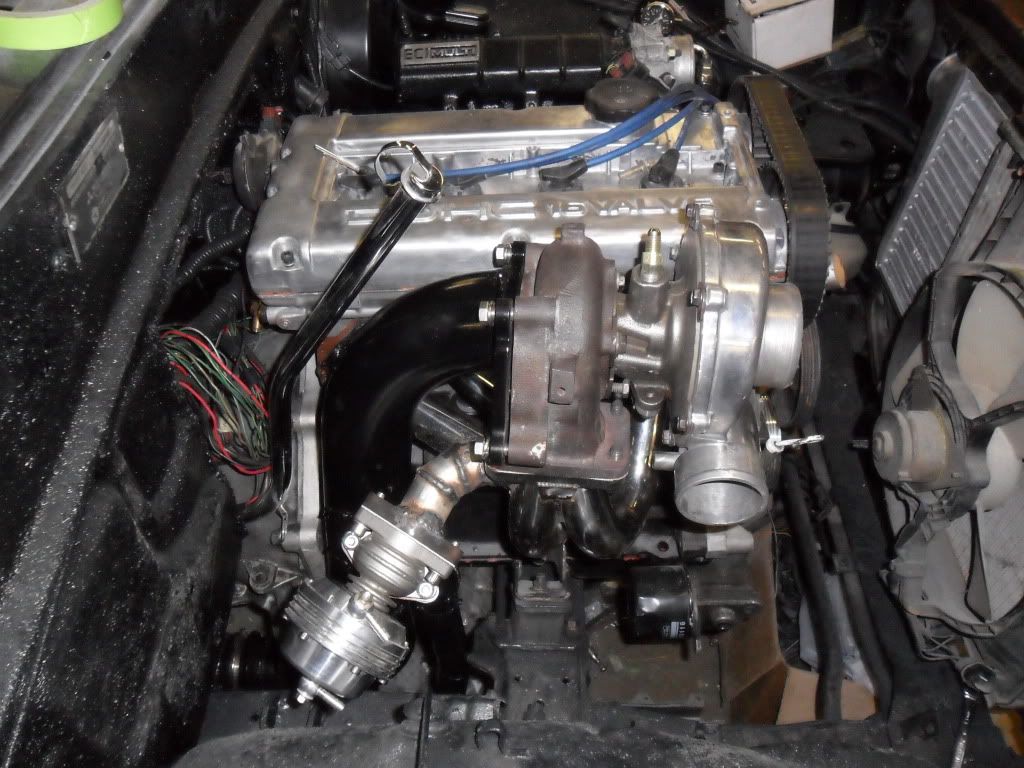
Im actually running a ported out borg warner gm-8 with a 17psi external gate set up. It should spool around 3000 to 3200 and hit hard all the way to redline. Its supposed to be a little better flowing/bigger than a 50 trim, but hit sooner and harder. God gave us deisel trucks so we could rape them of their turbos.
Posted: Mon Sep 28, 2009 4:58 am
by shroder15
Well, I wanted to hop on real quick just to send a thank you to a sponsor who just signed on with me for next year. I had already aquired Cooper tires, and another local company, but SiliconeIntakes.com just picked me up for next year as a partial sponsor. For those of us on a budget (who's not right?!), their parts/coupler/hoses are already about 1/2 to 1/3 the cost of some of the others out there...GREAT opportunity to save some cash on your intercooler setups.
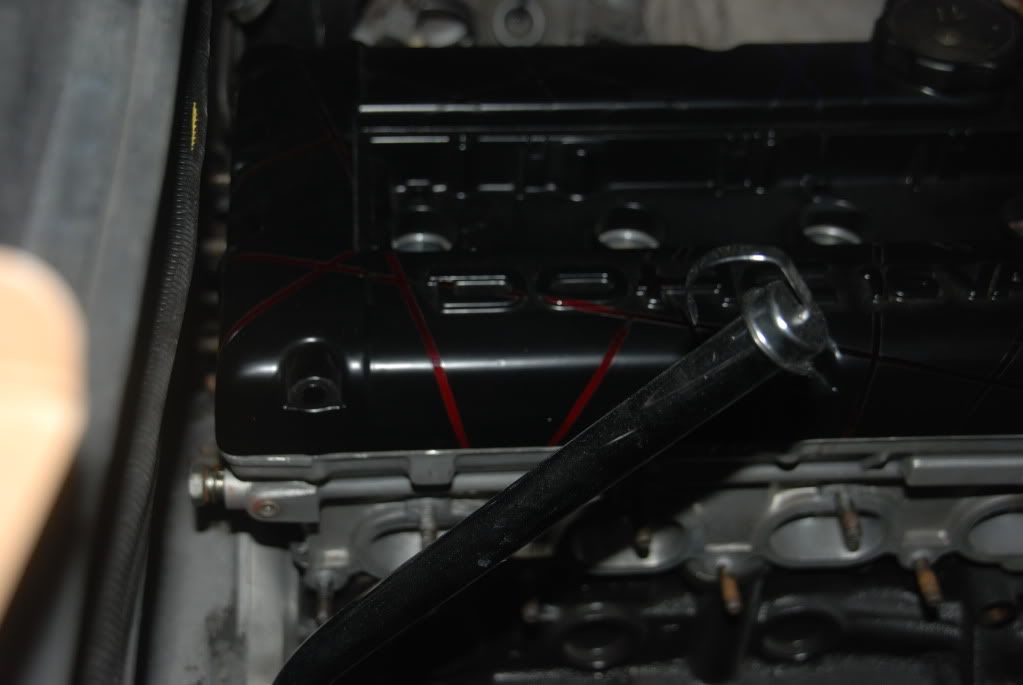
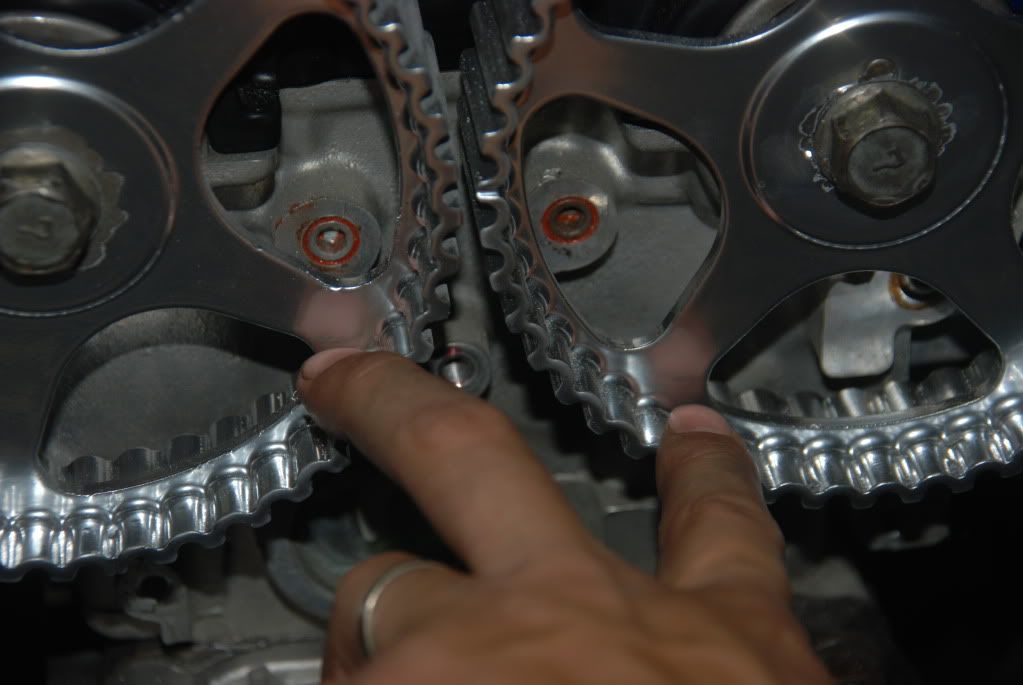
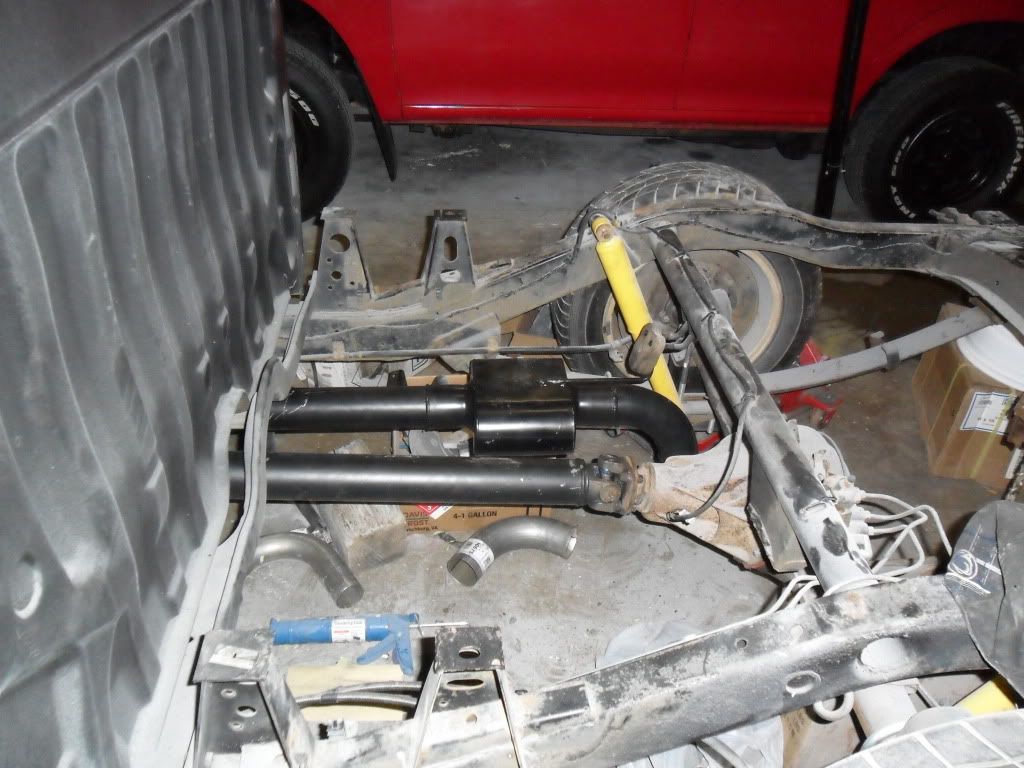
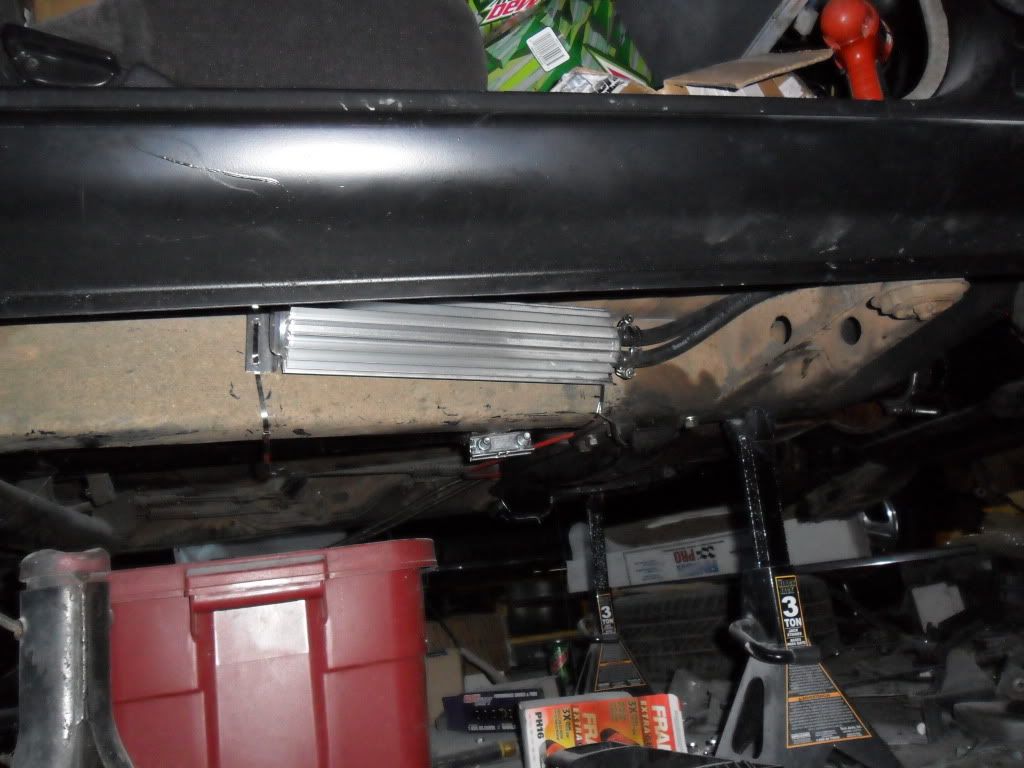
As far as progress with the truck, I finally have the timing set (manually) and have moved to a front outlet water pipe, but need to create the rear block off plate. Also, I need to get the bolts for the valve cover (Allen head bolts look so much cleaner!), and bolts for the front lower timing cover and PAINT the lower timing cover to clean it all up. But as soon as I get that done, I'll get some more pics and post them up!
Posted: Tue Mar 16, 2010 2:28 am
by shroder15
Posted: Tue Mar 16, 2010 2:39 am
by shroder15
Posted: Wed Mar 17, 2010 11:22 pm
by 2.3strokdtalon
Builds like these make me want to spend money I don't have to start the swap of my Max. Lookin good!
Only thing I noticed are the coils for your COP are intrepid coils. You really want 300m coils. I had 2 different Intrepid COP setups on my Talon and both suffered from heavy misfiring. This was with an ARC-2 ign. amplifier and with plug gaps ranging from .028-.015. I switched back to the stock coils w/ the ARC-2 and .028 gap and never looked back at near 40psi of boost. Also, if you weren't aware, a COP setup is a downgrade over the stock coils if you aren't planning to run a ign. amp. This reminds me that I need to start a build thread on here soon.
Posted: Fri Mar 19, 2010 6:45 pm
by boise-nic
Hard to beat the price on those crager nomads. I might have to copy you on that. What is the offset on those things? Will those stay tucked under the fender? I also want some crazy fat tire but I'm not sure how wide of a tire I can stick under there.
Posted: Fri Mar 19, 2010 11:08 pm
by shroder15
The COP setup was on the cheap for me and from a buddy...I wasn't aware you needed the amplifier. Can you provide any other info on that for me? Thanks!
As far as the nomads, they were a great price, but not exactly the design I wanted...but I'll spend the real money if I ever convert to 5 lug. They are 15x10 and have a 3.75" back spacing. I think when I got them they might have said a -38mm offset, but I could be wrong...oh well

Theres almost 4 inches to the back, and about 6 up front
Posted: Tue Apr 20, 2010 12:32 pm
by shroder15
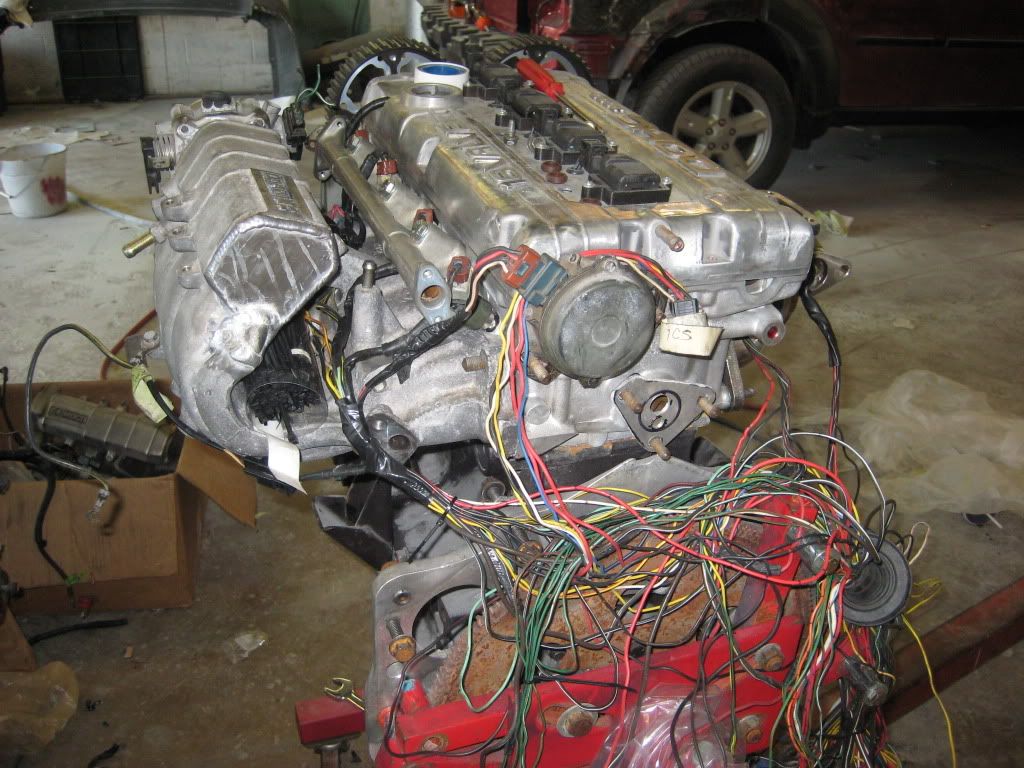
Just a few new pics
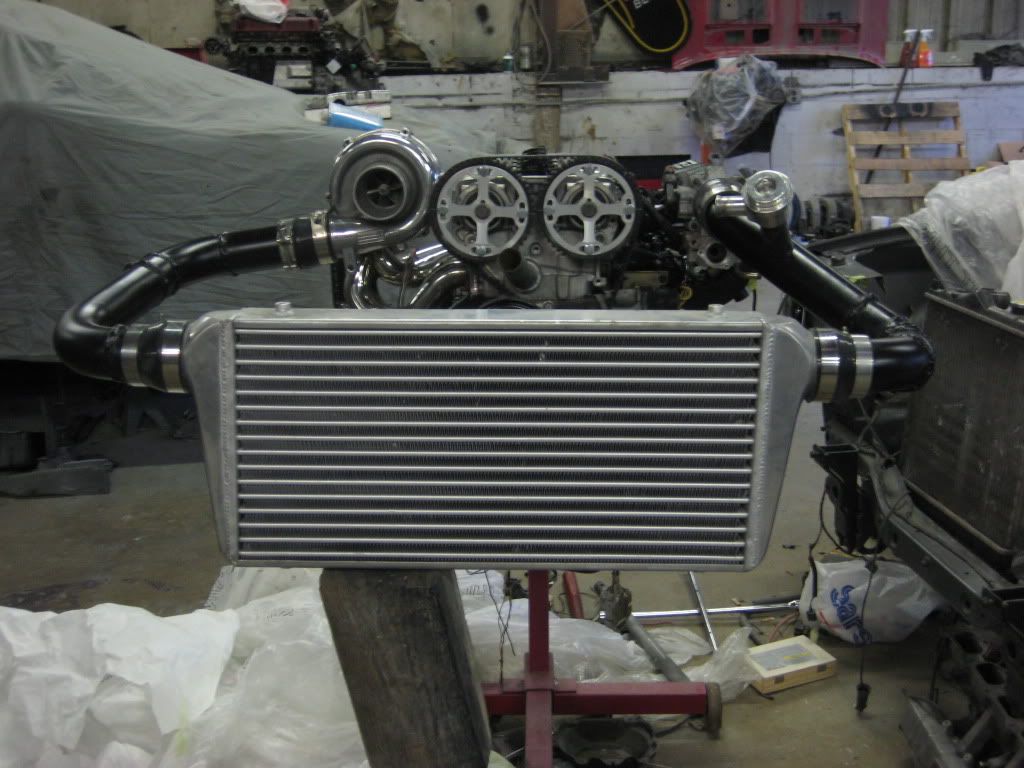
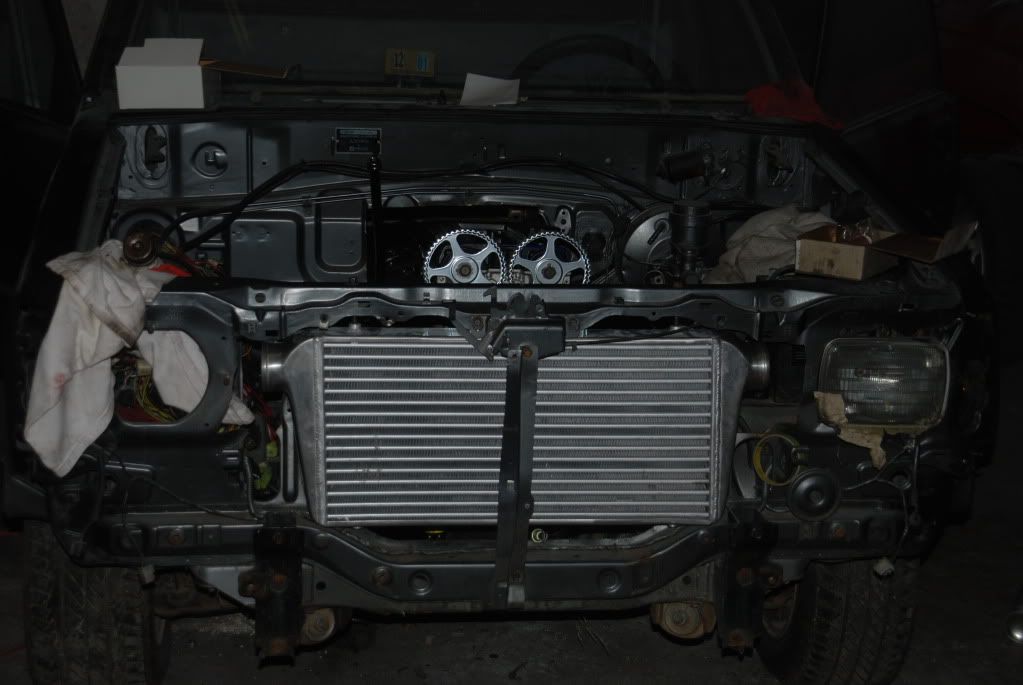
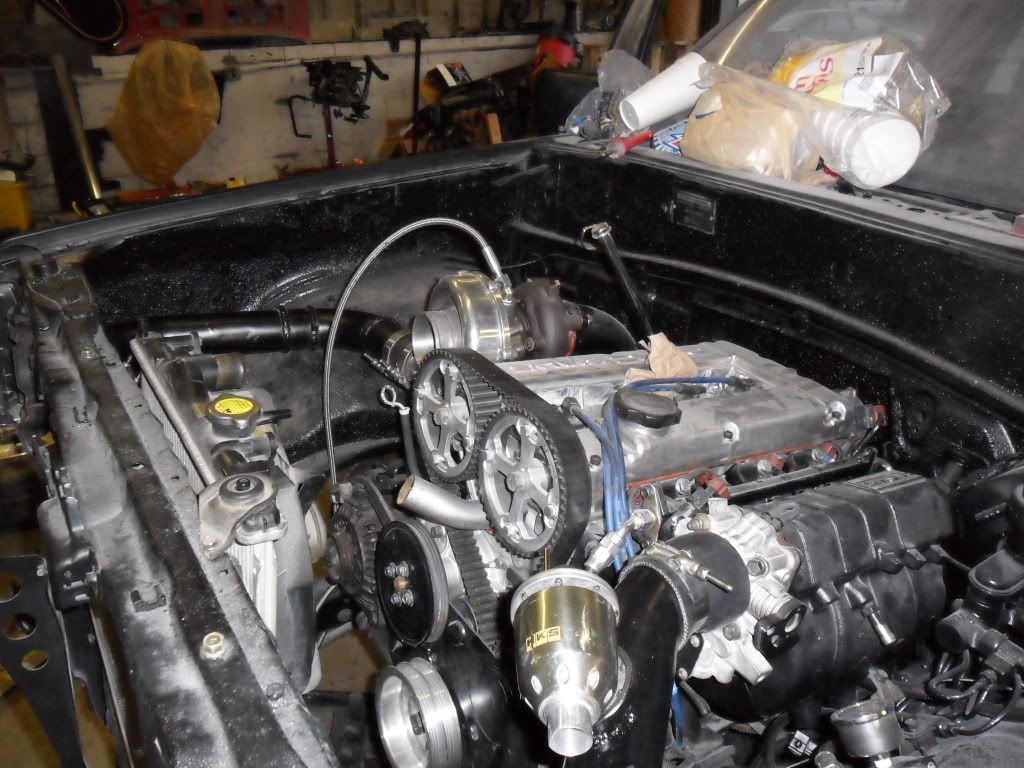
Intercooler Piping
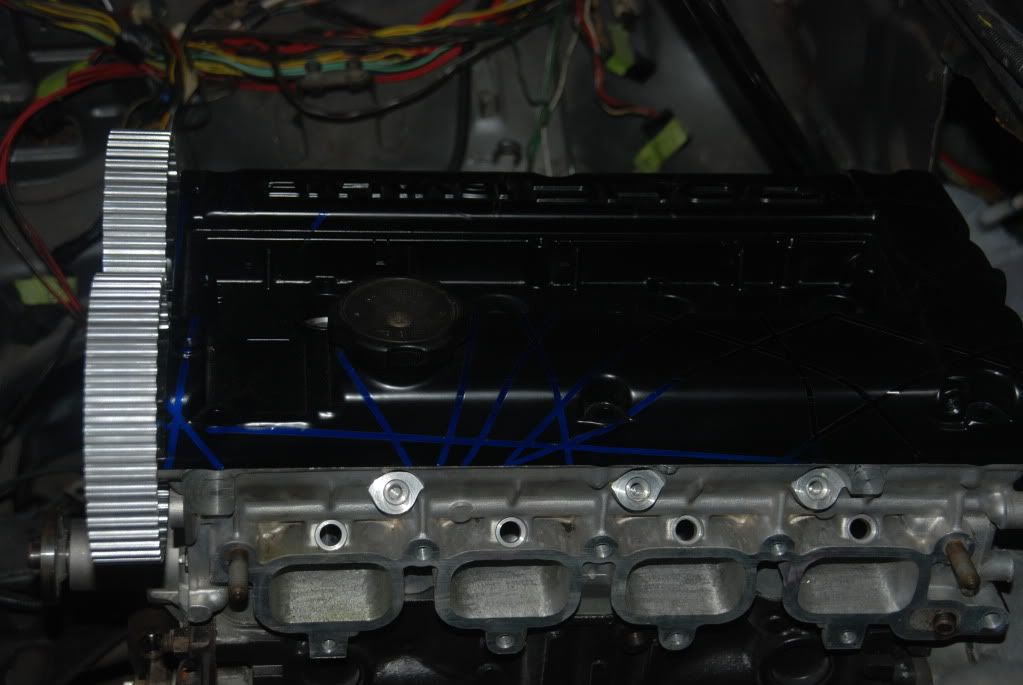
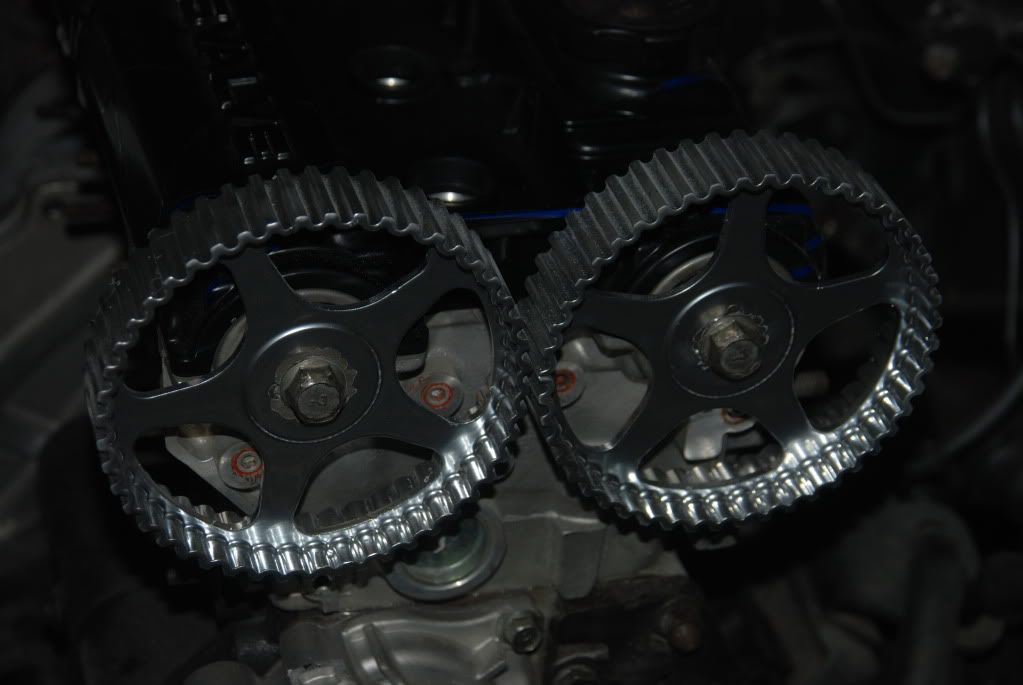
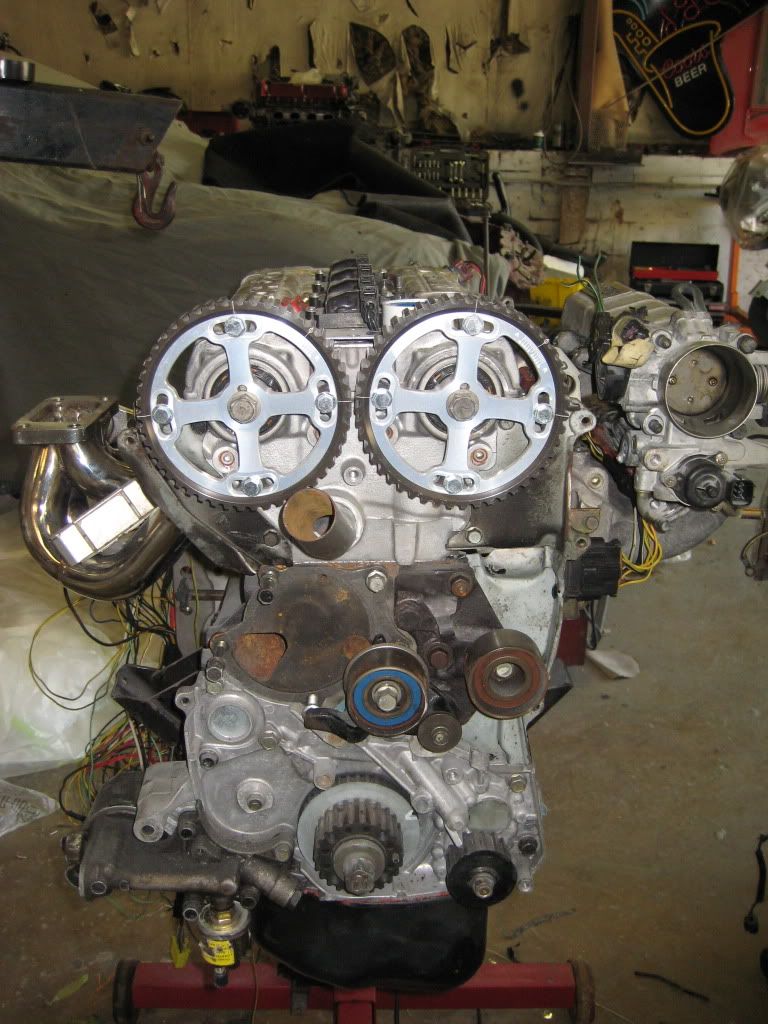
Adjustable Cam Gears
Rear block off with sensor holes tapped
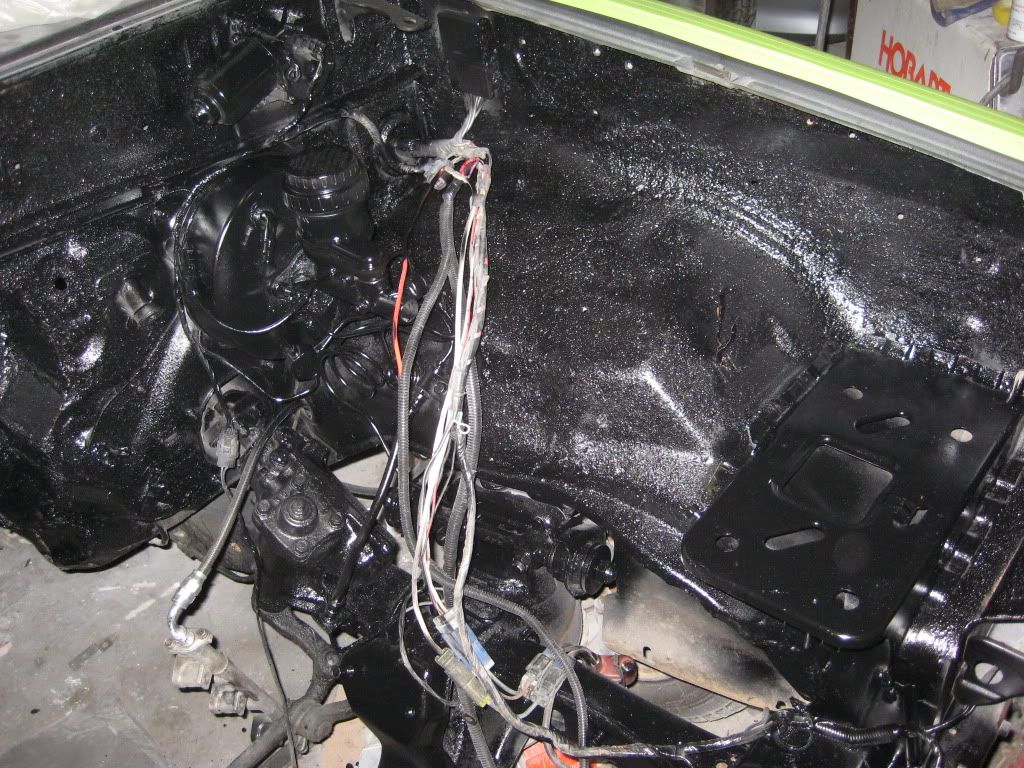
Start of wiring fun

Rats Nest
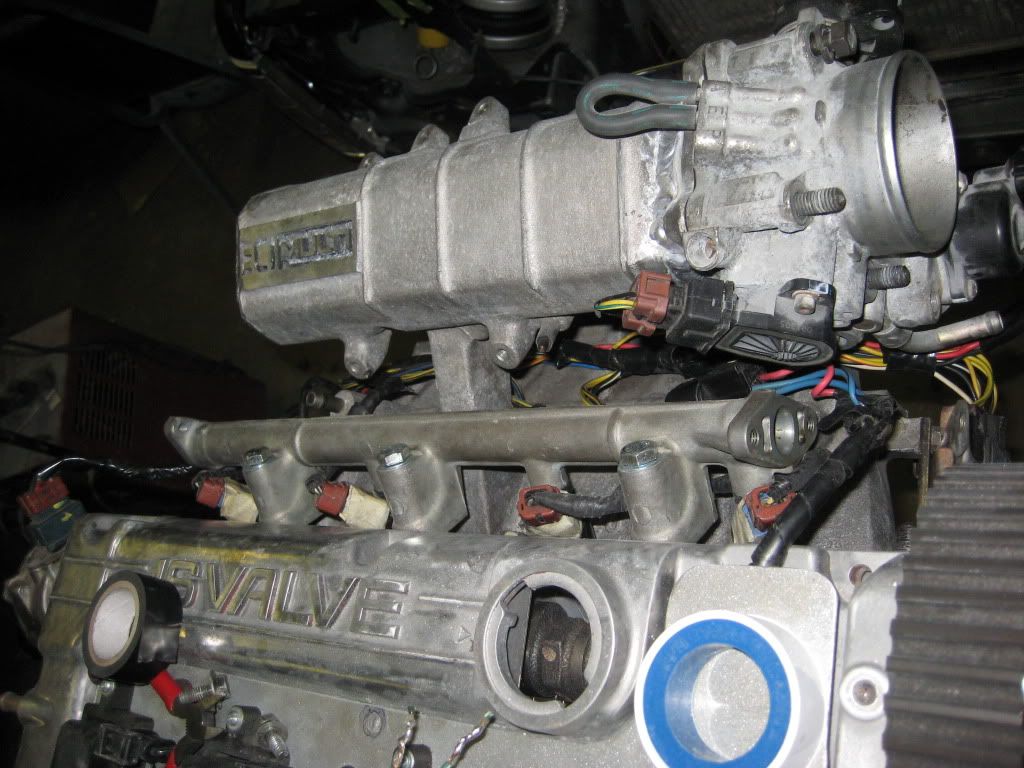
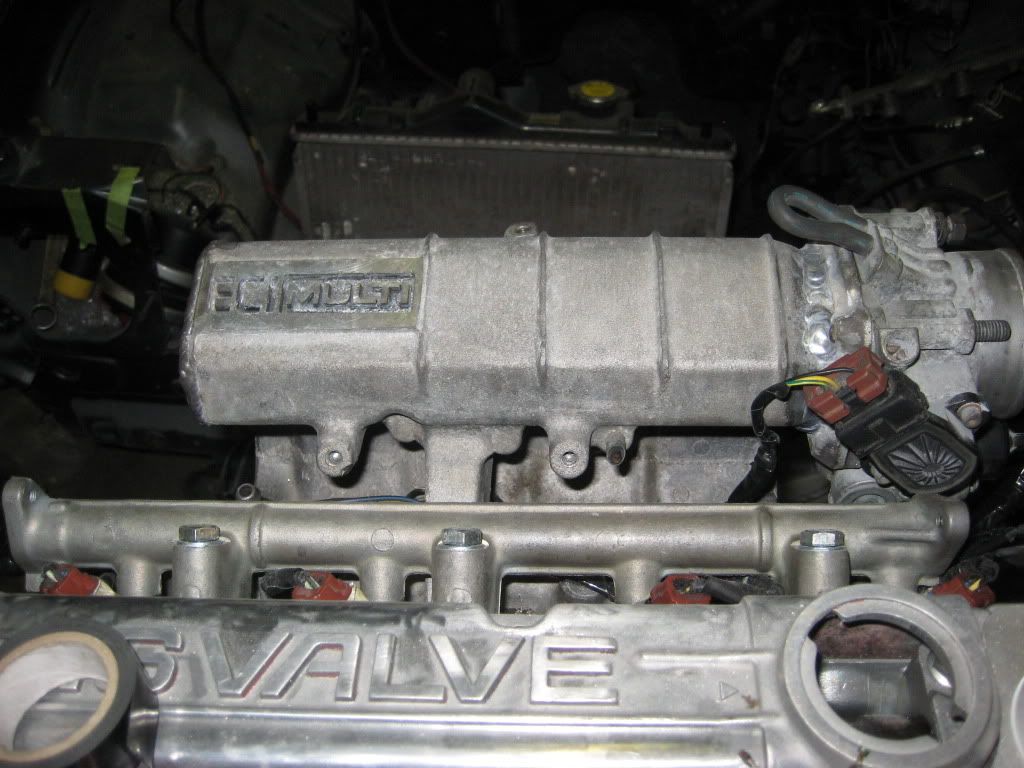
3rd gen throttle body and sensors
Its a little more clean

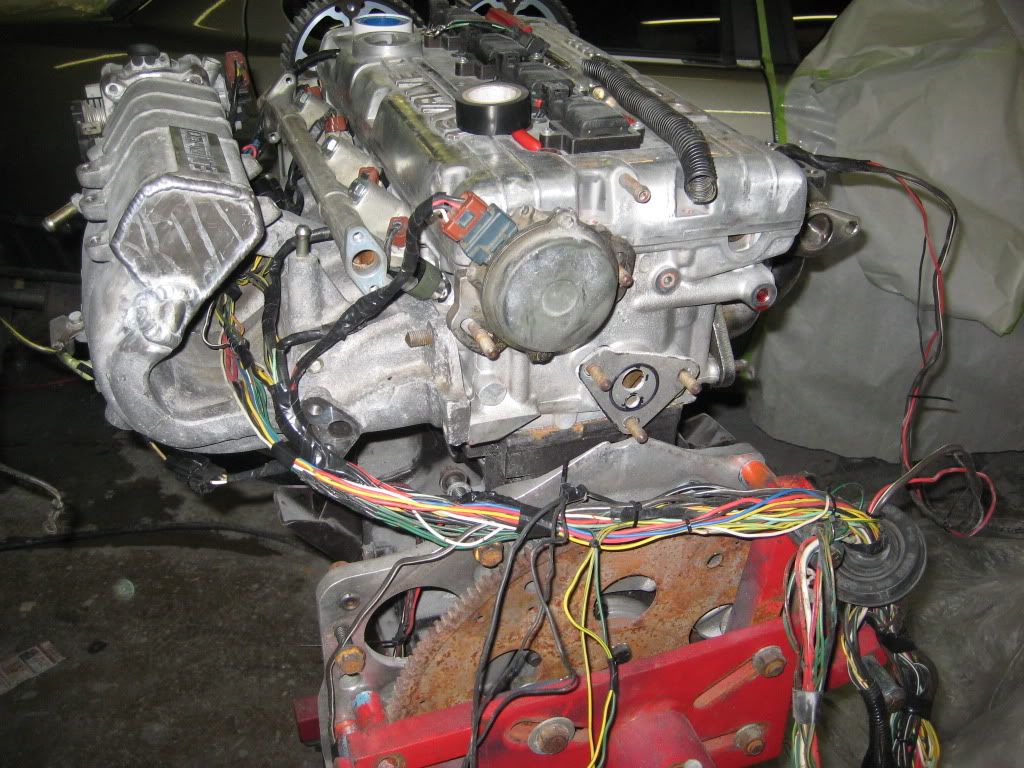
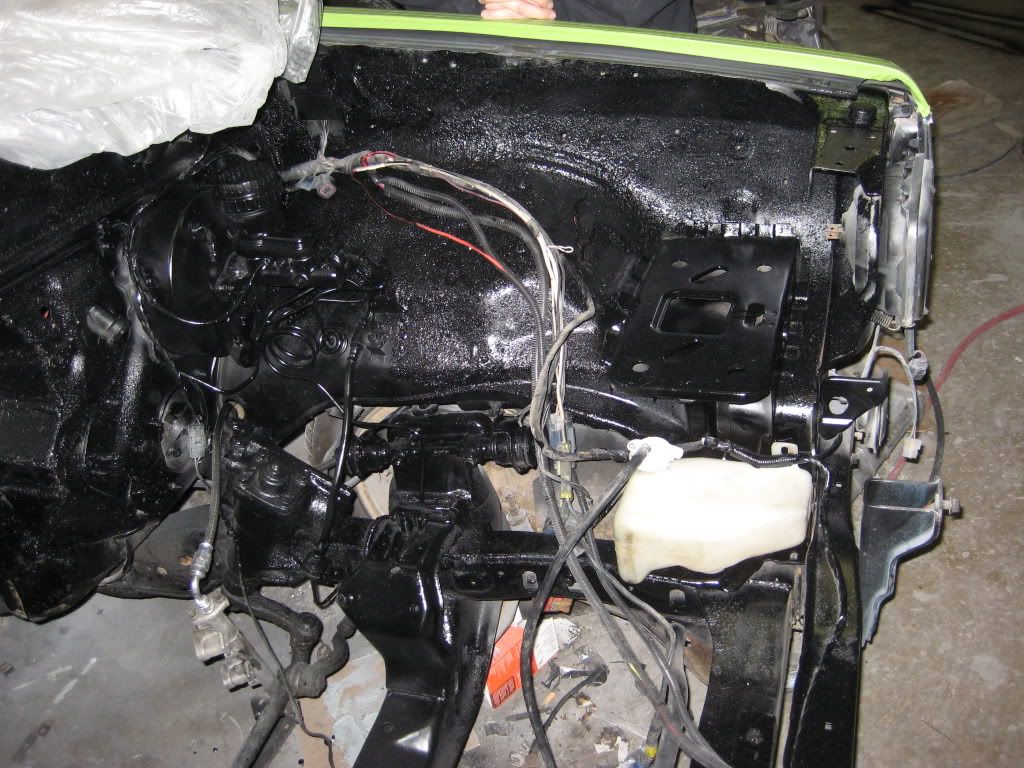
Wire tuckin and ready for loom
Posted: Thu May 06, 2010 7:37 pm
by shroder15
Posted: Tue May 11, 2010 10:41 am
by shroder15
Ok...so the truck plan has OBVIOUSLY changed since the first post on here...lol! I thought I would update with the modlist that is most current with all that I can remember. Again, I want to thank my sponsors: SiliconeIntakes.com, Cooper Tires, and Larry's Tire from Lynchburg, VA. Anyways...the list:
Motor/power adders:
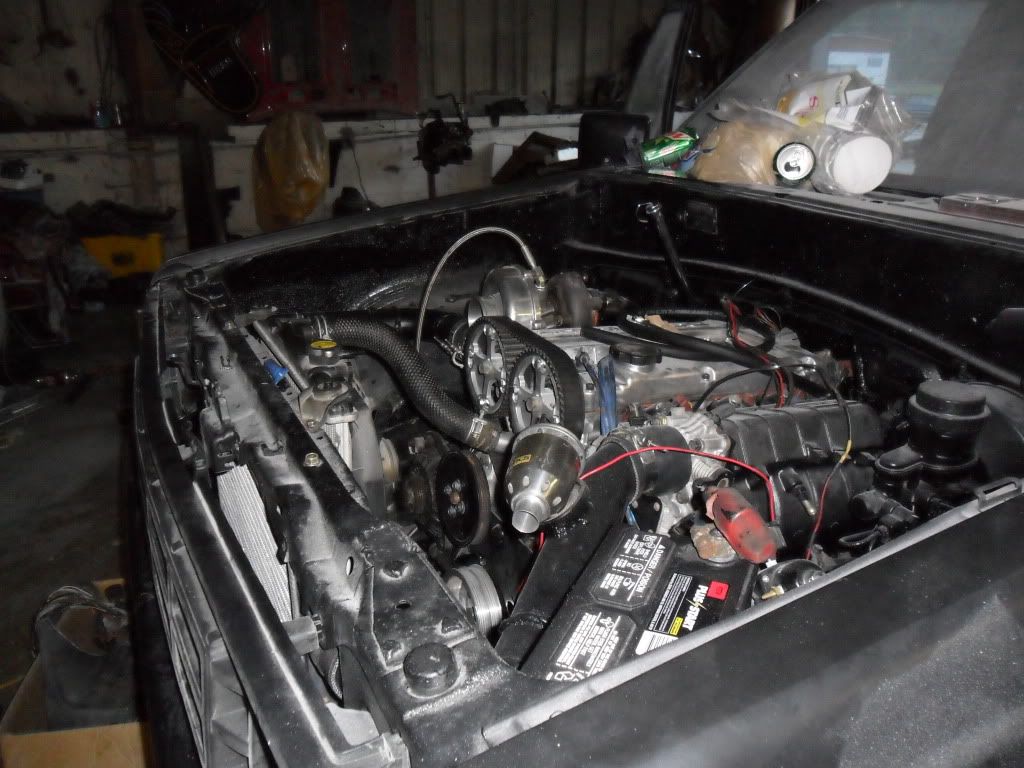
4g63 6 Bolt stock block rebuild
1g ported and polished head with a stock rebuild
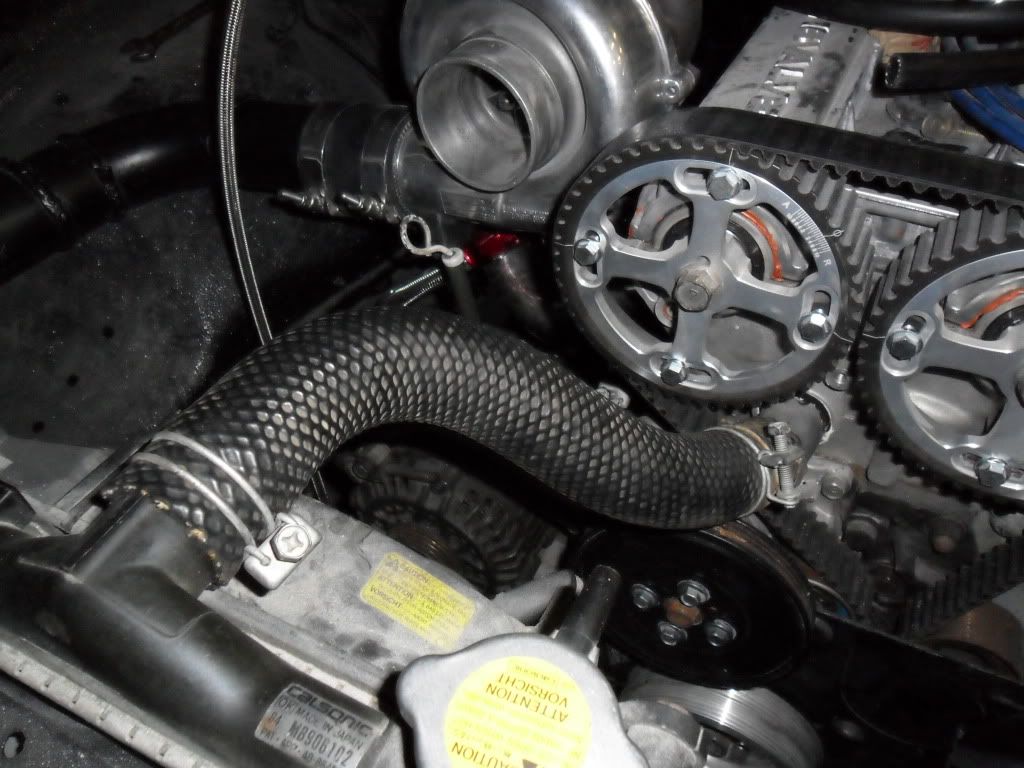
AutoGear Adjustable Cam Gears
1g Flipped manifold with blocked EGR
3G Throttle body with ISC block off and 3g TPS wired in
Flipped EbAy t3 manifold
Borg Warner GM-8 turbo
Custom o2 housing with external wastegate
Custom 3" exhaust w/ high flow cat and muffler
EbAy billet underdrive pulley
D50 waterpump w/ side exit welded and tapped for water inlet to back of head
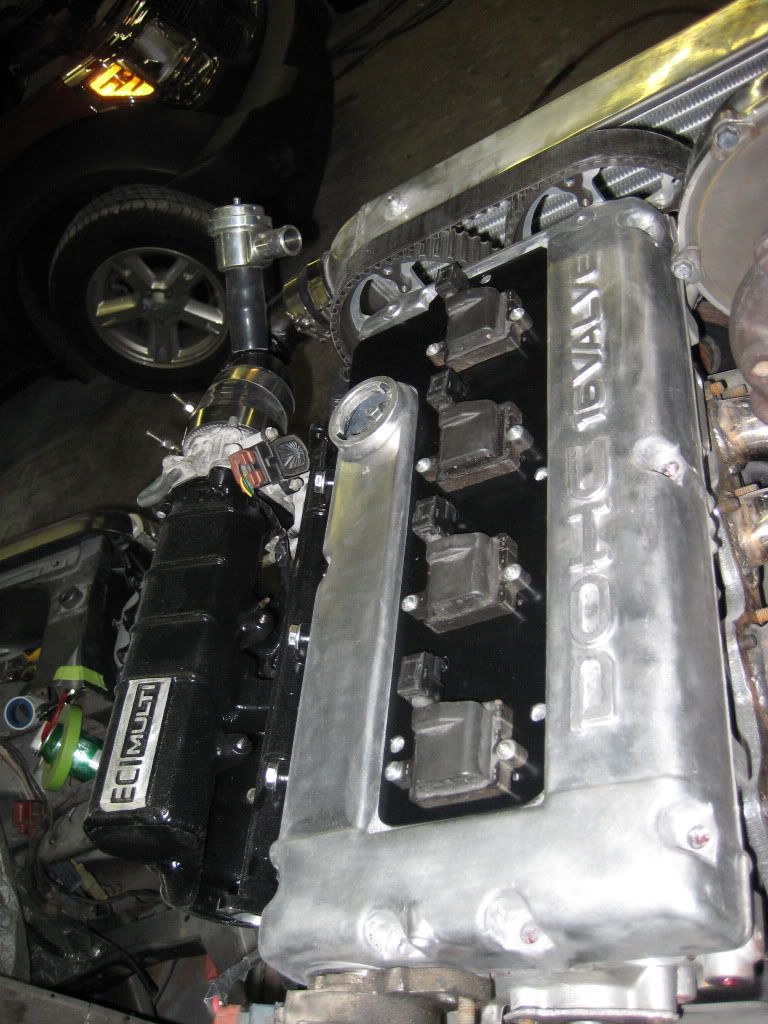
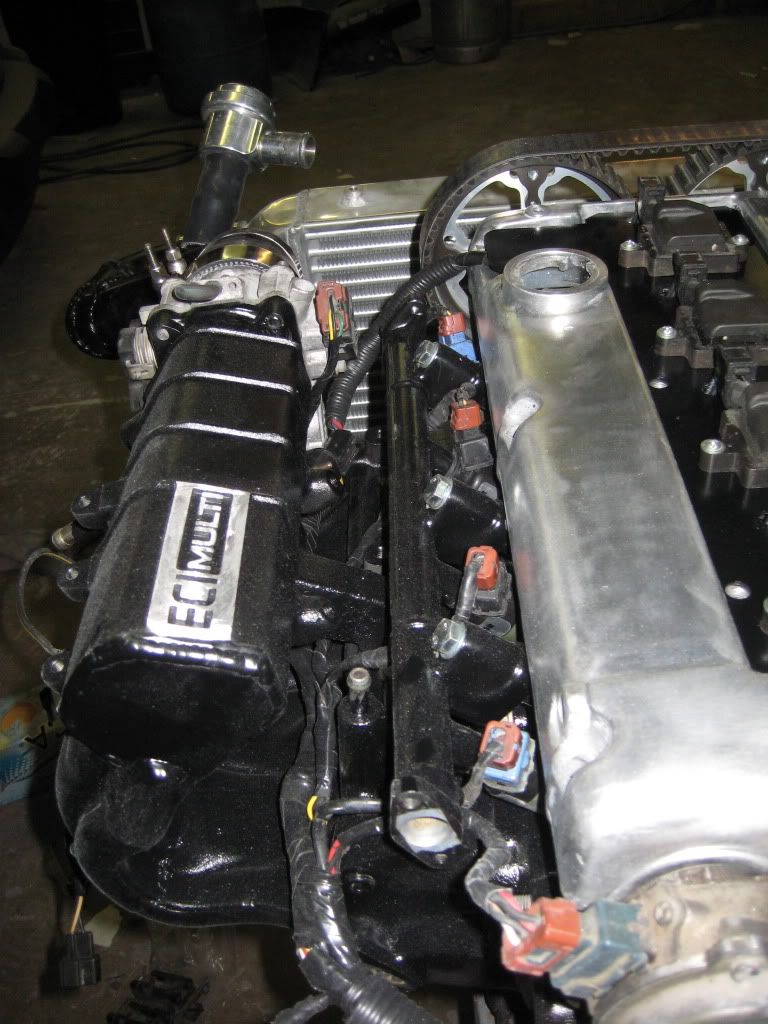
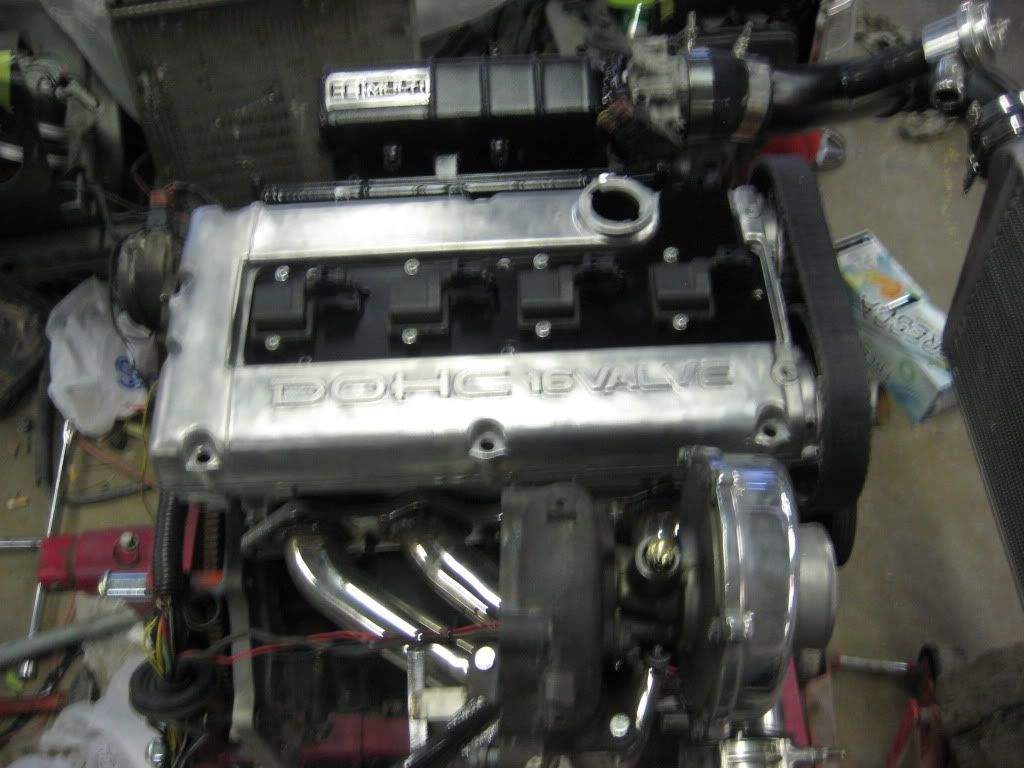
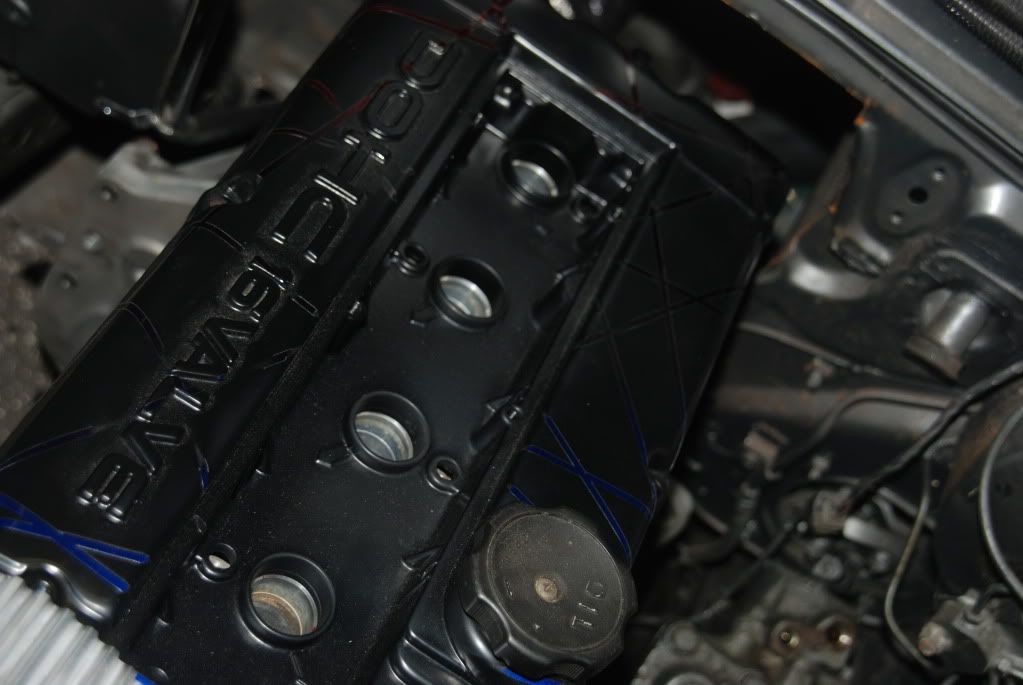
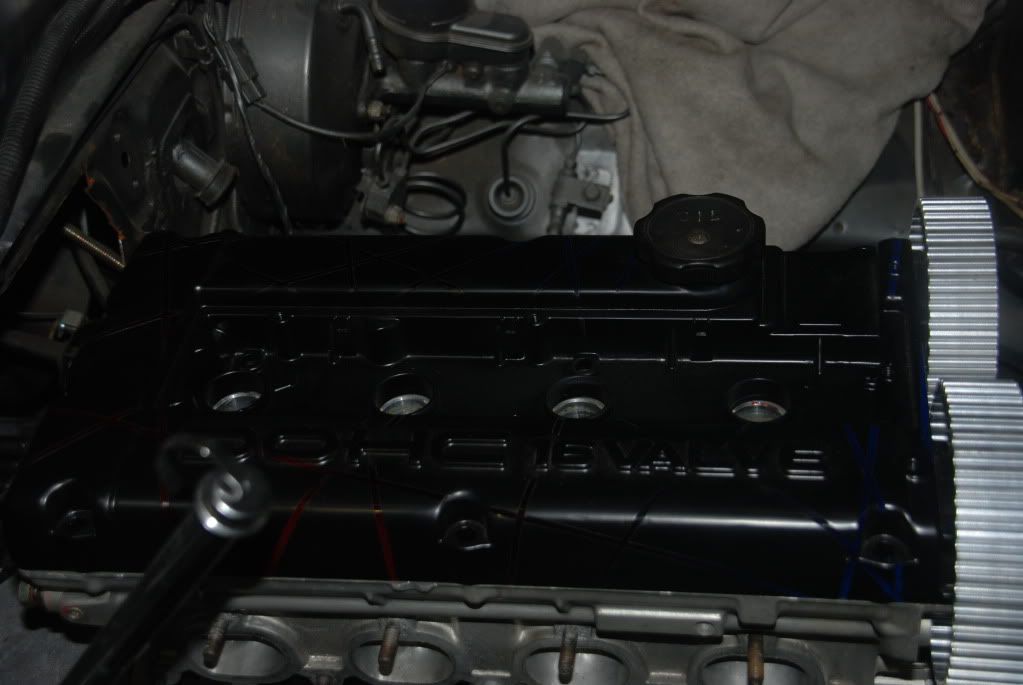
Raw aluminum Valve cover
Cut/Modified front cover
Balance Shafts removed
90 wiring harness converted to 91+ for ease of parts...also tucked harness
91+ hidden coil pack
custom cut sparkplug cover painted semigloss black
NGK copper plugs
Jackal/DS-Map free speed density software
GM 3bar map
GM iat
Moates ostrich
Socketed ECU
PLX wideband
Autometer boost gauge
Glowshift oil pressure gauge
28x12x3 intercooler with 3" inlets
2.5" custom intercooler piping
HKS Blow off valve
Custom rear water block off tapped for sensors/small water exit
Front exit water pipe
Fuel:
1050cc FIC injectors
-6an custom lines tank to rail and back
Fuel lab RRFPR
Summit inline fuel pump
Russel inline filter
Custom fuel tank pick up
Trans/Driveline/Wheels/Tires:
Custom driveshaft
D50 LSD with 3.909 gears
Billhousing th350 trans adapter
TH350 transmission
B&M rebuild with manual valve bodies and upgraded clutches
B&M Z-gate shifter
GM flexplate
3800 RPM Jegs stall converter
Crager nomads (10" for rear) with Hoosier QTP's 28"
Izuzu Wheels with Cooper Cobras
Chassis/Body/Suspension:
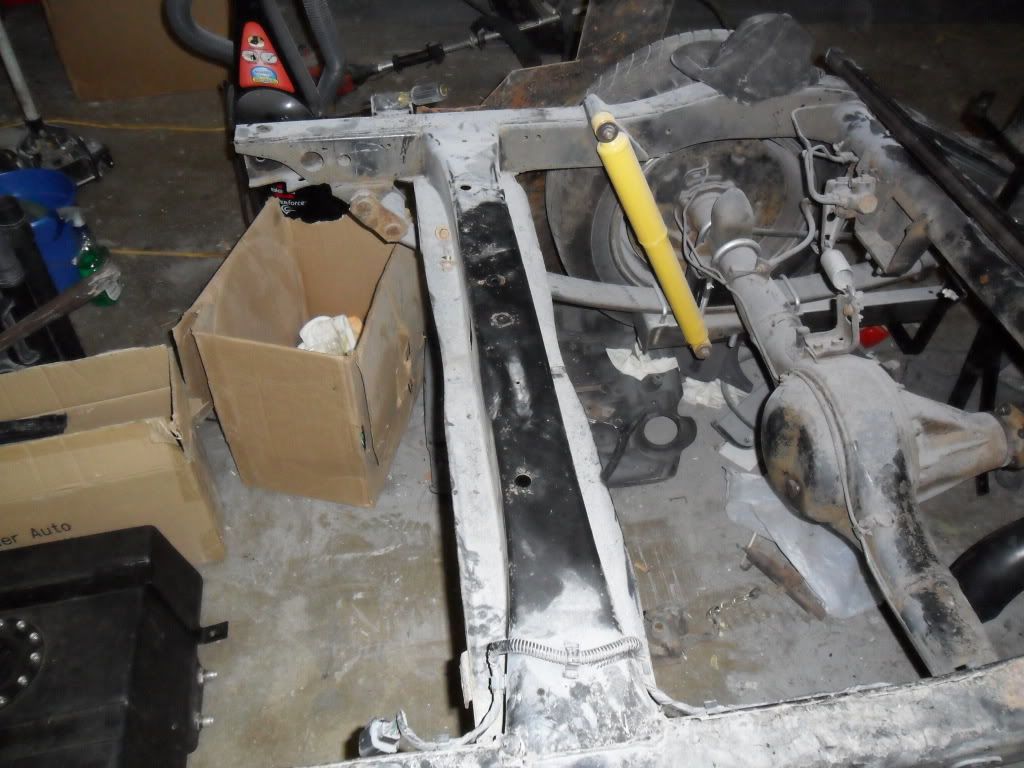
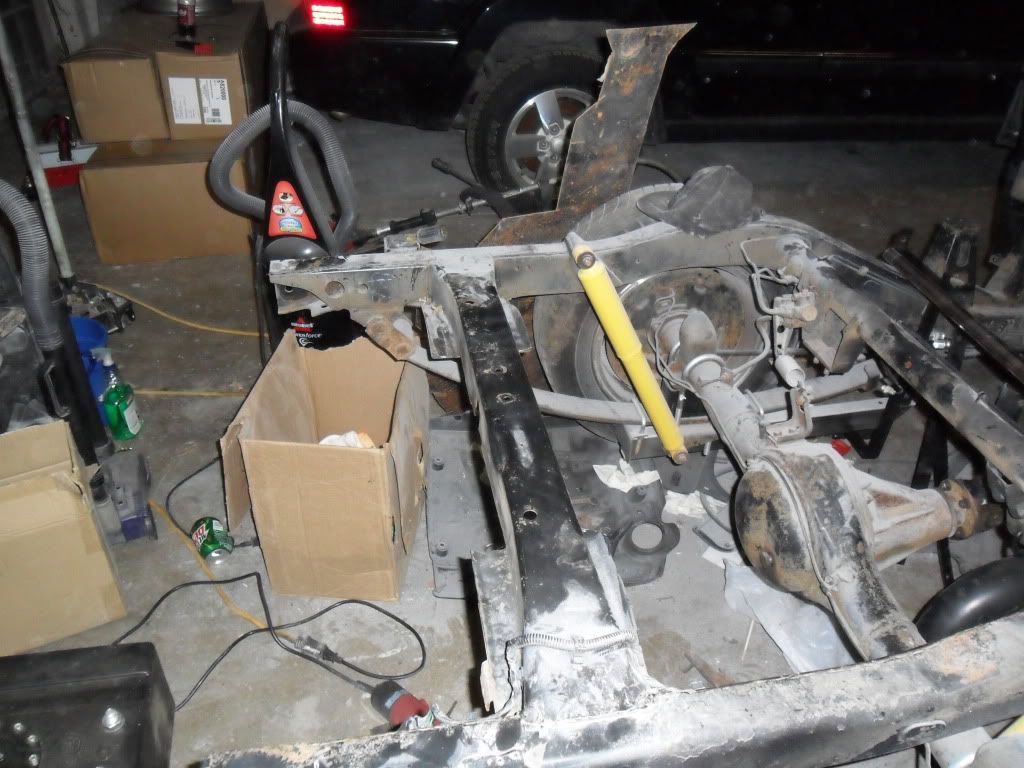
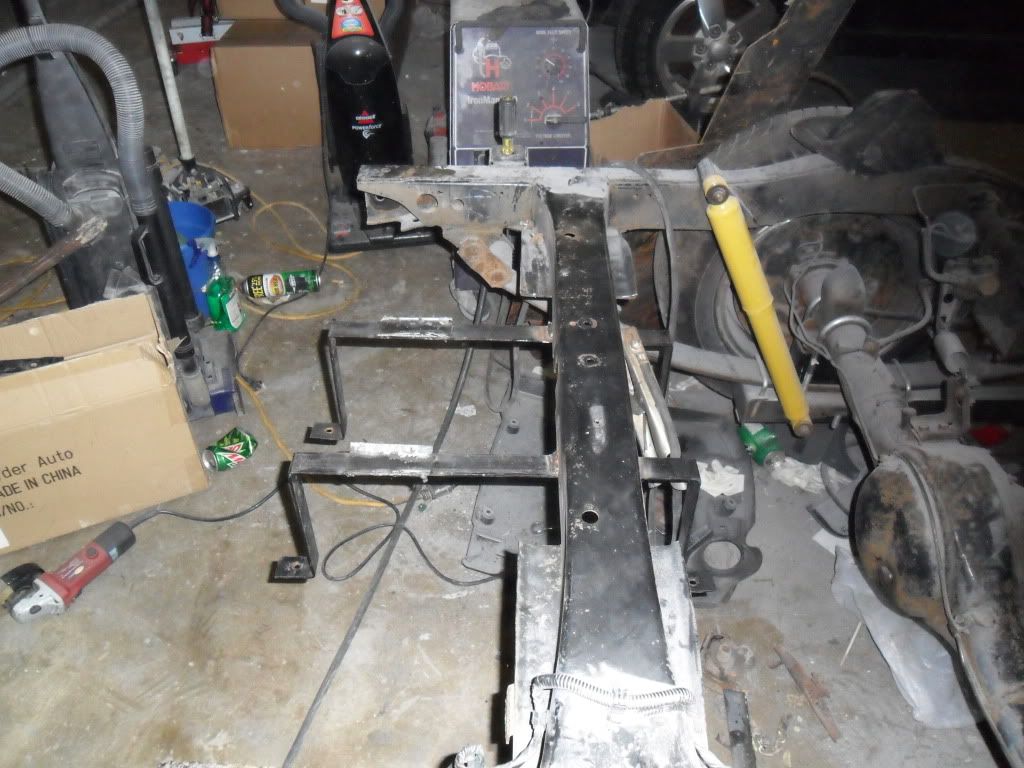
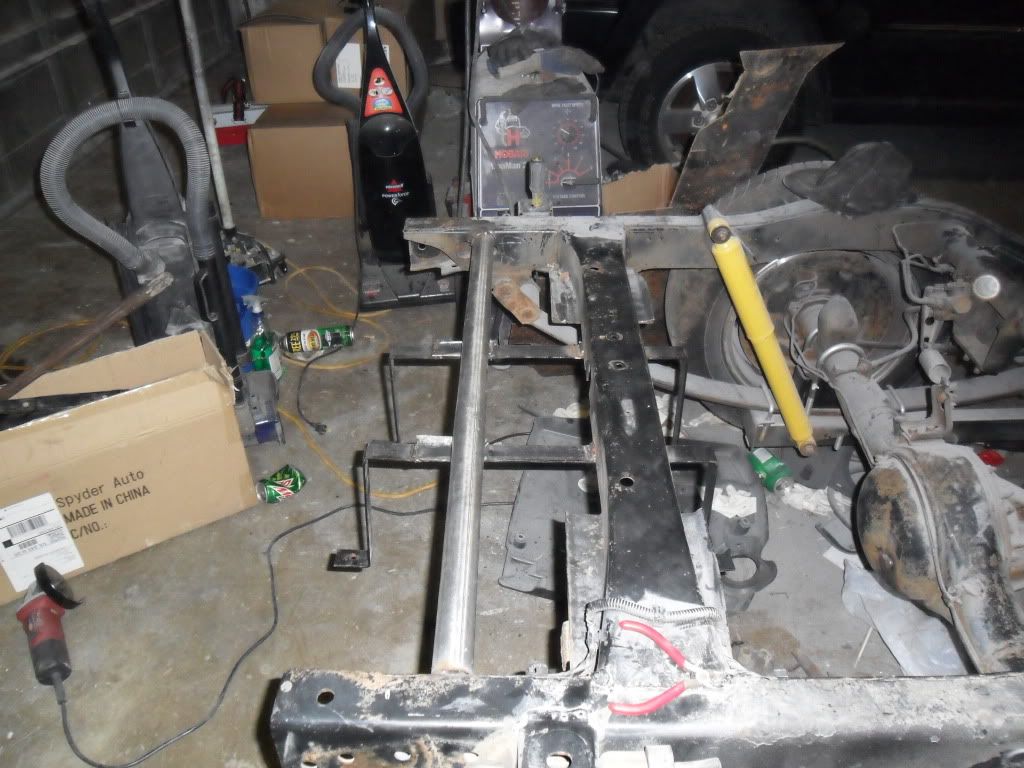
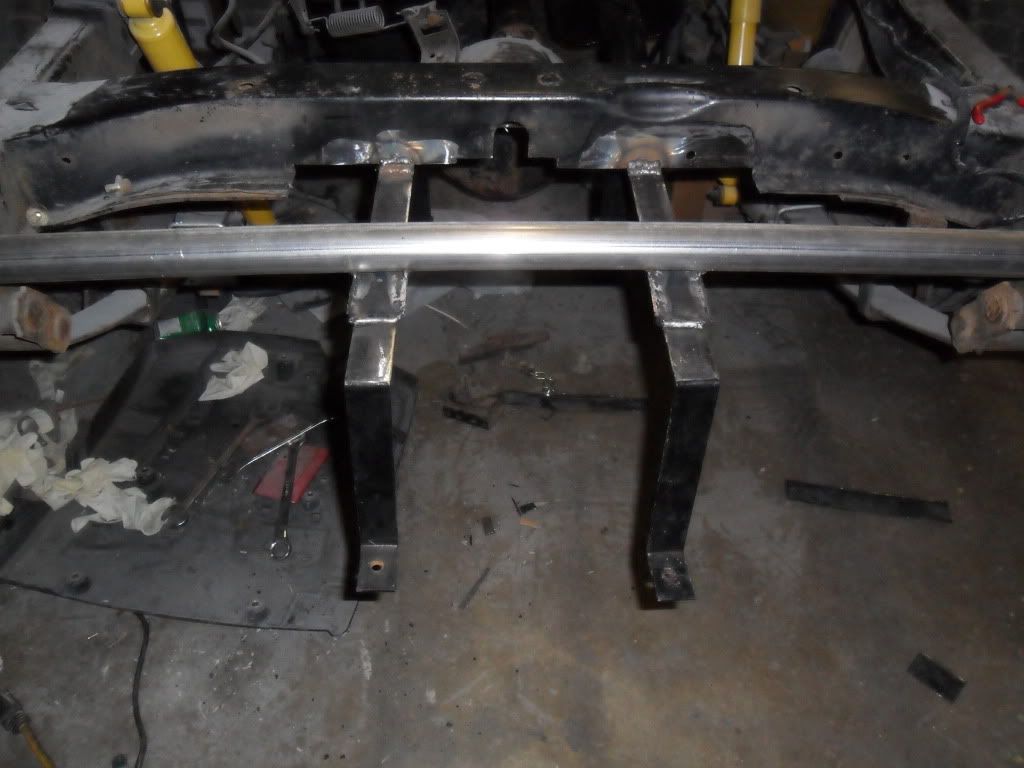
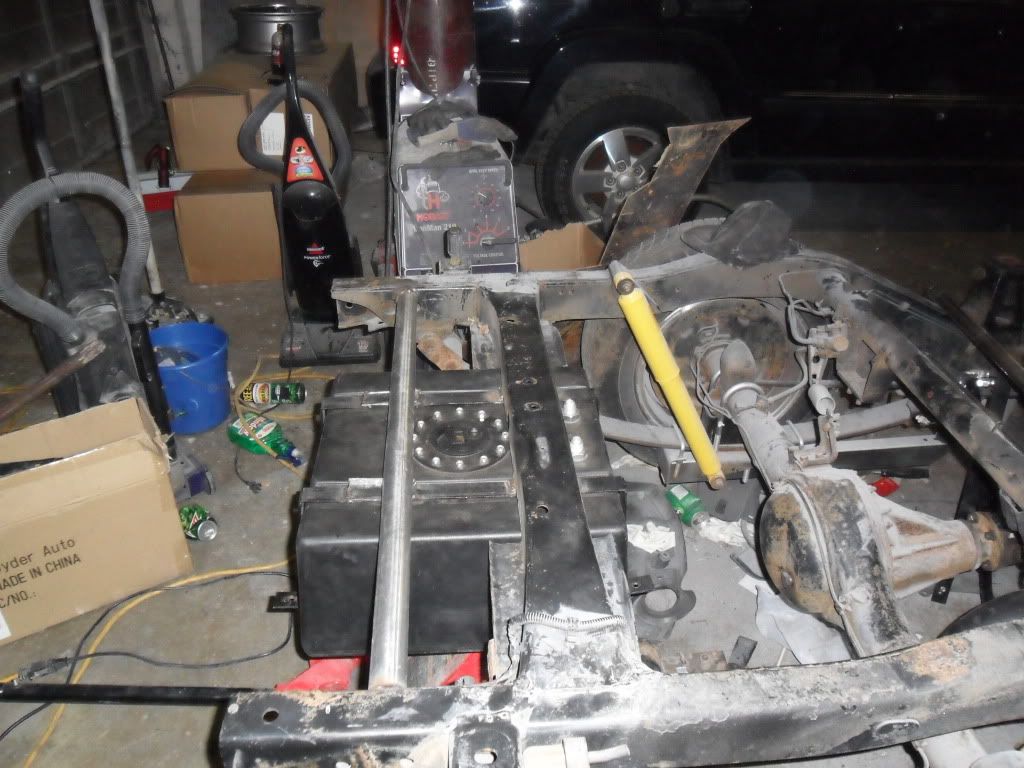
4" firewall recess for motor/trans
Satin black paint
Monroe Shocks
1 leaf spring from the d50 per side with 1 s10 spring per side
3" blocks
Lakewood universal traction bars
Summit racing driveshaft loop
Radiator support converted to be removeable
Mr. Gasket hood pins
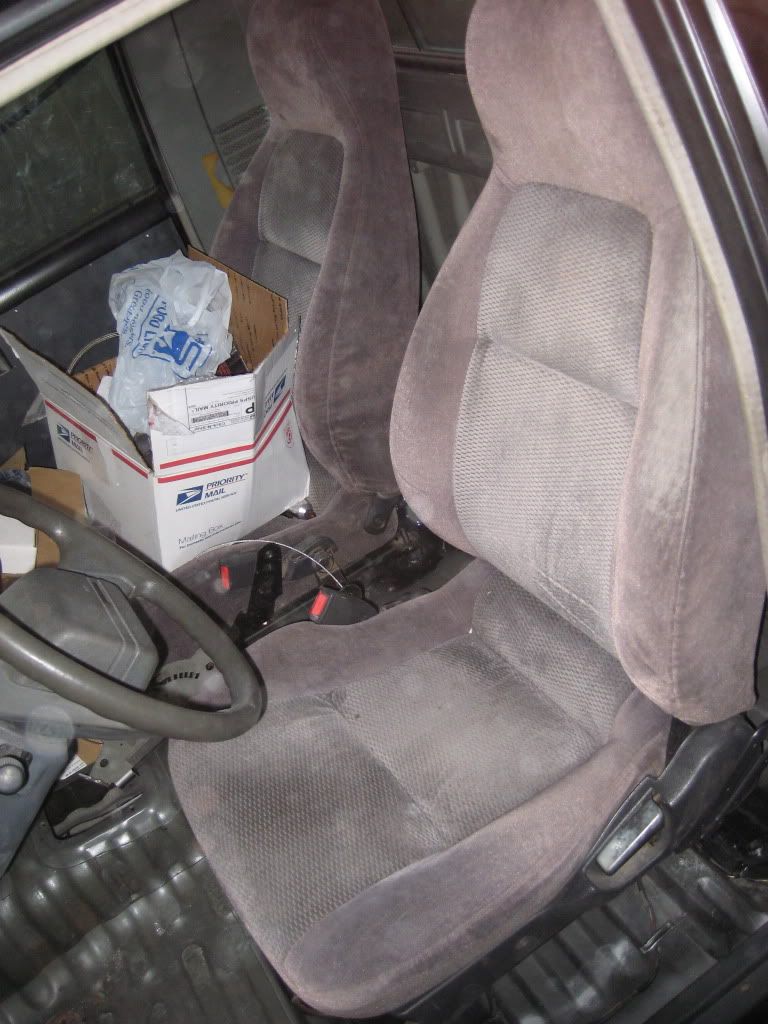
1g DSM bucket seats mounted in CLOSE to the factory position
Custom Sheetmetal door skins
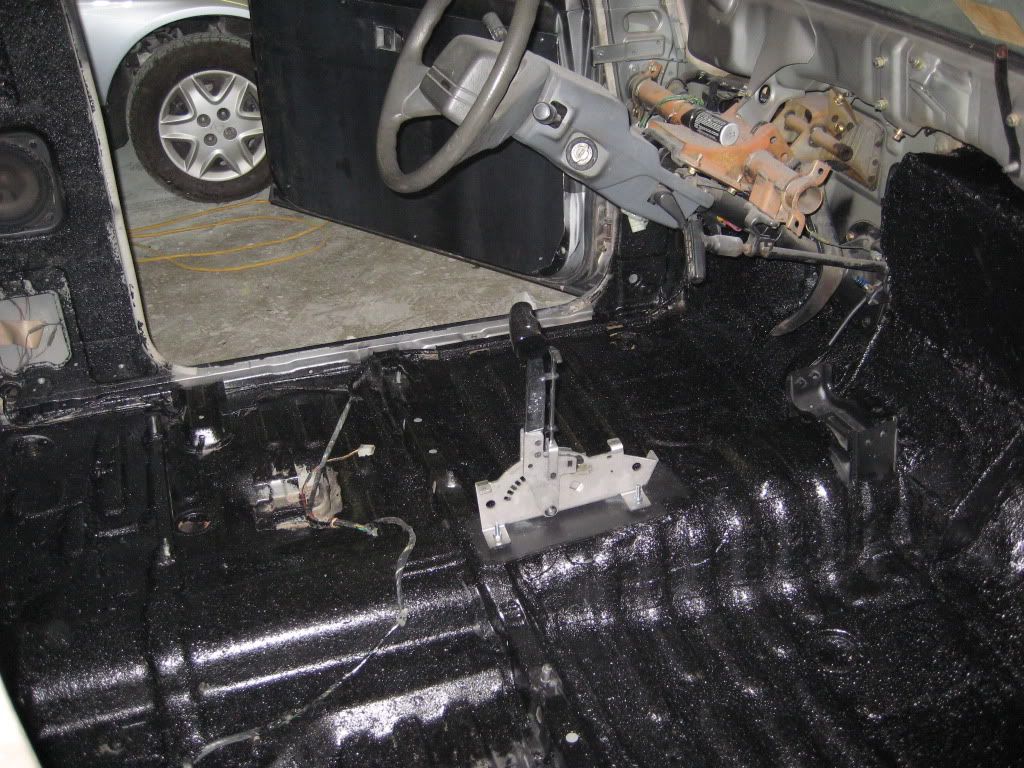
Bedliner'ed bed, cabin areas, and under hood
Ok...the bad thing is, I'm pretty sure I'm still missing stuff, but I cant figure out what at this point. Hope you enjoy the list! Let me know if you have any questions on anything!
Posted: Thu May 13, 2010 1:05 am
by boise-nic
^Seriously one of the nicest setups I've seen. Really man, that is so impressive! You may have stated your goals but I may have missed it. DD or drag only? What hp are you aiming for? Any shots of the rear end with the new wheels and tires? I'm wondering what offset (or is it backspacing?) you have on the rims to get them tucked under the bed. How does the rear sit with the new leaf springs? Mine needs drop at least a few inches (I see a lot of frame rail).
Posted: Fri May 14, 2010 11:15 am
by shroder15
LOL...Well...the truck will be competing in the "footbrake" classes at the local tracks, but still be tagged for light street duty. I am still waiting on the slicks, but be sure I'll get pics up asap once i have them mounted. The truck isn't bad with the drop and leaf spring combo, but i really need to get my drop spindles on to really see how its gonna look. With the slapper bars, it'll have 3-4 inches of ground clearance for the track/street....not much, but enough for VERY light street duty. As far as power goals, I dont really have one...lol. I'll be running a 16psi spring and upping the boost to cut a 7.7 to 7.6 1/8th mile so I stay legal til my cage and other parts. And i'm shooting for an 11.5 or slower in the 1/4 for the same reasons. The truck should have the balls to go tens...just depends on what my stall wants to do.
Posted: Fri May 14, 2010 7:43 pm
by shroder15
Oh...and I really appreciate the compliments. I was trying to keep everything in order as far as color and such, and really going for one of the cleanest swaps possible. No Maf, engine harness wire tuck, and really the only visible wires being that going to the battery. I'll also have 3 or 4 vaccuum lines to run the bare minimum, but who doesn't do that lol
Posted: Mon May 17, 2010 11:20 am
by shroder15
Posted: Tue May 18, 2010 10:58 am
by shroder15
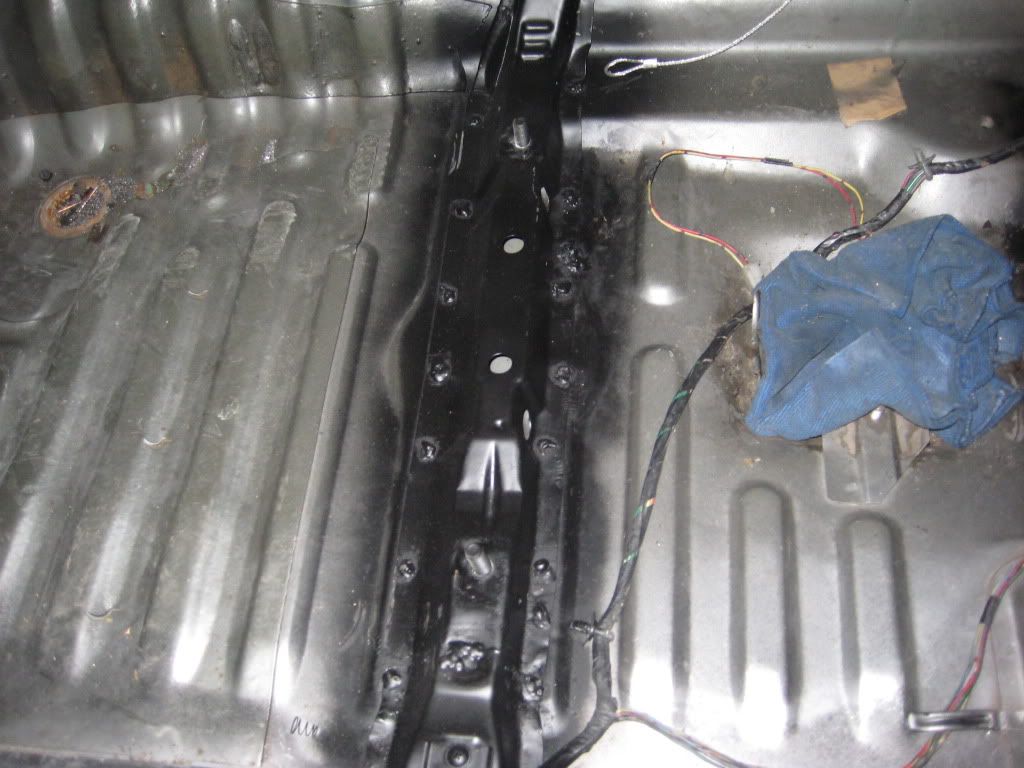
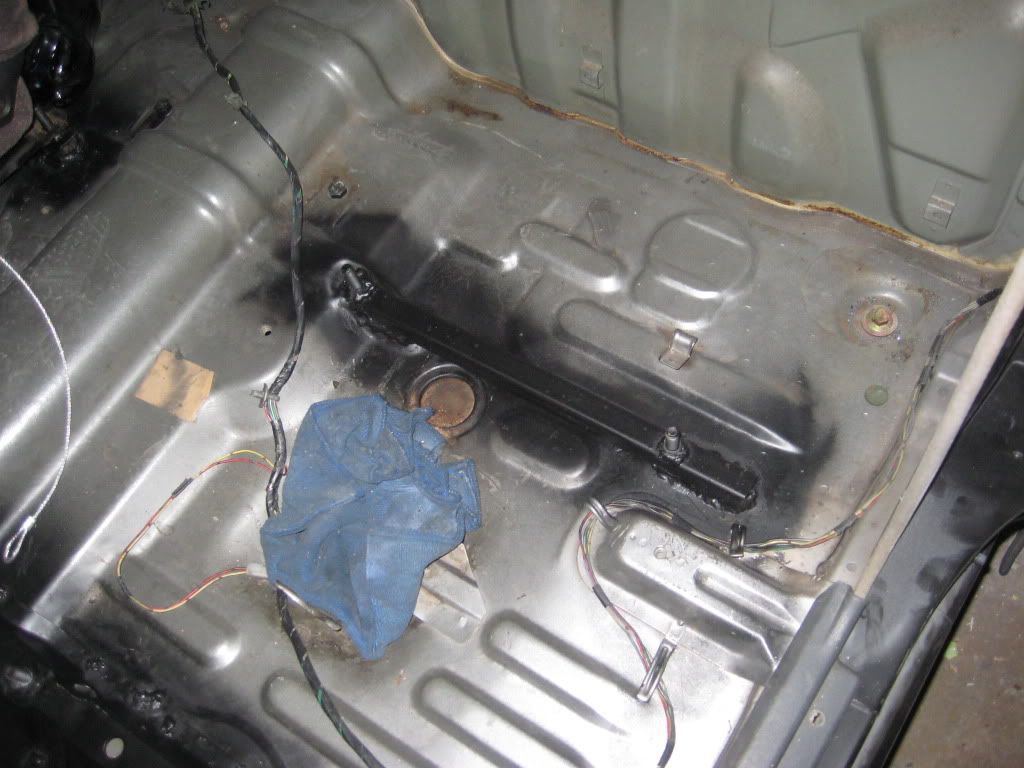
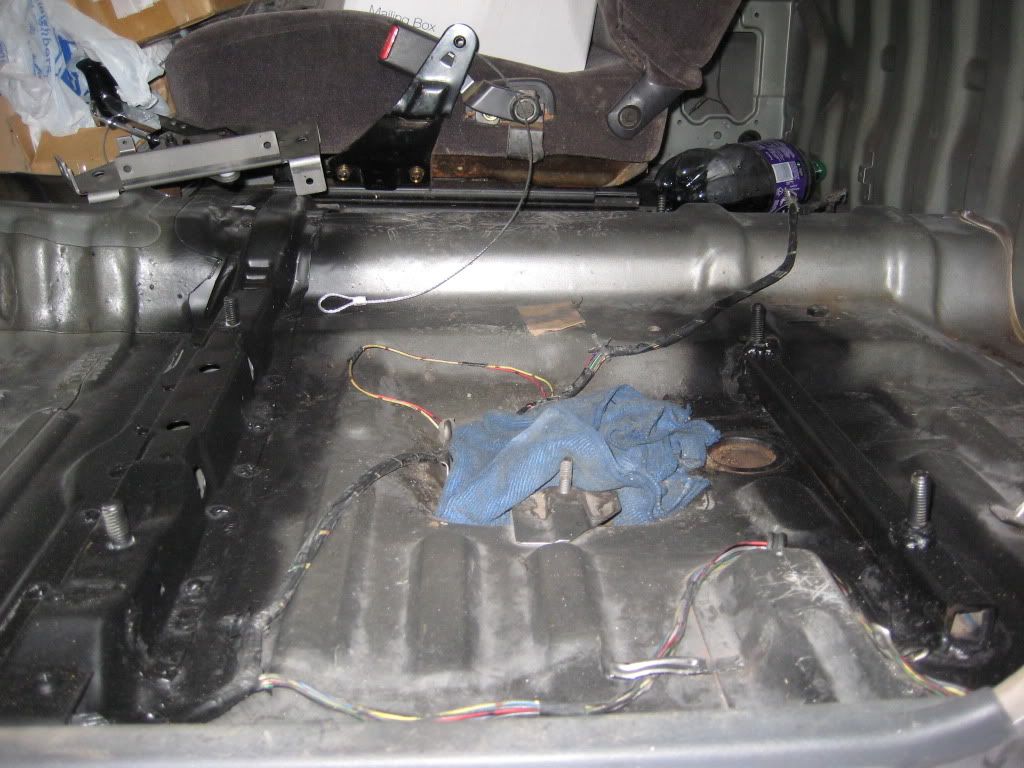
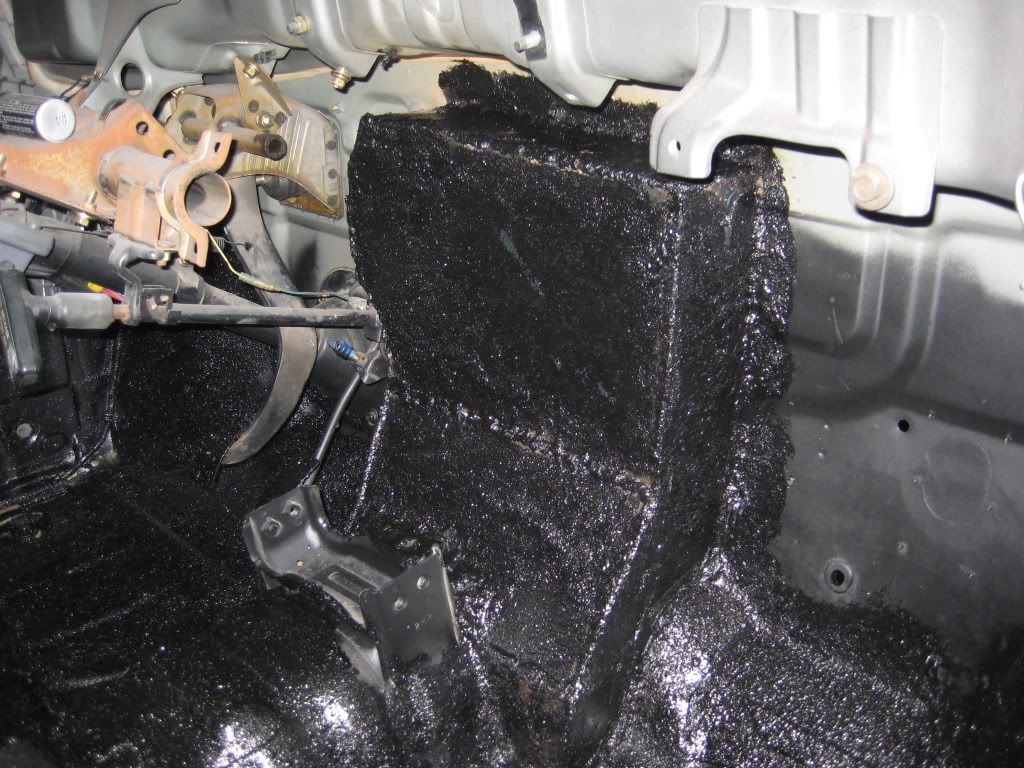
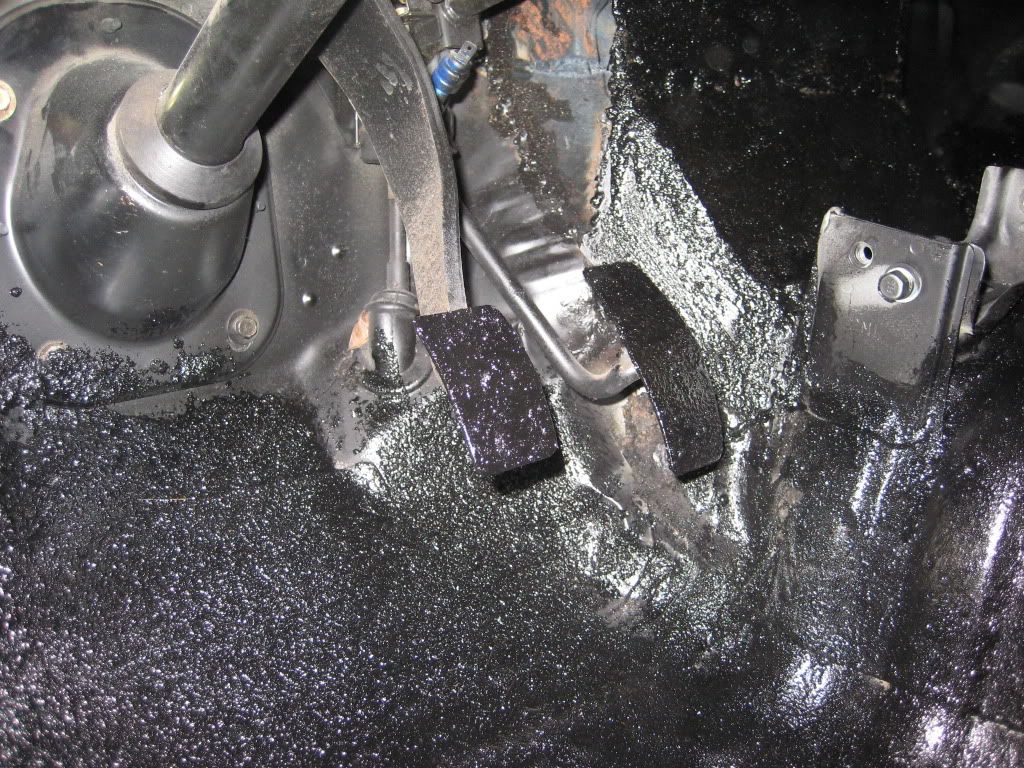
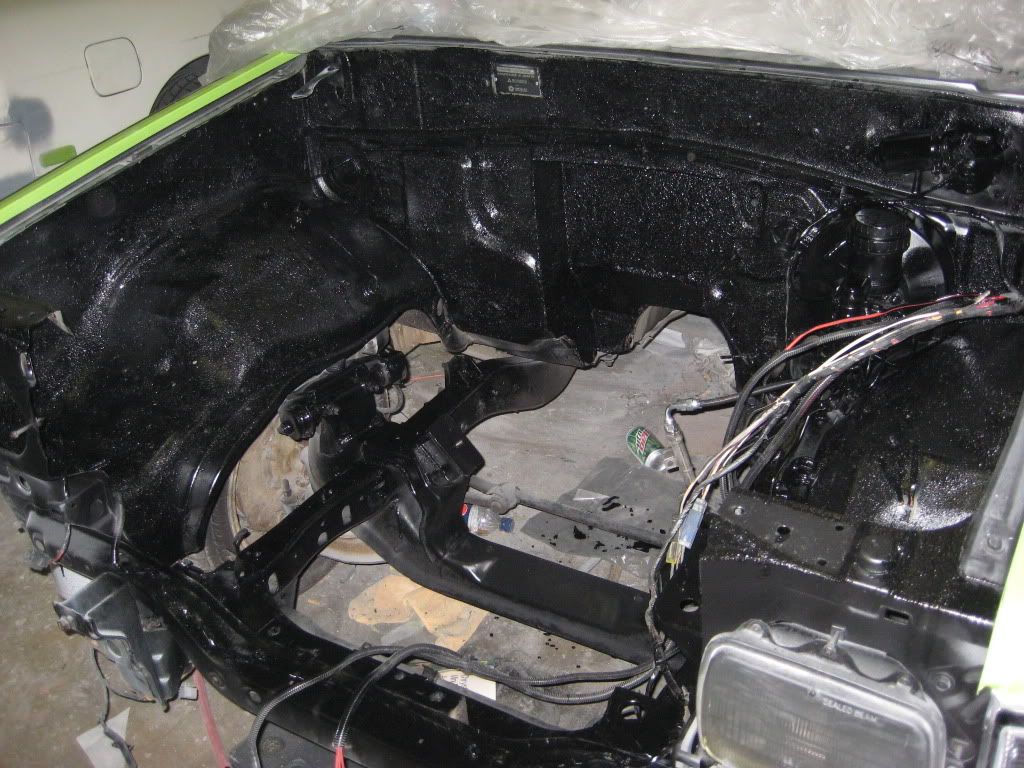
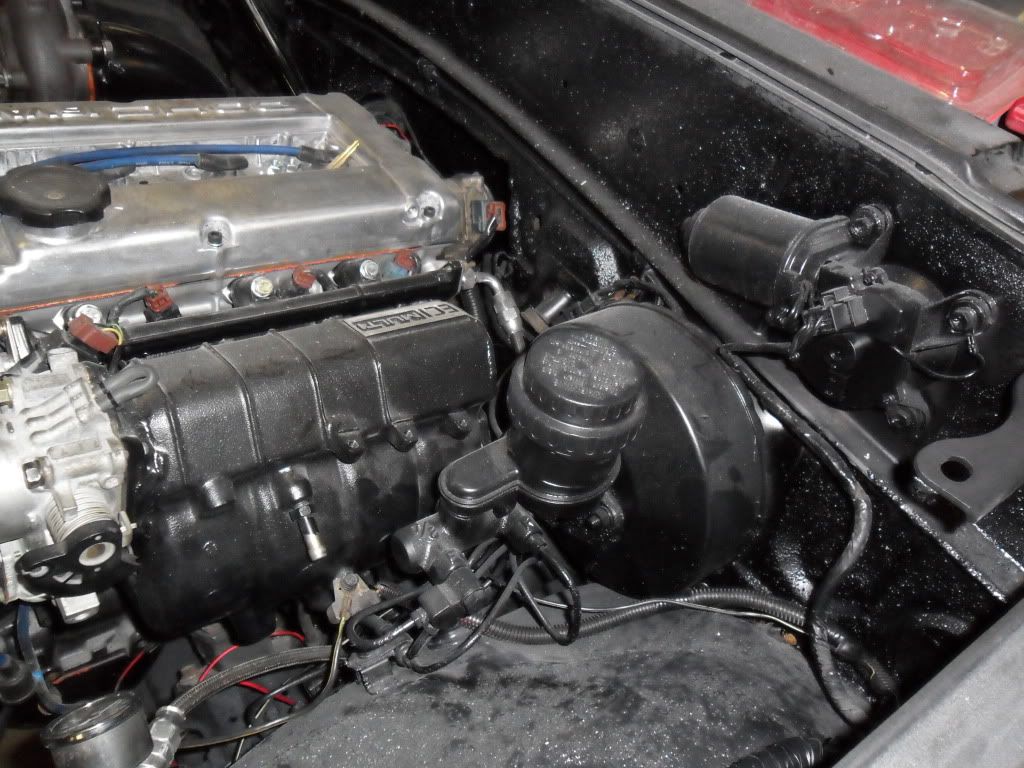
As for the newest update, I finally got the cab 90% complete. Bedliner is in the inside of the cab and the engine bay, and the bay has some semigloss paint where I thought it may be more appropriate. Also, one of the last pictures has my new coolant over flow tank from a mid 90's galant. the bracket had to be modified and its now welded in, but it'll work GREAT with the wiretuck. Clean and out of the way
B&M Shifter too
Firewall recess
Footpedals and such
Engine bay shots
Modified Galant Coolant overflow bracket and canister
Posted: Tue May 18, 2010 7:59 pm
by boise-nic
^lookin good! You were able to chop down the chasis wiring loom on the driver's side firewall way more than I was able to. Looks way clean. You keeping the battery in the engine bay? I stuck mine under the bed, helps get a little more weight over the rear and cleans up the bay. If you do a fuel pump rewire with it under the bed, the battery is only like 3' away from the fuel pump.
Posted: Tue May 18, 2010 11:30 pm
by shroder15
lol...yea, battery is staying up front for now. I need to get it rolling before I start putting more time into that
Also, the wiring harness is how it was when I got it...unfortunately, there are a few cut wires and randomness that confuse me. Actually, if you could help me out with it I would GREATLY appreciate it. I'll post a link tho to the forum the questions already on...and if you could answer any...or ALL of it I would really appreciate it. I really need to know about a few of them 100% instead of guessing so I can get this thing running. Its the LONG, picture filled 2nd to last post. its not urgent, but the sooner the better...lol!
http://www.hotrodcoffeeshop.com/forum/v ... c&start=15
Posted: Sat May 22, 2010 12:07 pm
by boise-nic
^Well from looking at page 2, I'd agree with what 4g63mightymax said about the wiring. All the assumption look correct. The only thing I'd caution you on is the purple plug. There are two plugs that are very similar. Mitsu was good about making their plugs keyed so you don't accidently hook up the wrong stuff...except for the purple plugs. It looked like 4g63mightymax answered your questions pretty well. I remember the engine harness wiring a lot better than the chassis harness. I just referenced the below diagram for the engine harness...

All I did was get a multimeter and check each and every pin to see where it goes.
As far as the chasis stuff on the link, it all looks good to me. I used the trucks ignition wires and charging system. I just unhooked the wiing to the trucks alternator and hooked up everything back to the 4g's aternator.
I don't know if you've wired the fuel pump yet but it was tricky for me. The pump actually runs on two circuts, one for cranking and starting and the other for running. Let me know if you got it down. If not, I can walk you though it.
Posted: Sun May 23, 2010 3:50 am
by shroder15
Ok thanks...I guess I was still a little confused on some of the wires, and wanted to be sure he was correct with it. The two plugs by the 3 fuse box were never answered I dont believe, and he wasn't sure what the black and white wire or black and red wire by the battery that was cut was for. I'm also trying to find out what the coolant temp sensor wire (single wire for gauge) looks like on the chassis harness. If you could hook me up with that it'd be great. As far as the engine wiring goes, I've pretty much got that, but we'll see how it works when I got to start it!
Posted: Sun Jun 06, 2010 1:40 pm
by shroder15
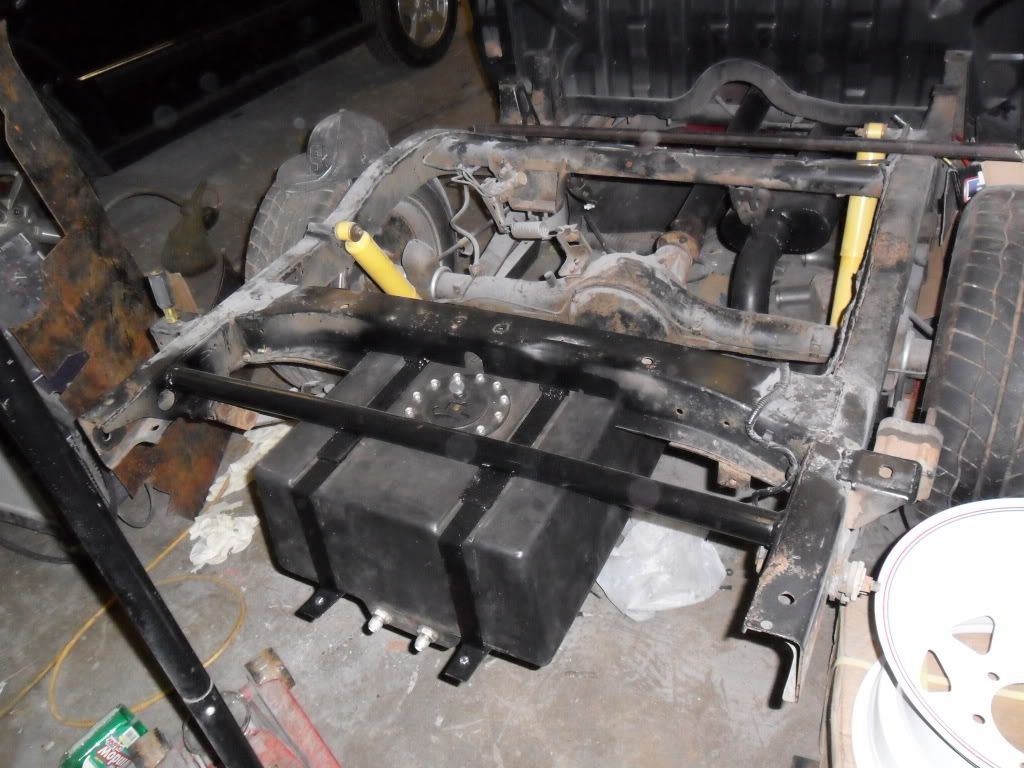
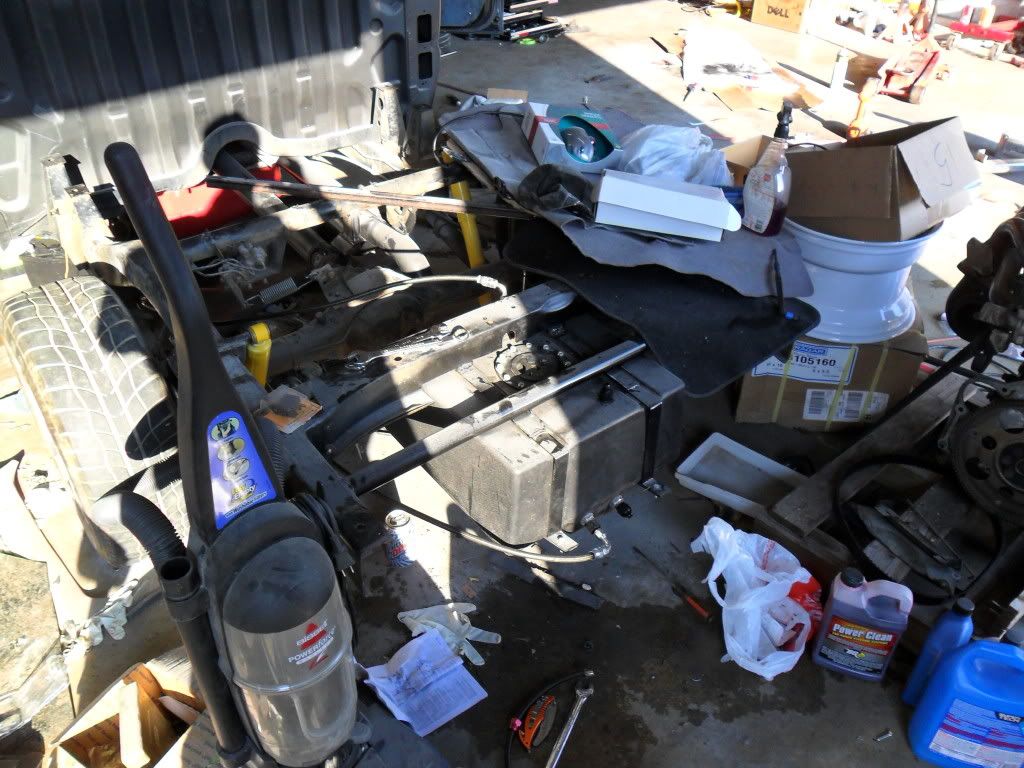
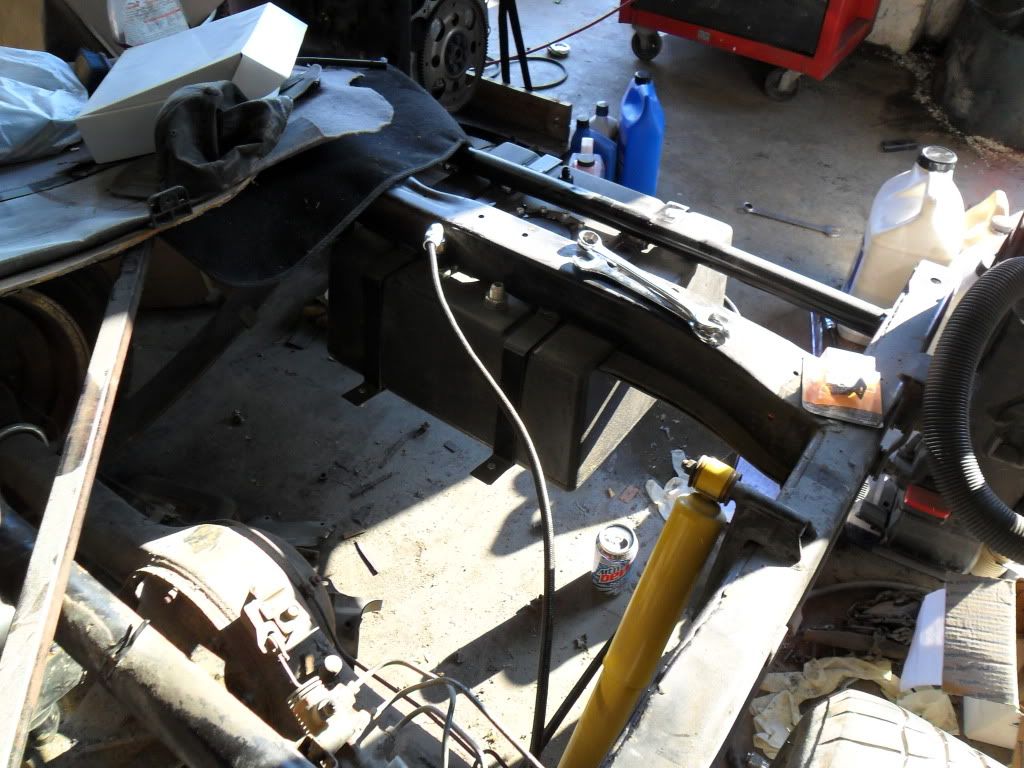
Well, I got some more done with the truck. The downpipe and exhaust are completed, along with the dump tube. I also ran into an issue with my stock tank that sat for 10 years...I went to run some water through it and for 15 minutes the lining of the tank continued to come off. At this point I decided it wasn't worth trying to save it and it wasn't worth the money to buy a new tank since all the ones in the junk yards are pretty rough too...sooooooo...Somebody got a 10 gallon RCI fuel cell...that didn't fit in the stock location. So I've got to order new lines...ugh. But on the upside, I got it with straps for 75 bucks used, and it came with foam. I mounted it where the spare tire used to go and "modified" the area around it to fit. Having some trouble with the photos, but I'm gonna try and get it all uploaded at some point tonight
Sorry to be a tease!
Posted: Mon Jun 07, 2010 10:58 pm
by shroder15
Ok, so the last day I was at the shop I completed the engine wiring harness (no pics yet) and threw a battery in the truck to tag the wires I need for the ECU. I was so happy because the first time since I've had the truck, it made noise! Grant it, it was the annoying "Hey moron, your key's in the ignition still" chime, but it made noise. AND I was able to find a constant/switched 12v off the key. The reason I was sooo happy was that the wiring was completely torn apart when I got the truck. Lots was missing and others were just thrown together. Its now nice and clean and loomed/taped.
But I can provide some pictures...such as my new fuel cell and how it is mounted, as I promised
. I used the spare tire mount, modified it, and added a 1 1/2 inch exhaust tube to assist with bracing. I dont have the final picture with it mounted and all painted black yet, but I should get that up on Wednesday or thursday
Here are the pictures, in step by step format with instructions on what to do...enjoy!
Step 1. Locate your spare tire brace. If you haven't done so yet, remove your spare tire and the lovely chain/mount. Discard or place where needed.
Step 2. Measure your fuel cell and determine what, if anything, needs to be modified in order to mount flush.
Step 3. Using your fuel cell (not pictured) place your brackets/straps and lift into place. I used a jack to make sure it was where I wanted EXACTLY and that everything would clear. When you find the spot. weld or secure your straps to the cross bar. *I added the love extensions on the top of the straps so that i would not have to alter the cross bar I was going to weld in next
Step 4. Measure and cut a piece of exhaust tube. I used 1 1/2 mild steel for this.
Step 5. Mount and enjoy your new fuel cell
Hope you enjoyed my retardation
Next is to finish the wiring, put my oil return line on, order some nice -6an line to modify my fuel lines, and fix up a few more things
Posted: Wed Jun 09, 2010 6:56 pm
by shroder15
Alright...Here are some pics of the engine bay harness as it sits now. I still have to add in some grounding straps, and maybe up the size of the cable going to my alternator from the battery, but its basically done.
Final Mount of fuel cell:
And to the wiring:

I still need to get new spark plug wires and get a wire cover to really complete it, and I have to run my IAT, Map, and Oil Pressure wires, but thats basically it
Posted: Wed Jun 09, 2010 7:14 pm
by shroder15
WOW. Just went back through my pictures and apparently I have some of the turbo, downpipe, and wastegate setup that never made it here. So...here are some more of the pics...SORRY!
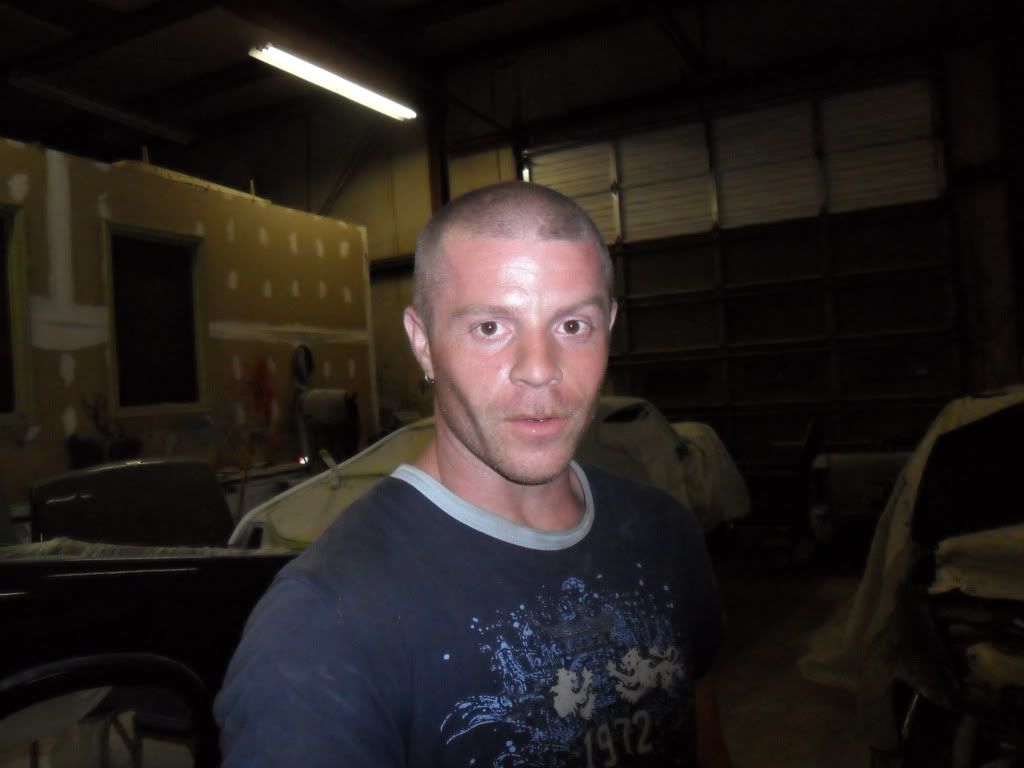
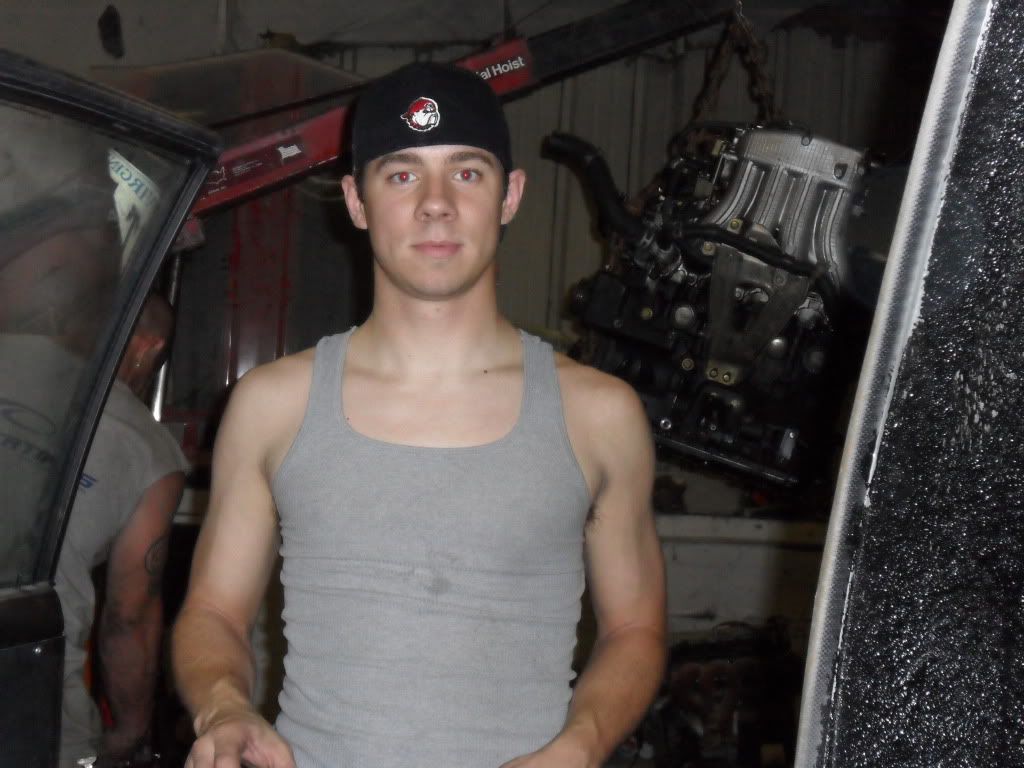
My Retarded friend TJ:
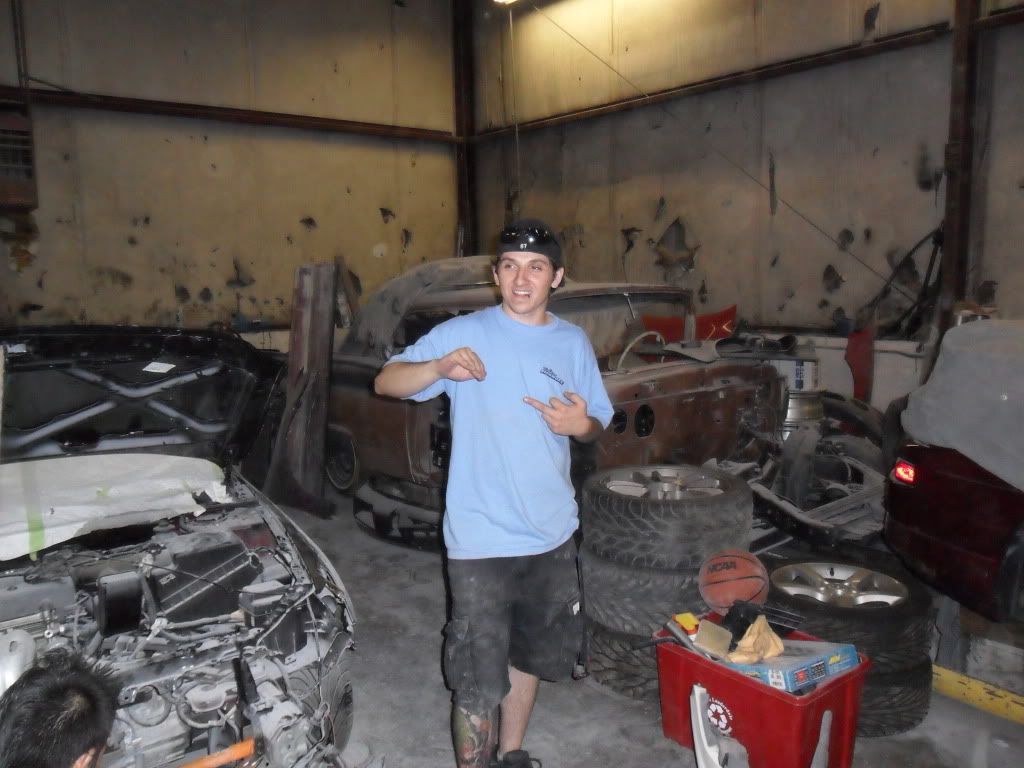
And Christopher:
And the Good Stuff:
And a lovely shot of the turn down and driveshaft:
There should be more coming after tonight. I've gotta long night ahead of me, but hopefully I can get motivated and stay that way!
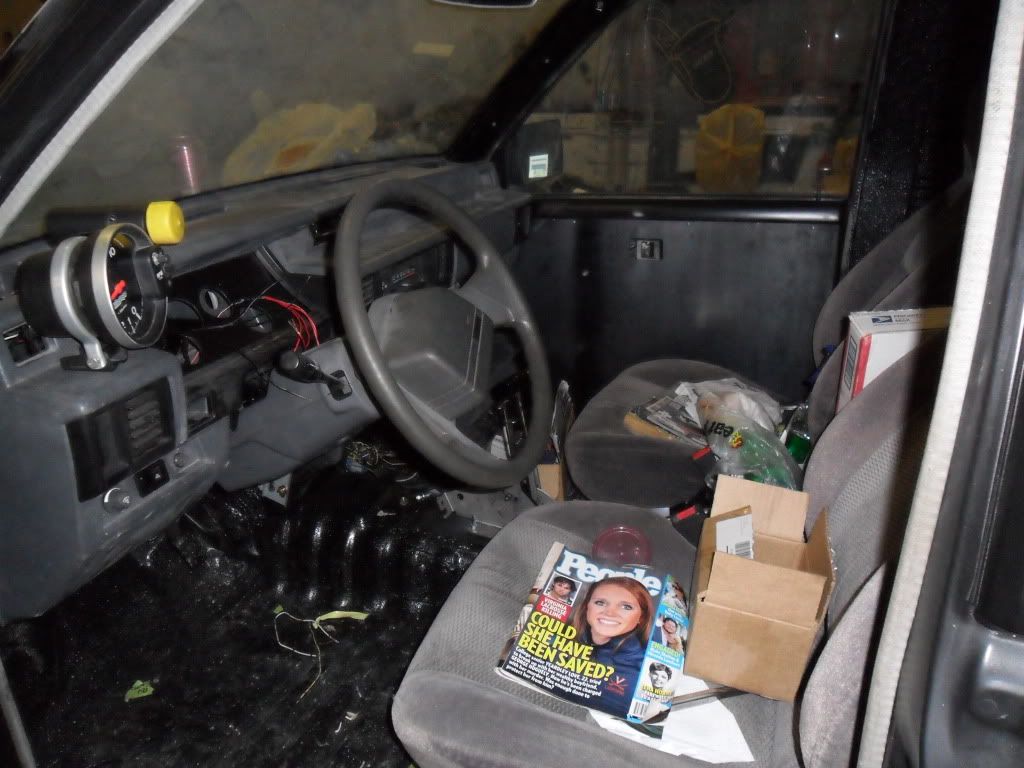
Posted: Sat Jun 12, 2010 2:07 am
by shroder15
Alrighty,
So I made progress, then again pissed myself off. The dash is in, my custer is cut, my tach is mounted, and I got an eclipse starter to spin over to test the wiring since it was so cut when I got it. THEN I wanted to alter my fuel lines to fit my fuel tank...only to find that the fittings I ordered are not long enough on the bulkhead to bolt in....SOOOO I ordered adapter fittings from Jegs that I now get to wait on. Ugh. Anyways, here are some more photos from the wiring and dash and such:
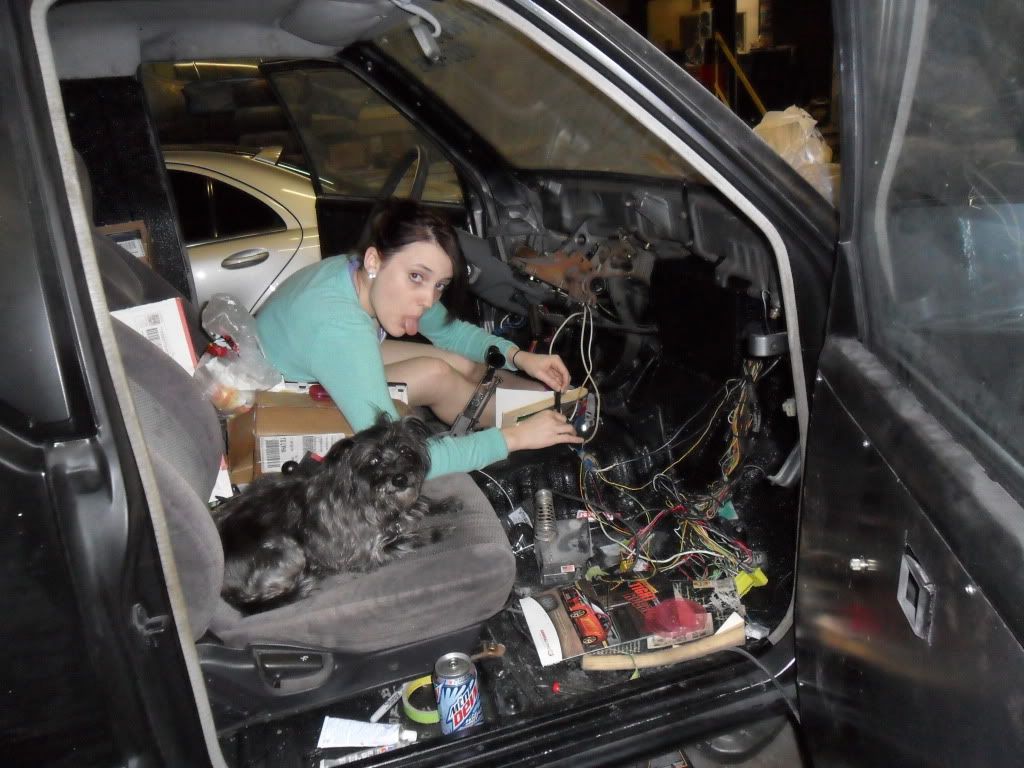
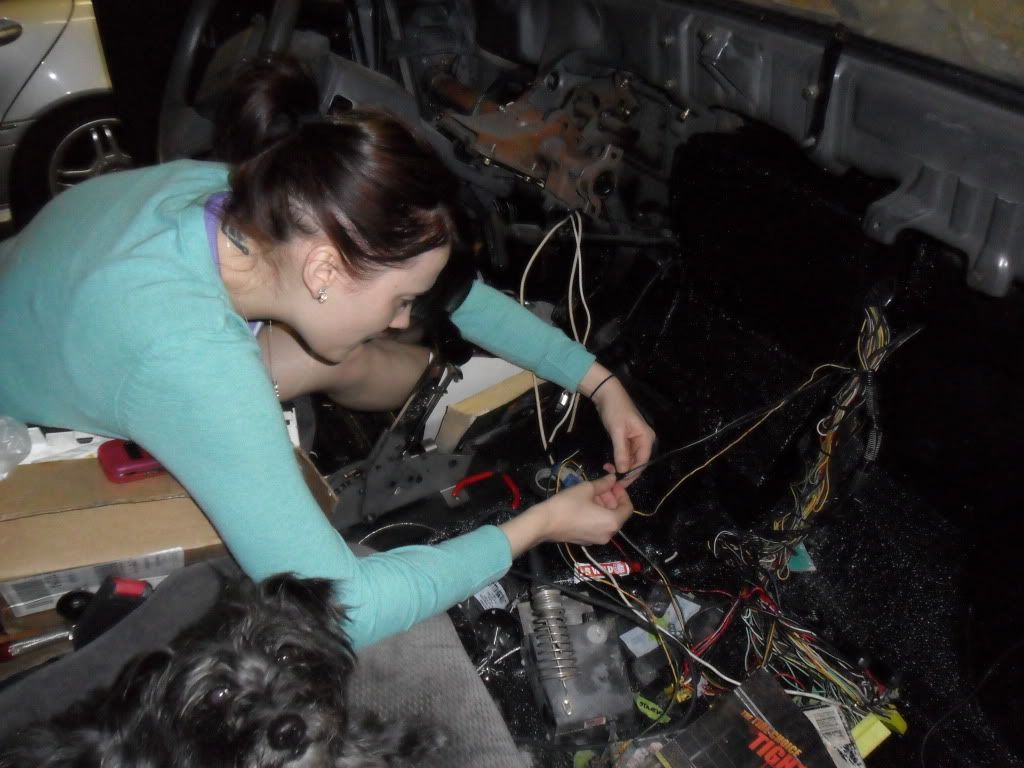
Picture she took when I turned around to ask a question:
My woman doing electrical tape and my dog:
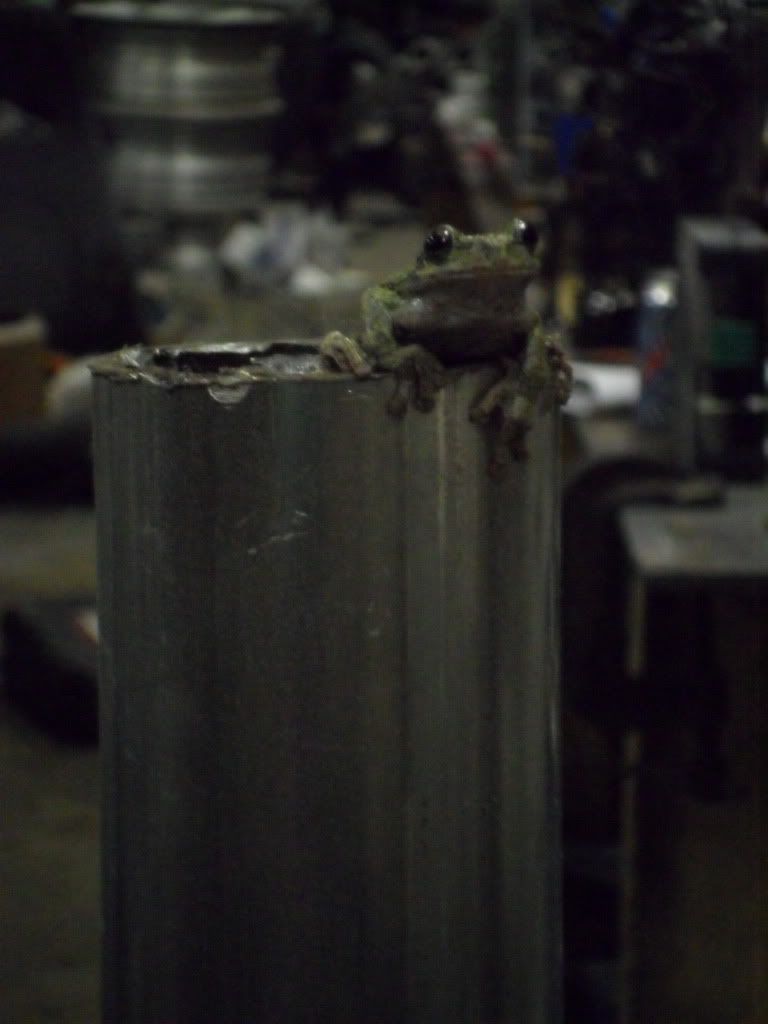
A tree frog we named Kermit, and then released because some moron wanted to keep the copper head they caught instead of this guy.
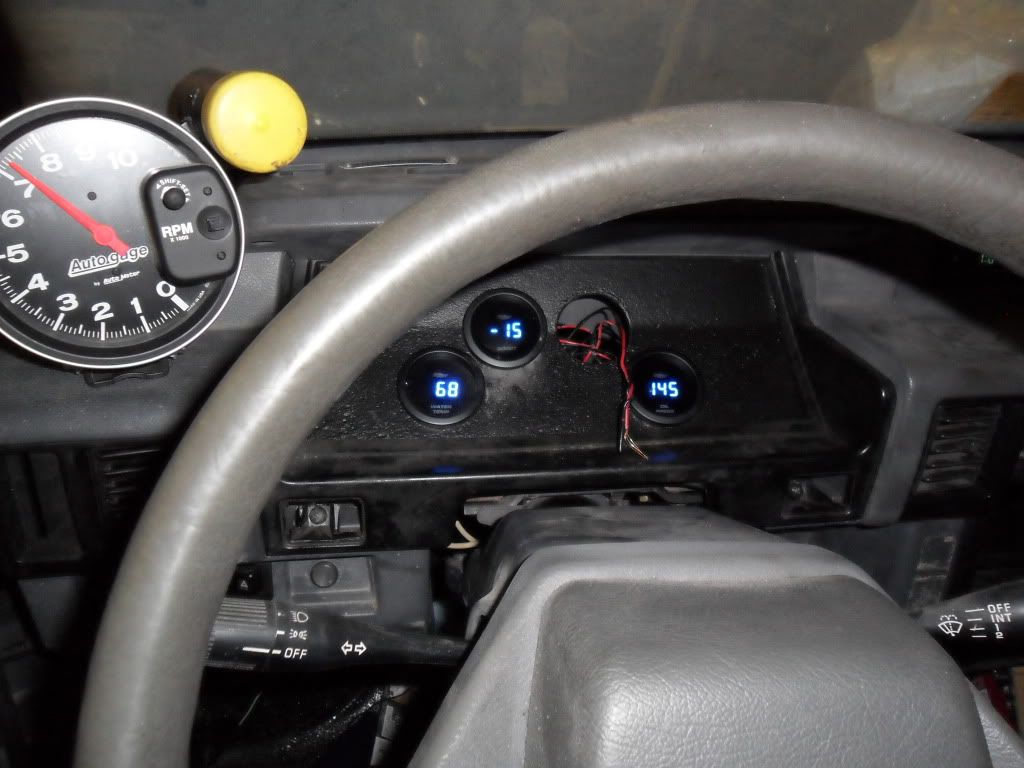
Cut and Painted cluster:
Installed:
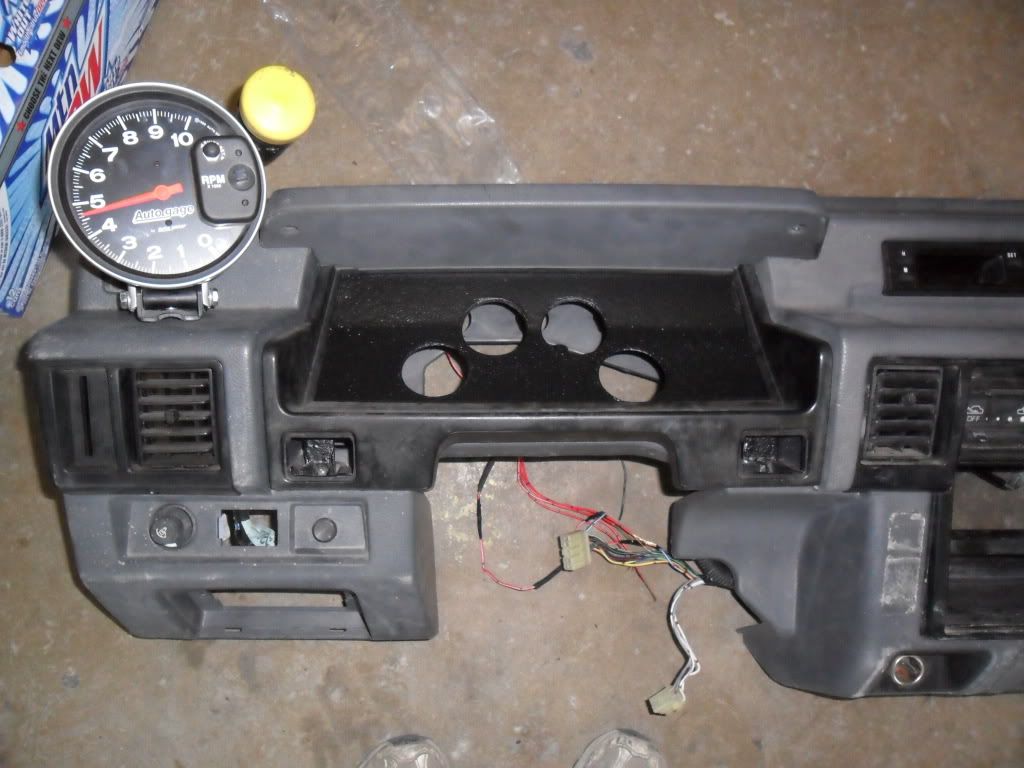
Dash installed and wired up:
As for the tach, there is a pin that comes off of one of the white plugs that is, according to wiring guides, a tach signal output. Can this, instead of ECU pin 109 be used for my tach, or do I need to wire it in with pin 109. Thanks!
Posted: Thu Jun 24, 2010 10:39 am
by shroder15
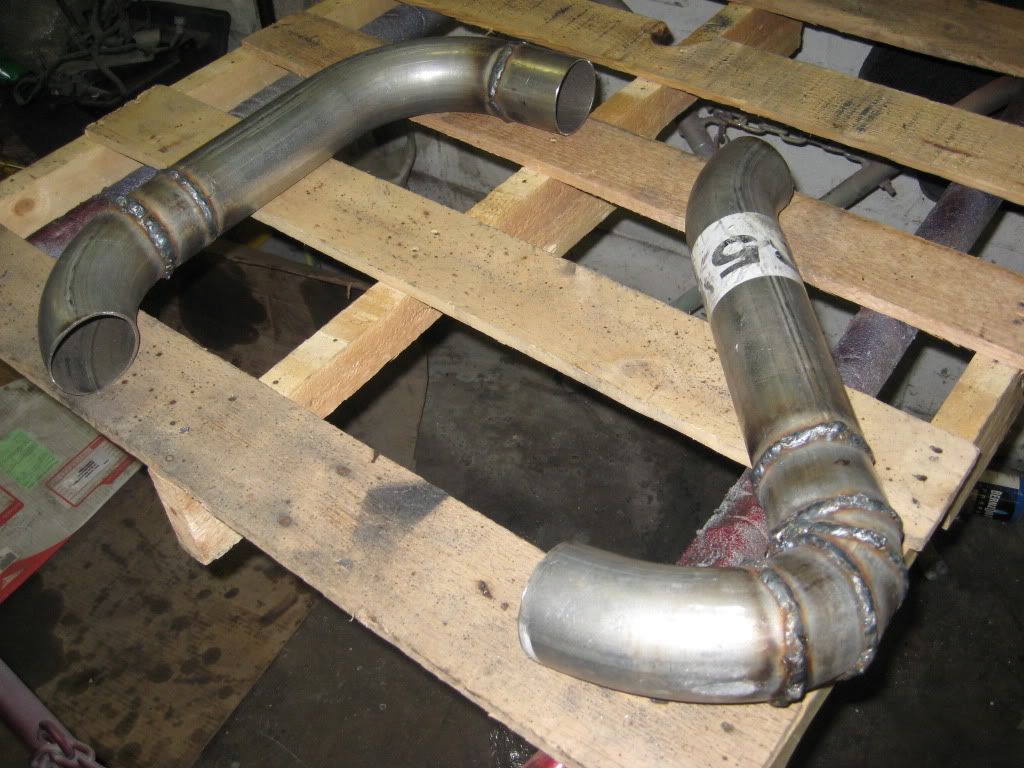
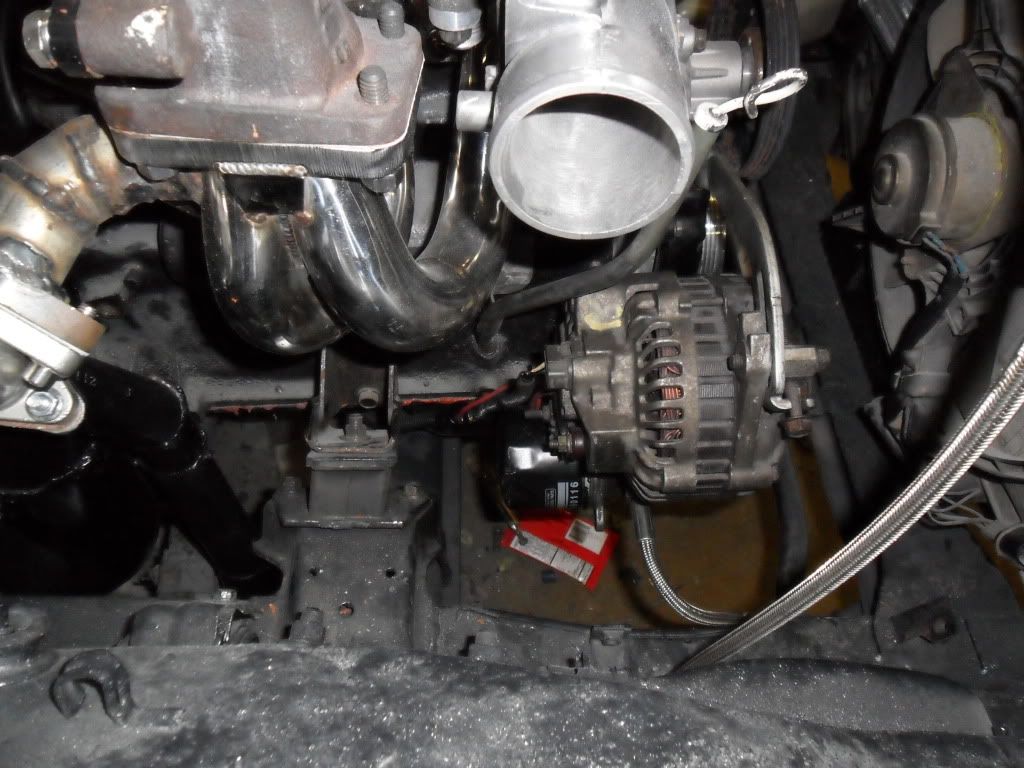
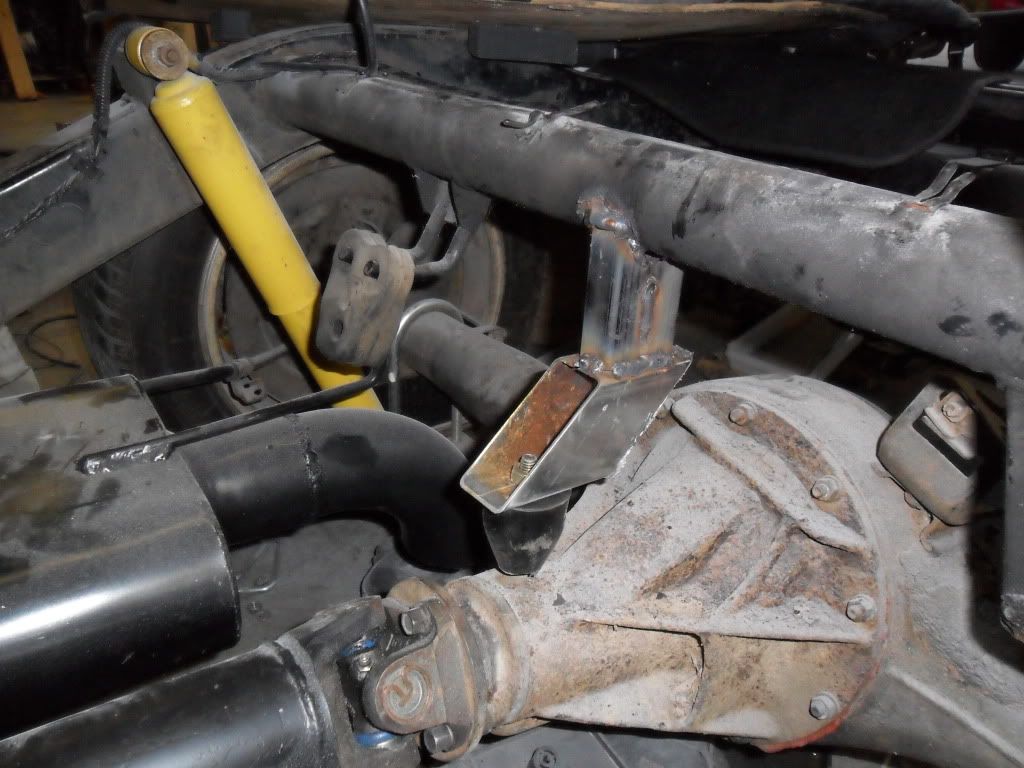
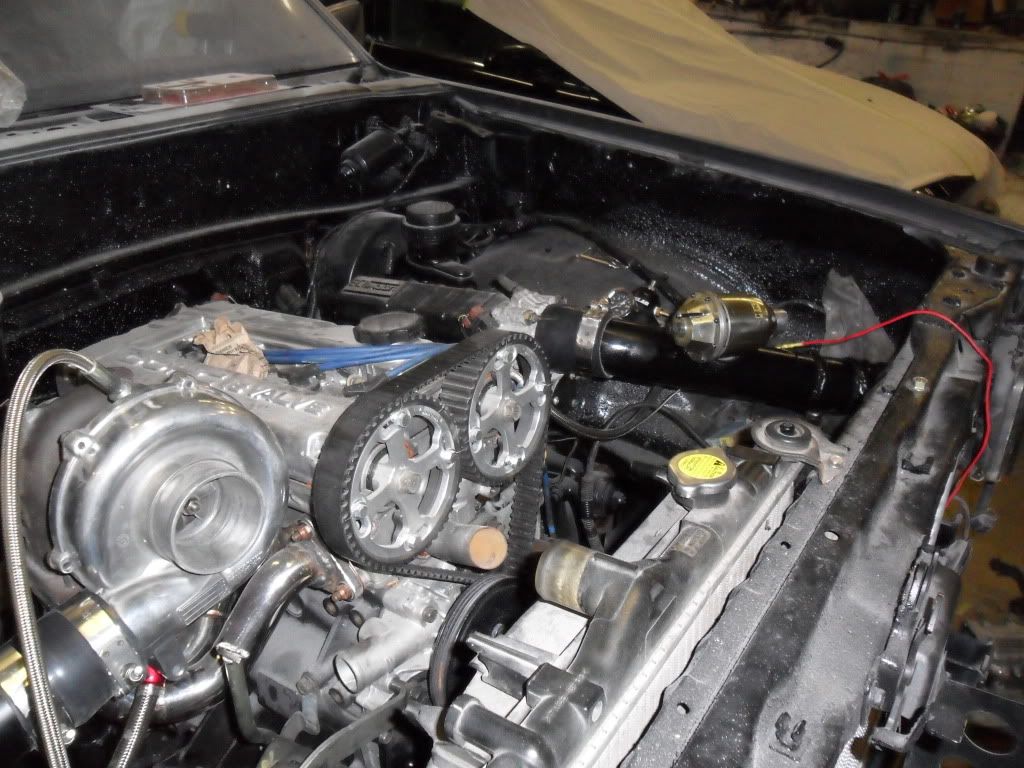
Got a little more done. I had to order a new fitting for my fuel lines as one fittings threads are jacked and will not seal, but other than that she's basically done! Also fabbed up a pinion snubber. I was not a fan of only having 3" of clearance or so from the slapper bars, so I chopped the lakewoods and made my own version... Also welded cut my old BOV "flange" and welded the HKS flange and painted it, along with putting the intercooler pipes on. AND finally did my 10an return line with 2 45* fittings. Hopefully it starts to really come together today. here are the most recent pics
Pinion Snubber
HKS
Edelbrock Fuel filter and Summit inline 255
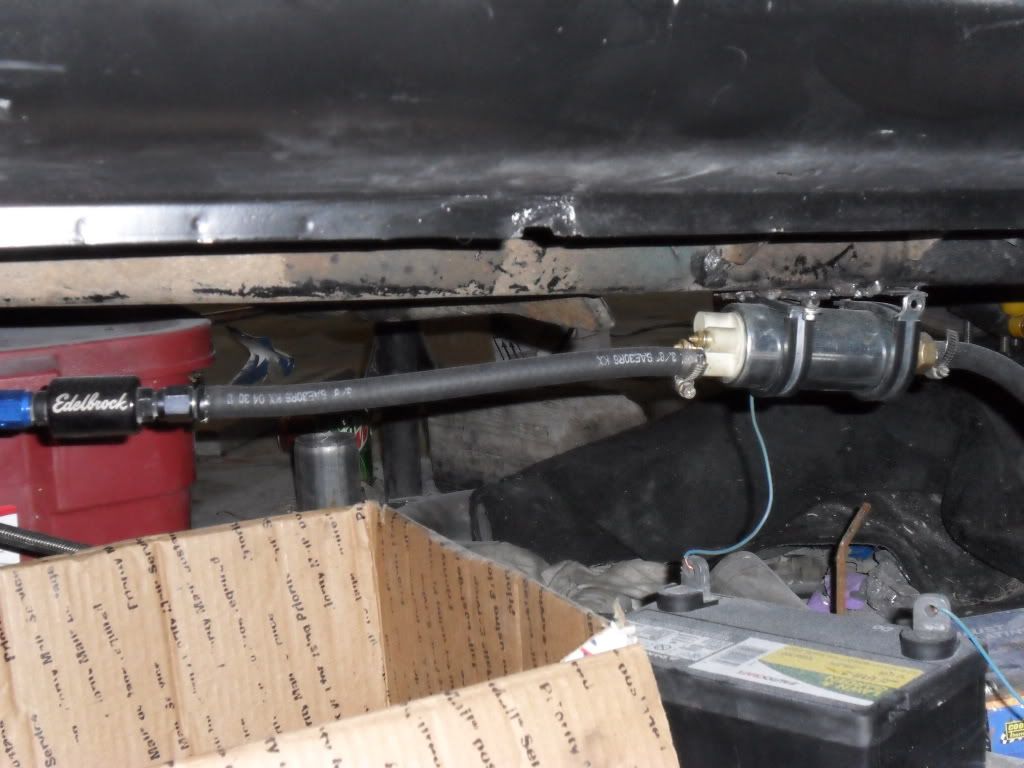
Fuel cell and fittings
Random pic...Me with my lovely hamster Wheel

Enjoy!
Posted: Fri Jun 25, 2010 5:29 am
by shroder15
Alrighty,
I got a little more done on the truck and thought I would share the progress. Mainly got the gauges (save the wideband) wired in and ready to get hooked up to their counter parts. Bed is on the truck about 95% (need to source some large grade 8 washers
). Trans cooler is mounted and waiting on lines and stainless steel ties. water line is run from the back of the head and most of the gauges sensors are mounted. I feel like I did a little more, but I couldn't tell you any more
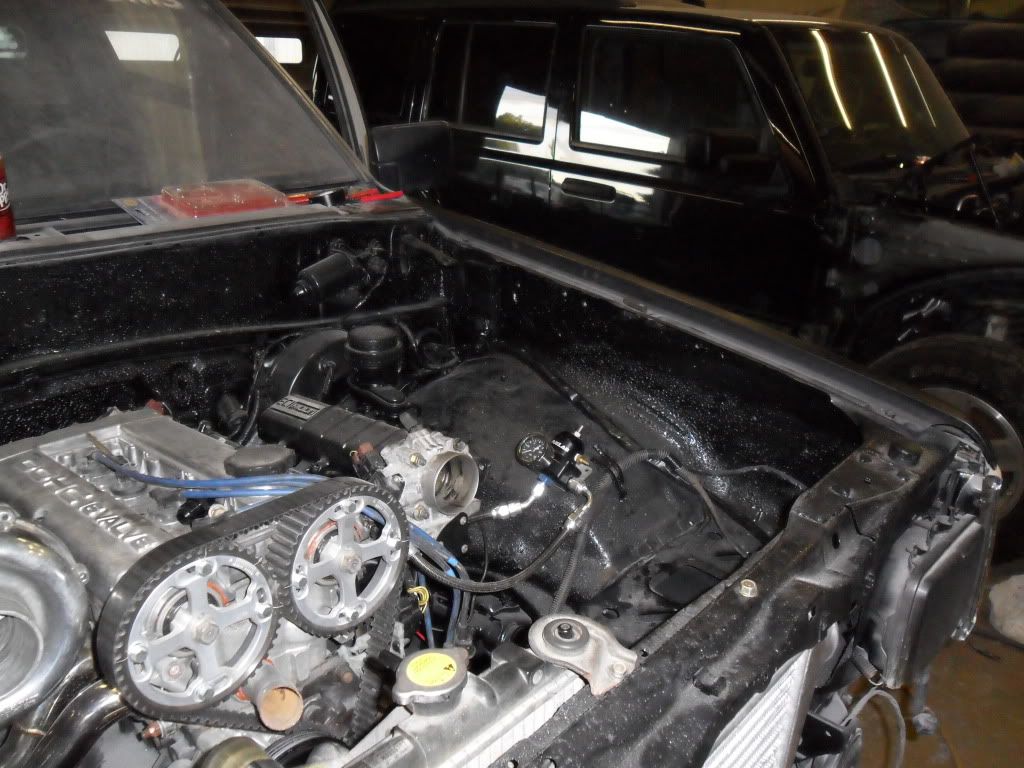
Enjoy the photos!
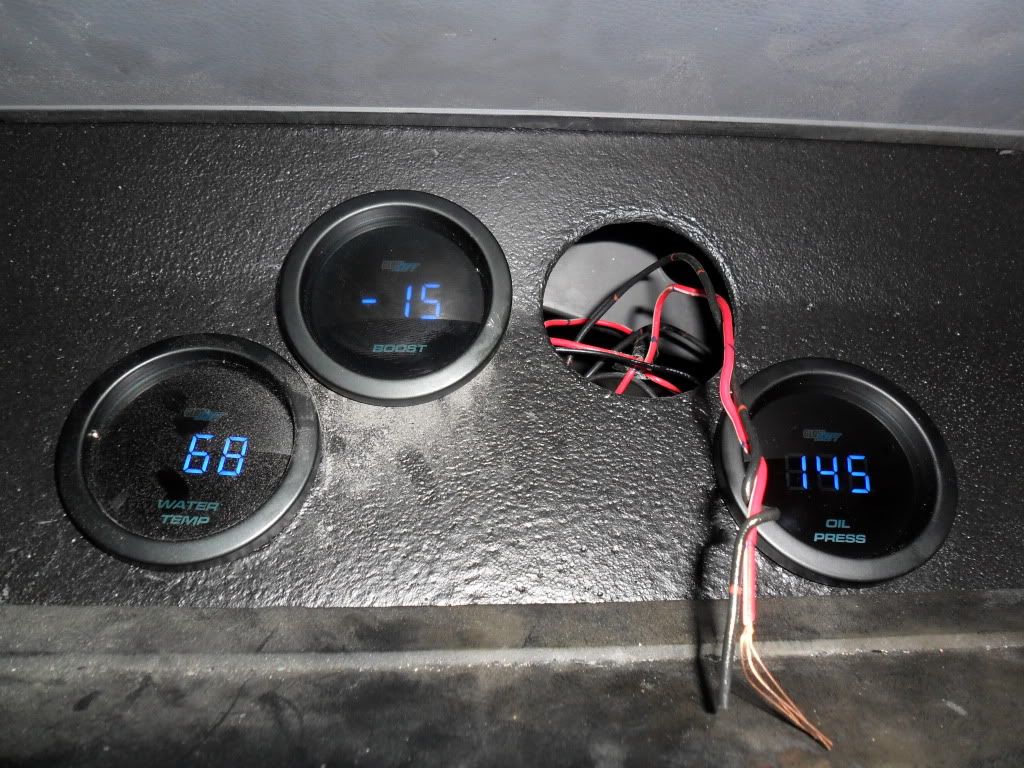
Gauges:
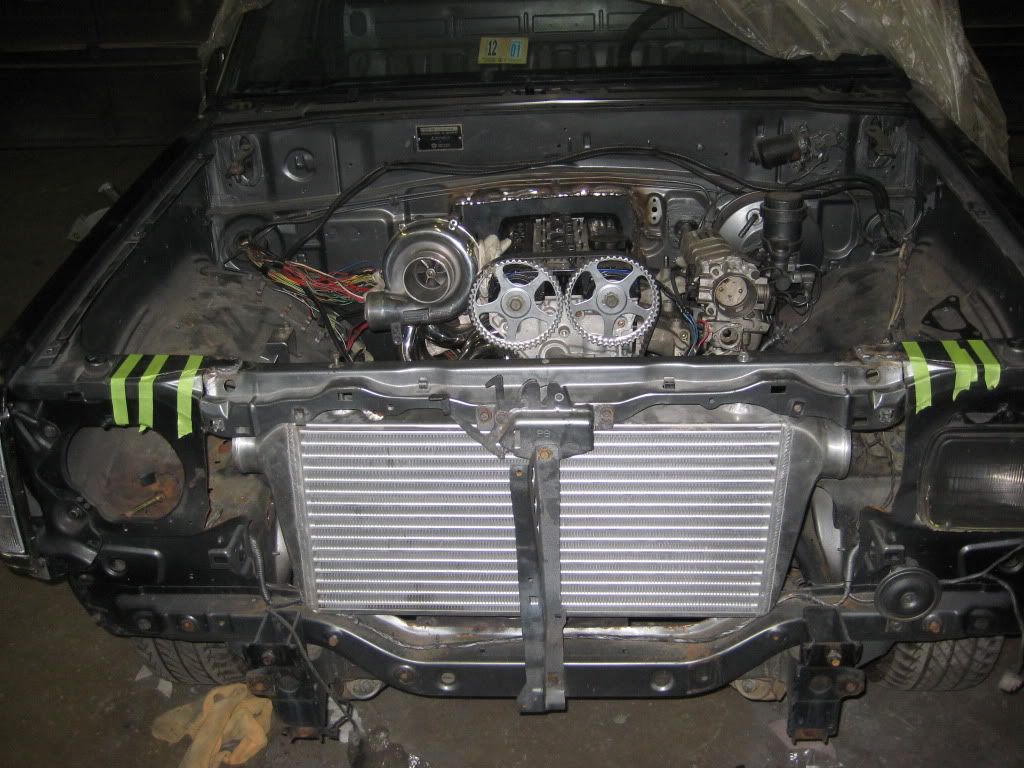
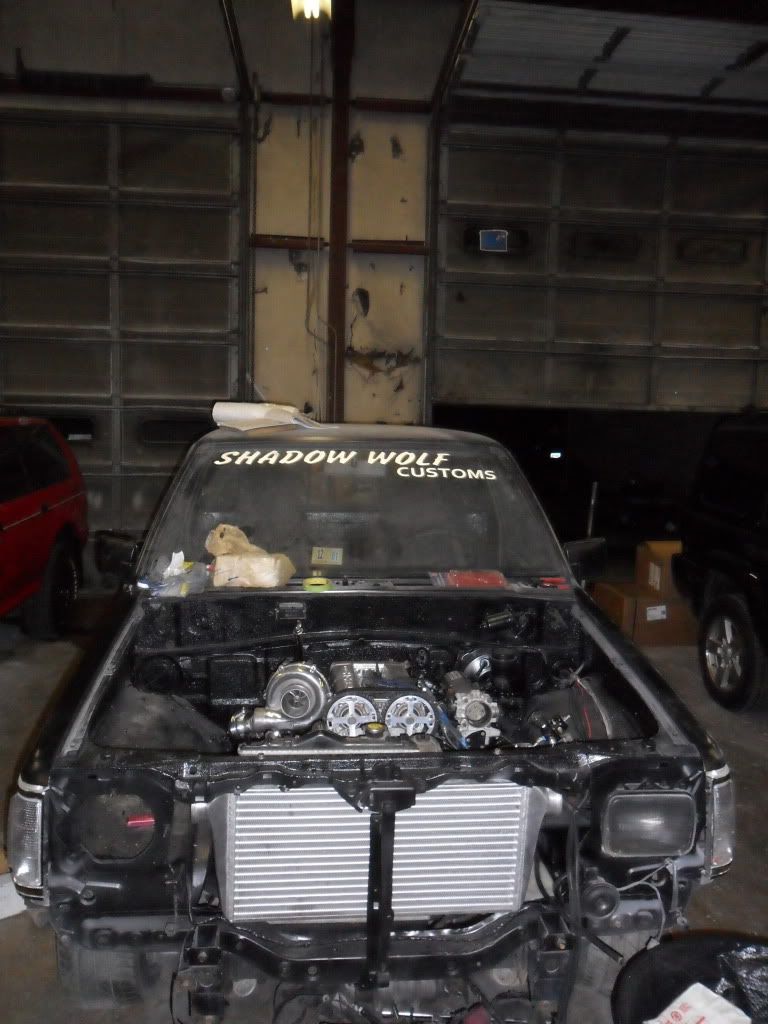
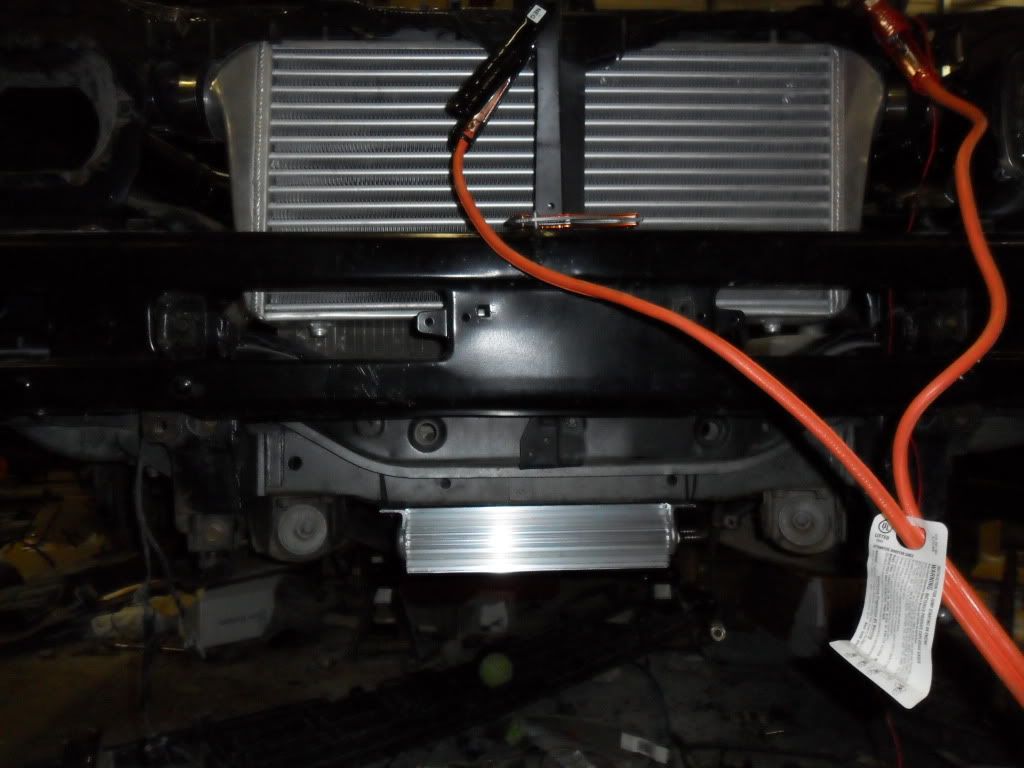
Intercooler, bumper (finally on), and trans cooler:
Bed finally back on:
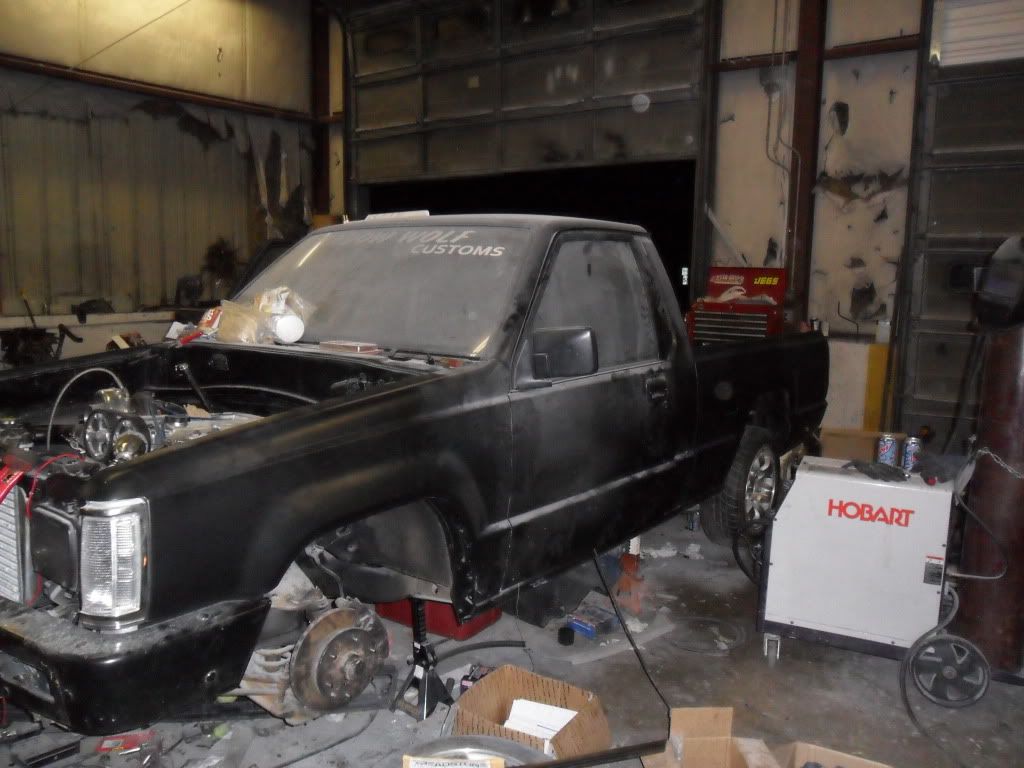
Hood on and another front pic:
Thanks again for all of the support guys!
Posted: Tue Jun 29, 2010 1:13 pm
by shroder15
FINALLY. Pictures. Not a started truck, but more pics
I made some progress, but had no motivation the last day I worked on it and am limited on time today. I should have it filled with fluid everywhere save the trans for reasons I'll show shortly. Depending on time constraints, I MAY get to wire up my wideband and IAT tonight and get that out of the way. I'm working with 4-6 hours, so no promises. This weekend I'm headed to Augusta, GA to look for a place to live and a job so no progress can be made until next wed/thurs, unless I can talk someone around here into knocking a few things out on it for me
Like the starter, fixing the trans problem...blah blah. But on to the pics.
New trans cooler mount (Passenger side frame rail
Lower valance bolted on and grill that's held on by "Drifter's bolts" and 2 screws (zip ties)
New honda battery...just need to aquire brackets
New headlights with H4 bulbs...they look more blue in person
Upper radiator hose. Small cut and it fit like factory...if only mitsu put a DOHC 4g in these...life would be so much easier:
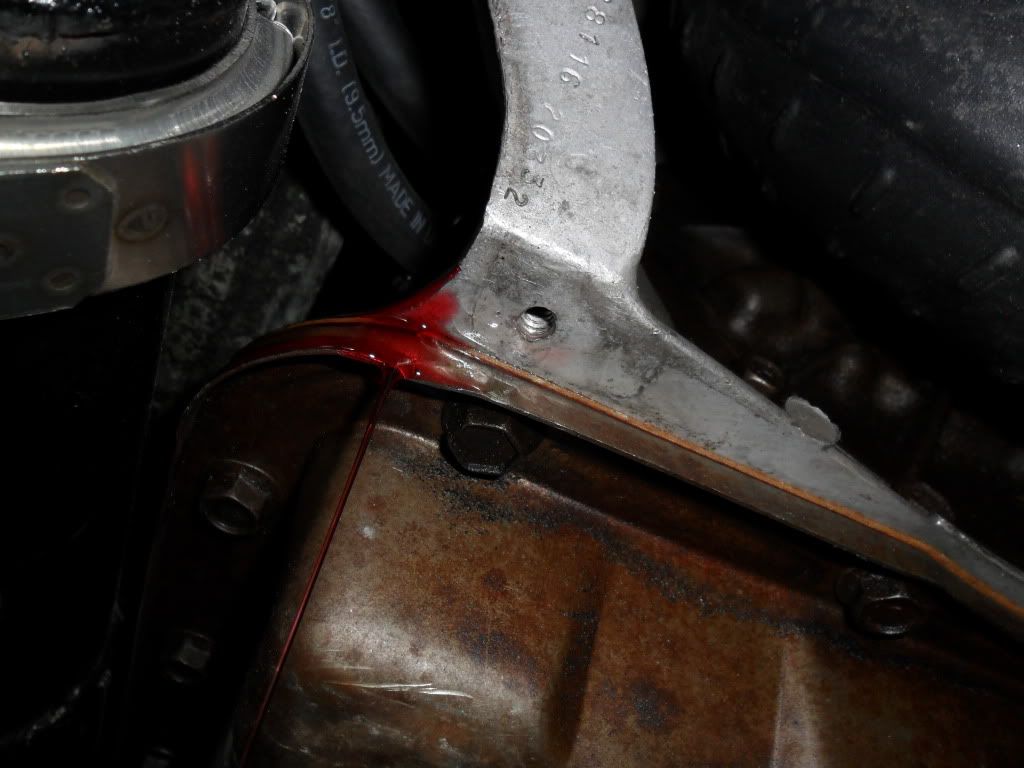
Apparently you are supposed to have a kick down cable or plug installed...I was not told this and lost about a quart by the time I stopped pouring.
I'm in need of a TH350 kick down cable if anyone can locate one in a local yard or has one laying around...I really only need the bottom part that bolts to the trans...it can be cut where it necks down about 2" up from the trans...Enjoy the photos...except the last 2

Posted: Sat Aug 28, 2010 5:20 am
by shroder15
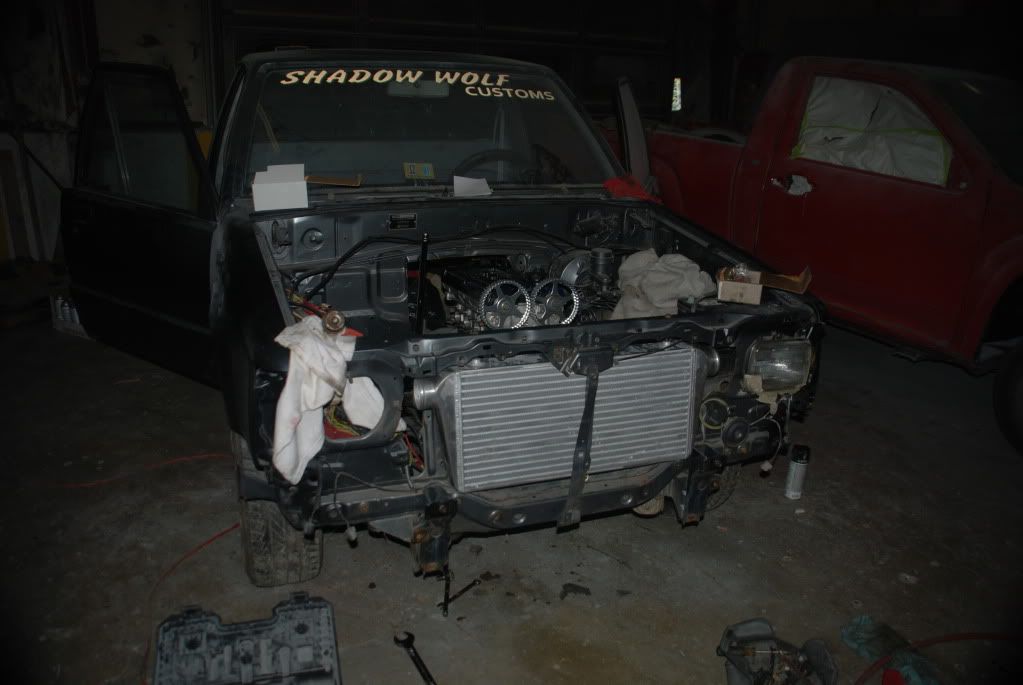
Sorry for the lack of updates guys. I recently moved to North Augusta, SC and am waiting to get the truck towed down to finish it. I have a few leaks to tidy up, I have to run the fuel line from the tank to the pump, aquire a new pump, and a few other odd and end things. I'm hoping to have the truck down here by next weekend, and running shortly there after. I made the move to South Carolina for a few reasons, the main ones are to pursue dreams. Jackson, SC has one of the most competitive tracks in the south east, along with a very good Auto enthusiast following. I'll be racing and competing in the upcoming 2011 Footbrake season and I'll be using the inbetween time to figure everything out with the truck (working out bugs, going faster, etc). I will also be opening a small shop, initially starting in carbon fiber and fiberglass work, but eventually I would like to transform into a full on custom shop that keeps performance (and budget options) in mind. Once the shop is running, I plan to become a vendor here, and the first product offered will be a carbon fiber upper and lower timing cover (6 bolt), with the lower timing cover retaining the factory timing marks. I'm hoping to have these available for order in the next 3 weeks or so, and once they are completed, I will have more information available to you guys! Hopefully, around the same time these are offered, I will also have some pretty good truck updates as well!
Posted: Sat Aug 28, 2010 9:20 pm
by shroder15
UPDATE: Funding for the business finally came through, so I'll be ordering everything for the carbon fiber and fiberglass this monday! I'll also be getting the truck down this weekend if all goes well!
Posted: Wed Sep 01, 2010 12:50 am
by shroder15
Plans are changing yet again with the truck...
I've had a hard time wanting to trust a nice heavy turbo hanging on to my head by extended studs. Due to some work on a buddy's 3g eclipse down here, I've been gifted an Evo3 thats in need of a rebuild. Plans are to sell my Evo8 set up (anyone interested, lol?) and use the money to rebuild the Evo3 and have my hood exit exhaust created. Wish me luck!
Posted: Tue Sep 07, 2010 2:05 pm
by shroder15
Well...I'm having a little trouble ordering some of the parts as I need a bank card to do so...and I had to recently switch banks with my move...But I picked up the Air Compressor a few days ago, and the shop's getting set up pretty well. I just ordered my vacuum generator for the resin infusion of the parts, and am really looking forward to ordering my tooling gel here shortly! not too long and we'll have the molds done and the parts ready to roll out of them!
Posted: Fri Sep 10, 2010 5:34 am
by shroder15
Alrighty. Forgot to update, but I now have a vacuum generator enroute to the shop and today I'm headed out to, according to yellowpages.com, a local fiberglass and autobody supply store. I'm trying to locate a good place local for the basic fiberglass supplies, body filler, auto paint, mold making supplies, and more...wish me luck as this could potentially get a mold for the upper and lower covers, along with the subaru (02-05 model???) alternator covers done! After that, its simply time to knock out 1 of each so I can get a group buy together for them all!
Posted: Sat Sep 11, 2010 5:14 pm
by shroder15
Ok...I've acquired a good amount of what I need to start making the molds, but I need a VERY good condition upper and lower 6 bolt cover. I do not have a 6 bolt, and my upper cover is bowed away from the timing belt. I'm going to try to fix this tonight with heat, but if this doesn't work, is there anyone out there with a good upper and lower cover that they would be willing to donate and I can either compensate financially or with a discount towards the purchase of the carbon covers? Thanks all!
EDIT: PM me as this is on multiple sites and PMs are checked before the threads...first come first serve on the offer, but I appreciate any and all help! (blemishes are fine, warped and chunks missing are not)
Posted: Sun Sep 12, 2010 2:40 am
by shroder15
Well...I'm going to try the junkyards around here tomorrow to see if I can come up with any. If not, the person who can come up with a great quality timing cover for me to use, I will either purchase it off of them or I can sell the carbon covers to that individual at very close to cost. Thanks!
Posted: Sun Sep 12, 2010 10:43 pm
by shroder15
Ok guys, I have had a VERY difficult decision to make over the past few days, and I do not enjoy this. I recently moved to North Augusta, SC to open a shop and to race. Unfortunately, I was unable to get a job until recently and lived on my funding longer than I wanted to, and no longer have the funding to do both. I have to do one or the other, and with my current job, I wont be able to fund the truck without the business. I have decided to sell the truck, which I really dont want to do, in order to fund the shop. By selling I can acquire everything I need to get the carbon fiber and possibly powder coating supplies and an auto 1g. I'm not looking to get a ton out of it because I know I'm not going to..its not how it works on one of these projects. But if there is anyone on here who is interested, shoot me a PM and we can talk about it. It'll have everything shown except the ECU/ostrich and the turbo may be swapped out for the evo 8 turbo. The trans has a fresh BM rebuild with shift kit, and everything else is listed. If you have any questions, PM me, but the truck is still in Rustburg, VA, but may get towed down to North Augusta, SC for a part out over the next few weeks.
Posted: Sat Sep 18, 2010 4:01 am
by shroder15
The truck is going to be on its way down to SC saturday, and the tear down will being. If there is anything from the truck that you would be interested in, please let me know. It sucks to have to do this, but its what I need to do right now to accomplish my goals. I'll be taking one step back to take two steps forward in the very near future. Once the truck gets down, I'll have a FULL list of what I have for sale off of it, but if you see something you are interested in, lmk. Dibs are welcome, providing you are ready to buy in the next week. I really need to move some parts in order to get what I want accomplished, so feel free to offer a little less than what I am asking. The worst that can happen is a no
Thanks again guys!
Motor/power adders:
4g63 6 Bolt short block - rebuilt w/ bsek - $200.00
1g Flipped manifold with blocked EGR (3g, Evo, Hyundai TB flange) - $100.00
Hyundai Throttle body with ISC block off and 3g TPS w/ pigtail: $50.00
Evo 8 Turbo and manifold (maybe o2 housing and j pipe) - $350
EbAy billet underdrive pulley - $15.00
D50 waterpump w/ side exit welded- $50
Cut/Modified front cover - $15.00
Autometer boost gauge - $10.00
Glowshift blue digital oil pressure, boost, and water temp gauges - $40.00 each (100.00 for the set)
HKS Blow off valve - $125.00
Fuel:
1050cc FIC injectors
-6an steel braided teflon lines - $2.00/ft
-6an fittings - $1.50/each (must be used with the teflon line)
Edelbrock inline filter (-6an)- $10.00
RCI 10 gallon Fuel Cell w/ foam (needs straps) -8an - $75.00
Trans/Driveline/Wheels/Tires:
Custom driveshaft (Th350/400/pg trans w/ motor in stock position and stock rear) - $100.00
D50 LSD with 3.909 gears - $100.00
Billhousing th350 trans adapter - $250.00
TH350 transmission w/ B&M transkit rebuild with auto/manual vb, shift kit, and upgraded clutches - $350.00
B&M Z-gate shifter - $30.00
3800 RPM Jegs stall converter - $150.00
Crager nomads (15x10 w/ 3.75" back spacing) - 75.00 (total)
Chassis/Body/Suspension:
Monroe rear Shocks - $30.00
2" Drop Spindles - $125.00
I'm sure there's more, but right now either I can't think of it or I'm not yet willing to part ways. If you see something you are interested in, PM me or post it in the forum and I'll let you know what the deal is. Also, if you are interested in the truck as a whole, I'm trying to get around $2200.00 obo for it. Also, check out
http://www.hotrodcoffeeshop.com/forum/v ... ?f=6&t=182 for the most up to date pictures/description. PM me instead of replying to the thread as I have this posted on MULTIPLE forums and I want to be fair and not look anyone over. Thanks all!
Posted: Sat Sep 18, 2010 4:31 pm
by dees75z
Hate to see this man, it was coming along so well.
How much for the injectors(price not listed)
Posted: Sat Sep 18, 2010 5:06 pm
by shroder15
LOL...I wasn't actually originally planning on selling them, and forgot to go in and put a price on them. I'm trying to get $250.00 shipped for them, they are new and only installed...never used.
Posted: Tue Oct 05, 2010 9:12 pm
by Ears93
Wish I had some money cause I'm not too far from you in Greenville, SC. This sucks!
Posted: Wed Oct 06, 2010 12:27 pm
by Mad Menace
too bad im in Colorado or Id buy up that rear end, fuel cell, drop spindles, rims and probably a few other pieces for my truck...
but shipping it all would kill