This post is more of a rant / reminder of all the things I did.. and then redid. It will help explain why this has been so frustrating and has taken twice as long as expected. It is also a warning to anyone that if you're too stubborn to give up like me, this is how a project can balloon way beyond your original scope.
The steering problem... Originally was was going to use the Starion steering, but with the problems of the White car (shake that wouldnt go away and blowing 5 steering boxes within 2 days of installing them). I made adapter plates for the crossmember and all was good. Then I added the steering column. This needed to run right where the stock brake pedal needed to be. So I got some floor mount pedals. These wouldnt mount nearly as close to the firewall as I wanted thus neededing to be moved back about 12" from the stock pedal location. This meant that the driver needed to move back as well.. which meant that the seat, steering wheel, handbrake, and shifter all needed to move back. This last paragraph was just a primer of what was to come.
Engine mounts - Revised 4 times. Originally going to use stock crossmember with stock mounts like white car. Ended up switching to the 240 rack which required me to raise the engine several inches. Made spacers and it was fine but off center. I later found it was becuase I was using the wrong bracket. Replaced the bracket and for the next 8 months fought with why the engine was crooked. Next revision was to make some aluminum solid mount brackets. Cut up some nice 1/2" aluminum plate but MA-motorsports drug their feet so long it never happened. Today I pulled the mounts from the white car and found that my passenger side mount did not match the one from the white car! Now I'm making some aluminum spacers to center the engine. Wish me luck!
Firewall - Revised 1 time. Cutting the firewall was the plan from the beginning, but sealing it up was the problem. First we rivited on some angle stock. I was going to make a little shelf and make a removable box to service things on the back of the head. This proved impossibly hard to engineer. I ended up copying Kane's maybe? Firewall idea using a piece of steel welded in from top to bottom.
Fuel tank - Revised 1 time. Originally we were going to use the stock tank and a 255lph pump. This wasnt large enough for the power goals I had so we were going to do a large single pump, but this had its own set of problems. I then decided to use 2 255lph pumps for flow and redundancy. We were going to modify the pickups in the tank to use 2 pumps. This ended up not working out so we scrapped the stock tank and ended up buying a 20 gallon (yeah.. way too big) fuel cell. This barely fits, but it seems to do what we need. We did have to cut out most of the rear though which was a contributing factor in moving the radiator back up front. It has its flaws: in the event of a bad rear collision it might get smashed. Possible reason to revise in the future. Might go to a smaller 10 gallong unit more safely mounted in the future.
Strut tops - Revised 1 time. Originally drilled new holes for the Nissan tops. Stock springs were binding during steering. Needed to go with coilovers to solve this. Made custom tops for Teins. The end result is very nice and professional looking. Plus I have Tein coilovers on a Starion!
Battery - Revised 4 times. The battery is a small drycell unit. It was going to be mounted on the firewall. I made a quick bracket, but later moved the battery to the access panel above where the brake booster would usually be. This was nice, but hard to made a nice cover for it. Later moved to the inside of the firewall reusing the brace I made for it. Most recently the battery was flipped upside down to make wire runs more tidy (yay drycell!)
Wiring - Revised 4 times. Orignally I was going to strip the stock harness down and reuse it. This was a cluster fuck and just wouldnt work. Ended up making a panel to mount to the cage that housed all wiring and relays. This later proved to be really messy and lacked any circuit protection. Later moved the wiring to the center console with the harnesses facing forward. This made checking warning lights and dip switches nearly impossible. Switched them around, that was an easy one. I also had moved the junction strips to the center console as well as the relays. This was all mounted on a piece of aluminum from the firewall back to the shifter. Messy messy.. and much much worse to come. We got the car running like this. Relays laying on their sides with exposed connections and stuff. The dash had a junction panel as well. We had the car running and were trying to make an event, and in my rushing I ended up shorting the EGT guages sheilding against the positive to th dash killing channel 4 of the MSD box. $200 down the tubes. In a rage I ripped the wiring from the car and swore to start over. I bought a Painless fuse / junction block. When it got here I looked at it for 5 minutes and put it back in the box never to use it again. It was so dumb. It did give me ideas for my wiring though. I have 2 fuse blocks.. 1 constant, 1 switched being fed from the battery with a 50A circuit breaker. The female connectors are all of the insulated variety. The relays moved from the same panel up into the stock center console box. Hides them very nicely. I also bought relays with little relay harneses so their are no exposed wires. These revisions took time, cost me in dead parts and missed events and my "budget" home made harness has cost me around $500.
Switch panel - Revised 4 times. Originally going to be up top where the rear view mirror should be. Made a panel with some LED switches... which turned out not to work when you switch to ground. Later moved this panel to the center console. Later shunk down to move to the box... and then I bought better switches which needed to be moved around to clear the plastic I was mounting them to.
Crossmember - Revised 3 times. Originally was going to use Starion crossmember (man that would have been nice), but I was frustrated with my white car's steering so we went with a Nissan front suspension and stuff. Once it was all together, I saw that the control arm angles were just really bad. I pulled the crossmember, tossed the adapter plates and cut out some of the height of the crossmember and welded on a plate with holes for the Starion. Raisng this fixed the control arm angles, but led to the following revisions: engine mounts (I knew I had to revise anyways), IC pipes, water pipes, possibly the hood, steering column, and oil pan.
Steering Column - Revised 3 times. Originally using a Starion column, but this was thrown out early in favor of the 240SX rack. Column needed to be moved back 3" when the crossmember was raised. I wish it was like this originally. Originally the rubber bushing on the column was right at the firewall which made a big ugly hole necessary. This will eventually lead to a final revision of the firewall. Also, the 12" spacer made for the brake setup put the steering wheel right at your knees making fancy foot work difficult. Much better 3" closer to the driver.
Radiator - Revised 2 times. Originally planned on doing a rear radiator using an old Z brass radiator Matt gave me. Welded brackets in the back and mounted it, but it proved much too difficult to engineer the firewall to accomidate the engine moving around and sealing it for safety. Plus that water pipes under the passenger seat might have been a royal pain as well. Later mounted the radiator up front and made water pipes for it. These needed to be tweaked for the engine beeing raised up with the crossmember revisions.
IC Pipes - Revised 1.5 times. Originally planned on doing a rear radiator and a top mount intercooler, but no pipes were made this early on. Later we moved the radiator from the trunk to the front and had a nice setup, then I moved the engine. This put the IC pipes on the driver side into the hood and the passenger side was now too short. Cut and added a coupler on the passenger side. Driver side I switched to the white car's intake manifold which angles down not up like the other one. This should make it easier to make IC pipes for this side. Still in progress.
Handbrake - Revised 2 times. Moved back onto a bracket tilting up, required me to redo the dodads that held the cables in place. Luckily I drug my feet. Then the plan moved to a hydraulic handbrake and the handbrake moved back to the stock position to be used only as a parking device. The bracket was going to be used for a switch panel, but that was later revised as well and the bracket cut off to make room for the center consol box that houses the relays I moved.
This is what I can currently recal. Took about 3 hours to type. If I remember anything I'll add it.
DJ's Starion with 4G64 and RX7 trans *updates on page 3*
Moderators: DJpowerHaus, mattmartindrift
-
DJpowerHaus
- Sir Post A Lot
- Posts: 1779
- Joined: Wed Apr 07, 2004 3:24 pm
- Location: Baltimore, MD
- Contact:
-
Bill Hincher
- Donating Member
- Posts: 1625
- Joined: Thu Jun 22, 2006 8:57 pm
- Location: Toledo,Ohio
- Contact:
I have a chalk board on my wall in the shop, when I leave at night , I write down where I left off.........so I wont just go out the next night and sit and stare and become overwelmed with the project.......I have to write down what decisions I made the night before...and then stick to the same tarin of thought..........I have a drafting board and when my mind wont shut off.....I draw the idea............its because I keep changing my mind........its kinda like playing chess really.........you make a move , knowing you are setting up the next 5 moves.......and sometimes.....I just stop.......because I know somethings wrong but I dont know what........and then after a couple weeks.....it dawns on me...........and I go back three moves to set up the next 5..........success is a series of small failures strung together....and a good artist never knows when he is done
-
DJpowerHaus
- Sir Post A Lot
- Posts: 1779
- Joined: Wed Apr 07, 2004 3:24 pm
- Location: Baltimore, MD
- Contact:
I am still working on some little things here and there. Not really any pressing deadlines though which is nice. I took a nice picture of the interior today:

http://projectzerog.com/drifting/images ... _large.jpg
Some more revisions to above:
Ingnition System - The 2nd DIS-4 showed that it was a piece of junk on the dyno. I put a rush order in for an Autronic CDI which is on the car now. Only some re-pining of the coil harness was needed. This did clean up the wiring of the center console some though and the Ignition system is superior. In the end 2 half working MSD DIS-4s and and 1 $900 way cool Autronic CDI. I also got a tach adapter with it if you want to count that as a revision. At least the tach works now without a doubt.
Headgasket - Blew on the dyno. Went with an OEM composite headgasket for the time being.
Tuning - See above. 1st trip the MSD started to die. 2nd trip the headgasket went after we tuned it to 18psi. One day there will be a 3rd trip, but only after the car has gotten some use out of itself. Here is the dyno sheet from the run before the headgasket went (it made more power at 18psi.. this run is 16psi):

Still needs to have the A/F fine tuned. Once that is done we will tune the ignition a little better to get those numbers WAY up.
Currently working on a firewall between the fuel cell and the cockpit.
I also am working on the Police theme:
http://projectzerog.com/drifting/policeTheme.shtml
I am Getting the lightbar and siren working, mounted and wired (sounds like the kind of girl you marry).
I made a lower bellhousing cover:

I also found out on my first test drive after reinstalling the head, that a gravel driveway and a car this low are not good.. especially if you have an open timing cover. Disassembled and inspected. Covers going back on (all of them!) soon.
Lots of other little stuff going together, getting inspected.
Still trying to finish up the power steering.
http://projectzerog.com/drifting/images ... _large.jpg
Some more revisions to above:
Ingnition System - The 2nd DIS-4 showed that it was a piece of junk on the dyno. I put a rush order in for an Autronic CDI which is on the car now. Only some re-pining of the coil harness was needed. This did clean up the wiring of the center console some though and the Ignition system is superior. In the end 2 half working MSD DIS-4s and and 1 $900 way cool Autronic CDI. I also got a tach adapter with it if you want to count that as a revision. At least the tach works now without a doubt.
Headgasket - Blew on the dyno. Went with an OEM composite headgasket for the time being.
Tuning - See above. 1st trip the MSD started to die. 2nd trip the headgasket went after we tuned it to 18psi. One day there will be a 3rd trip, but only after the car has gotten some use out of itself. Here is the dyno sheet from the run before the headgasket went (it made more power at 18psi.. this run is 16psi):
Still needs to have the A/F fine tuned. Once that is done we will tune the ignition a little better to get those numbers WAY up.
Currently working on a firewall between the fuel cell and the cockpit.
I also am working on the Police theme:
http://projectzerog.com/drifting/policeTheme.shtml
I am Getting the lightbar and siren working, mounted and wired (sounds like the kind of girl you marry).
I made a lower bellhousing cover:
I also found out on my first test drive after reinstalling the head, that a gravel driveway and a car this low are not good.. especially if you have an open timing cover. Disassembled and inspected. Covers going back on (all of them!) soon.
Lots of other little stuff going together, getting inspected.
Still trying to finish up the power steering.

Getting the engine bolted in is about 10% of the way there.
The next 80% can go quickly with help and skill.
That last 10% takes about as long as the 90% that came before it.
-
DJpowerHaus
- Sir Post A Lot
- Posts: 1779
- Joined: Wed Apr 07, 2004 3:24 pm
- Location: Baltimore, MD
- Contact:
Who knows what the JE dyno is doing as far as smoothing though.
Anyways... I pretty much finished up my rear firewall today. I am going to tape of around it with aluminum tape and I've already started to fill a section of the fenderflare body work with Great Stuff foam to keep the cockpit as air tight as possible. Before dust would just POUR into the cockpit. Can't even imagine how it would be with tire smoke. I have also covered every little hole that I could find with a piece of aluminum tape.
Here is a pic of the rear firewall:

I cleaned the windsheild too. Sounds like a small detail, but the other day when I took my cousin for a ride, we had ZERO visibility when driving towards the sun. The car hasnt ever had its windshield cleaned since I've had it and I know its been a parts car since at least 2000. That's 6 years of dirt on that thing. Had to use acetone to get the first of it off followed by Windex.
Forgot to ask Mr. Bobby to make my light bar brackets. I think I'll work on light bar wiring tomorrow. I just cant wait to hear that siren going with the lights going. Still need to put the timing cover back on. I should probably retorque the head too.
Also found that the rear driverside brake line was rubbing the halfshaft. Matt.. I need you to see if you can get a 90 degree fitting for this -3 line. The only reason it rubbed is because the 45 degree fitting pointed it right at the halfshaft. Pretty sure the line is not too damaged, but just in case.. do you have any more -3 line?
Anyways... I pretty much finished up my rear firewall today. I am going to tape of around it with aluminum tape and I've already started to fill a section of the fenderflare body work with Great Stuff foam to keep the cockpit as air tight as possible. Before dust would just POUR into the cockpit. Can't even imagine how it would be with tire smoke. I have also covered every little hole that I could find with a piece of aluminum tape.
Here is a pic of the rear firewall:
I cleaned the windsheild too. Sounds like a small detail, but the other day when I took my cousin for a ride, we had ZERO visibility when driving towards the sun. The car hasnt ever had its windshield cleaned since I've had it and I know its been a parts car since at least 2000. That's 6 years of dirt on that thing. Had to use acetone to get the first of it off followed by Windex.
Forgot to ask Mr. Bobby to make my light bar brackets. I think I'll work on light bar wiring tomorrow. I just cant wait to hear that siren going with the lights going. Still need to put the timing cover back on. I should probably retorque the head too.
Also found that the rear driverside brake line was rubbing the halfshaft. Matt.. I need you to see if you can get a 90 degree fitting for this -3 line. The only reason it rubbed is because the 45 degree fitting pointed it right at the halfshaft. Pretty sure the line is not too damaged, but just in case.. do you have any more -3 line?
Getting the engine bolted in is about 10% of the way there.
The next 80% can go quickly with help and skill.
That last 10% takes about as long as the 90% that came before it.
-
DJpowerHaus
- Sir Post A Lot
- Posts: 1779
- Joined: Wed Apr 07, 2004 3:24 pm
- Location: Baltimore, MD
- Contact:
Not looking so good today. Still in the diagnostics phase. Hopefully on to the making sure it doesn't happen next time soon.
Had my 2nd event. This one was over 300 miles away though and thus lots more expensive. Plus I got a speeding ticket. First session was good. This car is way too fast. First run of Session 2 I oil down the track when the oil filter o-ring blows out. Then the car starts running like crap. Pull the plugs and 2 of them are melted pretty bad. Can't remember which ones. Too many experts on site.
Got home, did a compression test: 115, 55, 145, 150. Decided to pull engine and head to see what's up.
Not sure if this is a cause.. or just some other odd thing that came up. This is why my idle went from 1000rpm to 2100rpm over the first session. Not sure if it blew out or sucked in. Maybe this leaned out cylinder 1 and 2?

This is looking into the bore of cylinder 2. You can see that the heat from scuffing has lifted the edge of the piston a little.

Looks like Piston 2 is toast. Fucking hell. Rings are stuck in there.

Will likely be buying a new set of pistons and trying to get back on my feet soon. I am building an injector test bench this week so that I can see if the injectors are balanced and spraying correctly.
I suck at engines. Hopefully I'm learning something. This is already way expensive. Only live once I guess.
Had my 2nd event. This one was over 300 miles away though and thus lots more expensive. Plus I got a speeding ticket. First session was good. This car is way too fast. First run of Session 2 I oil down the track when the oil filter o-ring blows out. Then the car starts running like crap. Pull the plugs and 2 of them are melted pretty bad. Can't remember which ones. Too many experts on site.
Got home, did a compression test: 115, 55, 145, 150. Decided to pull engine and head to see what's up.
Not sure if this is a cause.. or just some other odd thing that came up. This is why my idle went from 1000rpm to 2100rpm over the first session. Not sure if it blew out or sucked in. Maybe this leaned out cylinder 1 and 2?
This is looking into the bore of cylinder 2. You can see that the heat from scuffing has lifted the edge of the piston a little.
Looks like Piston 2 is toast. Fucking hell. Rings are stuck in there.
Will likely be buying a new set of pistons and trying to get back on my feet soon. I am building an injector test bench this week so that I can see if the injectors are balanced and spraying correctly.
I suck at engines. Hopefully I'm learning something. This is already way expensive. Only live once I guess.
Getting the engine bolted in is about 10% of the way there.
The next 80% can go quickly with help and skill.
That last 10% takes about as long as the 90% that came before it.
-
Robert Venable
- Donating Member
- Posts: 229
- Joined: Fri Sep 22, 2006 8:37 pm
- Location: BATON ROUGE, LA
-
Bill Hincher
- Donating Member
- Posts: 1625
- Joined: Thu Jun 22, 2006 8:57 pm
- Location: Toledo,Ohio
- Contact:
when you have a loose plug or a leaky intake gasket, the pistons pull in extra air on intake stroke and it leans the mixure creating the extra heat. Thats why the spark plug electrode burning off
Thats preignition burning your pistons, the fuel is cumbusting way too advanced.
I have never had any luck with wisco pistons holding up under race conditions
Thats preignition burning your pistons, the fuel is cumbusting way too advanced.
I have never had any luck with wisco pistons holding up under race conditions
-
Bill Hincher
- Donating Member
- Posts: 1625
- Joined: Thu Jun 22, 2006 8:57 pm
- Location: Toledo,Ohio
- Contact:
think about what you are doing in the cylinder , you charge the intake manifold with 14lb boost , everything is fine until the intake valve closes, where does all the pressure go? well, its supposed to bounce off the back of the intake and cause reversion, and you are supposed to use the reversion to your advantage to tune the length of the intake runners.
but if you have a weak spot in the pressureizd area the pressure will go to the weakest point. in this case its your intake manifold gaskets. the wastegate is built in to aviod that condition
you blow out the gaskets and then lean the mixture to over heat your cylinder burn @ the exhaust valve, where the heat is at its highest.
Your non stock rods are not drilled to provide oil to the back of the piston and you dont have a way of controling the heat, if you dont have squirters in place that doubles the heat problems.
the water pump should help you , but you can do much more heat control with the oil
-
DJpowerHaus
- Sir Post A Lot
- Posts: 1779
- Joined: Wed Apr 07, 2004 3:24 pm
- Location: Baltimore, MD
- Contact:
I have spent the last few months recuperating from my burn pistons.
I spent several weeks dragging my feet, then I spent a few weeks waiting for Joel's friend to become available to get me a spare block and crank so I could build 2 engines side by side. I then had everything together and found that both cranks needed to be turned down. The one from Joel had pitting due to water in the mains. My engine had a chewed up (not spun) third main bearing. I took it to a shop to see if they could polish it. They could not polish it out. I then took it to another shop to be turned down. I had the shop supply me with the bearings I needed to use. I think they turned it down .5mm on all Journals. They said it would take a week, but due to some "mix up" it ended up taking 4 weeks. So the time I had planned before starting a summer college class had run out and now I had 1 month in which to pass Spanish and build an engine with 3 hours less to use each day before work.
Over the next few weeks my cousin Andy and my uncle Dean helped me get the 1st of 2 engines together. This time Andy milled the head and decked the block. I used a Cometic headgasket with some modifications to the way the water passages. I also used a truck water pump to clean up the water hoses. I also used a Nylon intake manifold gasket that will not suck in and will also not transfer heat from the head to the intake manifold.
I tried as hard as I could to make Hyperfest, but I couldn't do it. I ended up taking some more time and trying to get it ready for a practice event 2 weeks later.
A few days before this event MA-Motorsports was having a dyno day. I figured it would be safer and more legal than just running up and down the street without a wideband. I filled up with 100oct Sunoco gas on the way down. I still do not have a temperature sensor, but I can read temps on my laptop if need be. My oil pressure gauges is again working due to swapping out the sender and I rewired everything and loomed it to clean up the engine bay and to protect the wires.
We did a few half pull with the dyno's RPM pickup getting false triggers from my coil harness, but we found a good position for it and got a good full pull in. We stopped after that due to the turbo oil drain leaking, which was fixed later that night. Anyways. I'm sure you want to hear results...
341hp
Video: http://videos.urbanracer.com/viewvideo/192/


And Dyno Logs to show torque, etc.
http://projectzerog.com/drifting/MA_dyn ... Data.shtml
This was on a DynoDynamics machine that seems to read low. The C6 Z06 made 420hp I think and its rated at 501hp conservatively. I'm guessing my number is higher than it showed too . Looking at the logs and things, it looks like we were not even getting full boost until nearly redline (7500rpm). Very strange. Ray from MA thinks that this could be cured by tuning the timing better. Either way it makes gobs of power now. If you look at the dyno data you can see that from around 3500rpm - 7500rpm the torque is nearly flat around 240ft/lbs. I cant imagine how much power it will make at 25psi with the fuel and timing all sorted out and the boost coming on sooner.
Wednesday I have a drift event. I think I'm more ready than I have been in a long time. Hopefully it will be a good day and I can finally come back with some good on track drifting photos. It'll be interesting in 3rd gear. I will be in the powerband from 40mph to 100mph.
I spent several weeks dragging my feet, then I spent a few weeks waiting for Joel's friend to become available to get me a spare block and crank so I could build 2 engines side by side. I then had everything together and found that both cranks needed to be turned down. The one from Joel had pitting due to water in the mains. My engine had a chewed up (not spun) third main bearing. I took it to a shop to see if they could polish it. They could not polish it out. I then took it to another shop to be turned down. I had the shop supply me with the bearings I needed to use. I think they turned it down .5mm on all Journals. They said it would take a week, but due to some "mix up" it ended up taking 4 weeks. So the time I had planned before starting a summer college class had run out and now I had 1 month in which to pass Spanish and build an engine with 3 hours less to use each day before work.
Over the next few weeks my cousin Andy and my uncle Dean helped me get the 1st of 2 engines together. This time Andy milled the head and decked the block. I used a Cometic headgasket with some modifications to the way the water passages. I also used a truck water pump to clean up the water hoses. I also used a Nylon intake manifold gasket that will not suck in and will also not transfer heat from the head to the intake manifold.
I tried as hard as I could to make Hyperfest, but I couldn't do it. I ended up taking some more time and trying to get it ready for a practice event 2 weeks later.
A few days before this event MA-Motorsports was having a dyno day. I figured it would be safer and more legal than just running up and down the street without a wideband. I filled up with 100oct Sunoco gas on the way down. I still do not have a temperature sensor, but I can read temps on my laptop if need be. My oil pressure gauges is again working due to swapping out the sender and I rewired everything and loomed it to clean up the engine bay and to protect the wires.
We did a few half pull with the dyno's RPM pickup getting false triggers from my coil harness, but we found a good position for it and got a good full pull in. We stopped after that due to the turbo oil drain leaking, which was fixed later that night. Anyways. I'm sure you want to hear results...
341hp
Video: http://videos.urbanracer.com/viewvideo/192/
And Dyno Logs to show torque, etc.
http://projectzerog.com/drifting/MA_dyn ... Data.shtml
This was on a DynoDynamics machine that seems to read low. The C6 Z06 made 420hp I think and its rated at 501hp conservatively. I'm guessing my number is higher than it showed too
Wednesday I have a drift event. I think I'm more ready than I have been in a long time. Hopefully it will be a good day and I can finally come back with some good on track drifting photos. It'll be interesting in 3rd gear. I will be in the powerband from 40mph to 100mph.
Last edited by DJpowerHaus on Mon Jul 02, 2007 9:31 pm, edited 1 time in total.
Getting the engine bolted in is about 10% of the way there.
The next 80% can go quickly with help and skill.
That last 10% takes about as long as the 90% that came before it.
-
DJpowerHaus
- Sir Post A Lot
- Posts: 1779
- Joined: Wed Apr 07, 2004 3:24 pm
- Location: Baltimore, MD
- Contact:
-
screemin eagle
- Too Much Time on His Hands
- Posts: 355
- Joined: Thu Feb 03, 2005 1:50 am
-
Robert Venable
- Donating Member
- Posts: 229
- Joined: Fri Sep 22, 2006 8:37 pm
- Location: BATON ROUGE, LA
-
Robert Venable
- Donating Member
- Posts: 229
- Joined: Fri Sep 22, 2006 8:37 pm
- Location: BATON ROUGE, LA
So, the FPCam3 and not the FPCam3x right???mattmartindrift wrote:Robert Venable wrote:Which cams are you running?
Forced Performance stage 3 Cams
I got this info from here.
1990 MIGHTY MAX, REG CAB,
-
DJpowerHaus
- Sir Post A Lot
- Posts: 1779
- Joined: Wed Apr 07, 2004 3:24 pm
- Location: Baltimore, MD
- Contact:
Doesn't it have 2D maps or something?peregrine wrote:timing maps?DJpowerHaus wrote:Can you share your timing maps with the rest of us?i can share my dsmlink setings
Getting the engine bolted in is about 10% of the way there.
The next 80% can go quickly with help and skill.
That last 10% takes about as long as the 90% that came before it.
its just sliders. honestly i avent even messed with my timing much. i probably have shitloads of power im missing because of that.DJpowerHaus wrote:Doesn't it have 2D maps or something?peregrine wrote:timing maps?DJpowerHaus wrote:Can you share your timing maps with the rest of us?
-
DJpowerHaus
- Sir Post A Lot
- Posts: 1779
- Joined: Wed Apr 07, 2004 3:24 pm
- Location: Baltimore, MD
- Contact:
Some photos from the first drift event that I have finished!
http://projectzerog.com/drifting/images ... itJuly4th/
Hood came up on first real run.. damnit. Had to take it off. After a few runs the water pipe started to wiggle loose. Had to fix it in a hurry, cut timing cover. And later a rock or something caused the power steering bracket to break which made the car very hard to drive.
Getting the engine bolted in is about 10% of the way there.
The next 80% can go quickly with help and skill.
That last 10% takes about as long as the 90% that came before it.
-
jeffball610
- Too Much Time on His Hands
- Posts: 619
- Joined: Wed Feb 22, 2006 5:29 am
- Location: Las Vegas, NV
I'd be really interested to see any results of street driving with the water outlet up front. Did you do the water passage mod that was mentioned in the "Mechanical Swap" forum? Any way you'd be willing to cruise around for 20-30min and see if any issues come up? Also, you're not running a thermostat are you? That might work okay for summer, but I'm sure there will be issues in the winter with a street car. Hope you can get some data for us.
-
DJpowerHaus
- Sir Post A Lot
- Posts: 1779
- Joined: Wed Apr 07, 2004 3:24 pm
- Location: Baltimore, MD
- Contact:
Justine and I drove this car around for about 2 hours in January, It has also idled in at events for up to 30 minutes with no issues.
Getting the engine bolted in is about 10% of the way there.
The next 80% can go quickly with help and skill.
That last 10% takes about as long as the 90% that came before it.
-
DJpowerHaus
- Sir Post A Lot
- Posts: 1779
- Joined: Wed Apr 07, 2004 3:24 pm
- Location: Baltimore, MD
- Contact:
-
carguyf545
- Addict
- Posts: 175
- Joined: Wed Jul 27, 2005 12:41 am
- Location: centralia WA.
-
DJpowerHaus
- Sir Post A Lot
- Posts: 1779
- Joined: Wed Apr 07, 2004 3:24 pm
- Location: Baltimore, MD
- Contact:
-
DJpowerHaus
- Sir Post A Lot
- Posts: 1779
- Joined: Wed Apr 07, 2004 3:24 pm
- Location: Baltimore, MD
- Contact:
-
DJpowerHaus
- Sir Post A Lot
- Posts: 1779
- Joined: Wed Apr 07, 2004 3:24 pm
- Location: Baltimore, MD
- Contact:
We have enough if you're willing to drive. Its a minimum 3 hour drive to any event. The one in VA was about 6 hours. I've made it a goal to get as much track time as I can before I pack the car up for the long winter.
NJ went great. Still have oil leaks from the turbo drain at the bottom even after going AN. Need to pull the pan and have a steel fitting welded onto the pan instead of this bulkhead fitting I have on it now.
http://www.youtube.com/watch?v=gSWW53R2xLk
Car wasn't down for long. 3 weeks and I'm back on track.
Getting the engine bolted in is about 10% of the way there.
The next 80% can go quickly with help and skill.
That last 10% takes about as long as the 90% that came before it.
-
DJpowerHaus
- Sir Post A Lot
- Posts: 1779
- Joined: Wed Apr 07, 2004 3:24 pm
- Location: Baltimore, MD
- Contact:
-
DJpowerHaus
- Sir Post A Lot
- Posts: 1779
- Joined: Wed Apr 07, 2004 3:24 pm
- Location: Baltimore, MD
- Contact:
That's how they do all the ice racing in NY. I've been hoping to do some of that for years. Festiva would be a great candidate. I could use some bolts to make some spiked tires.
Getting the engine bolted in is about 10% of the way there.
The next 80% can go quickly with help and skill.
That last 10% takes about as long as the 90% that came before it.
-
DJpowerHaus
- Sir Post A Lot
- Posts: 1779
- Joined: Wed Apr 07, 2004 3:24 pm
- Location: Baltimore, MD
- Contact:
If you rarely need to carry 2nd passenger, they are amazing daily drivers. Fun cars and as gay as they may be, putting the top down and driving around on a nice day is amazing.
Plus they're like a motorcycle on a sunny day. All the other Miata drivers wave as they pass.
Plus they're like a motorcycle on a sunny day. All the other Miata drivers wave as they pass.
Getting the engine bolted in is about 10% of the way there.
The next 80% can go quickly with help and skill.
That last 10% takes about as long as the 90% that came before it.
-
Robert Venable
- Donating Member
- Posts: 229
- Joined: Fri Sep 22, 2006 8:37 pm
- Location: BATON ROUGE, LA
-
DJpowerHaus
- Sir Post A Lot
- Posts: 1779
- Joined: Wed Apr 07, 2004 3:24 pm
- Location: Baltimore, MD
- Contact:
-
Professor Quest
- Addict
- Posts: 136
- Joined: Sun Nov 30, 2008 8:25 pm
- Location: High Desert, Albuquerque, NM. The NUCLEAR state!
Why am I getting red Xs instead of pics? 
The million dollar manual and AFFORDABLE parts too! USE IT!
http://starquest.i-x.net/viewforum.php?f=12
email: waynescoolworld@netzero.net USE IT!
http://starquest.i-x.net/viewforum.php?f=12
email: waynescoolworld@netzero.net USE IT!
-
DJpowerHaus
- Sir Post A Lot
- Posts: 1779
- Joined: Wed Apr 07, 2004 3:24 pm
- Location: Baltimore, MD
- Contact:
I really need to update this stuff. Check this directory out in the mean time:
http://projectzerog.com/images/members/djpowerhaus/
http://projectzerog.com/images/members/djpowerhaus/
Getting the engine bolted in is about 10% of the way there.
The next 80% can go quickly with help and skill.
That last 10% takes about as long as the 90% that came before it.
-
DJpowerHaus
- Sir Post A Lot
- Posts: 1779
- Joined: Wed Apr 07, 2004 3:24 pm
- Location: Baltimore, MD
- Contact:
I parked my car in November of 2007 to save for my trip to Europe. It took 5 months to save, 4 months to spend and another 9 months to save up again. Time to get it back on track. I'm about $600 into getting it going again.
It started as just a simple turbo manifold upgrade. Ebay Stainless Top Mount -> Slowboy Cast Bottom Mount. This led to a revision of the oil drain, but due to some past fixes, my old DSM pan was unusable (had a BIG hole in it with a bulkhead fitting).
So I took my spare engine's D50 pan and put that on and made new lines. Unfortunately, it wouldn't fit over the 240SX crossmember, so I cut the 240SX crossmember up and welded the rack flanges onto a Starion crossmember and redrilled the holes for the LCAs. This narrowed the front track enough that the tie rod ends needed to be shortened.
Luckily a few days before I would have cut them, I learned about MA-Motorsport's "Awesometron 5000" hubs (more angle, less ackerman, quicker steering). These hubs required longer tie rods on a 240SX, but I can use stock length tie rods just fine with my modifications. I put them on, and boxed in my lower control arms while I was at it. With the Starion crossmember, the engine moved forward an inch or so. I had to redo the intercooler pipes, tilt the radiator and intercooler up to clear the engine.
This weekend I'll be adjusting the steering column to fit now that the rack has moved around a bit. Will need to extend the driveshaft 2" (it was already 1.5" and the engine moving forward only made it worse. Also I need to make a new downpipe. Not sure how I can manage this since I only have 5" between my V-band flange and the firewall to fit a 3" mandrel bend.
I wonder if I will need to re-tune the engine due to the new exhaust manifold. Anyone with any tuning experience know if this will require me to change my fuel or ignition maps?
I've got 2 days this weekend to finish it up and then its going on the trailer next Friday.
Getting the engine bolted in is about 10% of the way there.
The next 80% can go quickly with help and skill.
That last 10% takes about as long as the 90% that came before it.
-
jeffball610
- Too Much Time on His Hands
- Posts: 619
- Joined: Wed Feb 22, 2006 5:29 am
- Location: Las Vegas, NV
That kinda sucks how a "simple" manifold change can cause such a snowball that you have to redo almost everything under the hood.
I would say that the manifold won't make you change your fuel maps or anything. You should get a little sooner spool from the manifold, but only by a few hundred RPM at most. As long as you have a decent tune in the first place, it won't effect anything.
Glad to see you've finally got back on this project. Hopefully this month I'll be doing a little work as well. Keep us updated and take some pics.
Do it in a Datsun!
1972 Datsun 510
7-bolt 4G63T, EVO 9 pistons and rods, Garrett GT3076R, "flipped" stock intake, Toyota R154, Z31 R200 w/ CVs
1972 Datsun 510
7-bolt 4G63T, EVO 9 pistons and rods, Garrett GT3076R, "flipped" stock intake, Toyota R154, Z31 R200 w/ CVs
-
DJpowerHaus
- Sir Post A Lot
- Posts: 1779
- Joined: Wed Apr 07, 2004 3:24 pm
- Location: Baltimore, MD
- Contact:
I'm thinking about retiring the old girl. Its been sitting for the better part of 3 years now with a few minutes of actual seat time between long stretches of fixing things. I COULD put it back together, but after reading all of the current rule books and thinking of all the work that would be needed to A) get it running and B) make it conform to the rules, I think its better to just strip it and store all the custom parts and one day buy a new chassis when I'm ready to go again.

Getting the engine bolted in is about 10% of the way there.
The next 80% can go quickly with help and skill.
That last 10% takes about as long as the 90% that came before it.
-
jeffball610
- Too Much Time on His Hands
- Posts: 619
- Joined: Wed Feb 22, 2006 5:29 am
- Location: Las Vegas, NV
Or you could change the purpose of the car. What about time attack or something? It's a waste to just let it sit. I say either get it going, or sell it off. I'm sure someone would be willing to pay enough to make it worth selling even if you need to part it out. But I would much rather see it on a track somewhere.
Do it in a Datsun!
1972 Datsun 510
7-bolt 4G63T, EVO 9 pistons and rods, Garrett GT3076R, "flipped" stock intake, Toyota R154, Z31 R200 w/ CVs
1972 Datsun 510
7-bolt 4G63T, EVO 9 pistons and rods, Garrett GT3076R, "flipped" stock intake, Toyota R154, Z31 R200 w/ CVs
-
DJpowerHaus
- Sir Post A Lot
- Posts: 1779
- Joined: Wed Apr 07, 2004 3:24 pm
- Location: Baltimore, MD
- Contact:
Junked the police car chassis, white chassis and stars and bar chassis back in the summer of 2011. Bought a rust free 87 a few days later and then started swapping all of the racecar parts over to it. Was supposed to be a few week swap. 4 years later I just took it for paint. Still needs to be tuned after it gets paint.
Hoping to have a nice daily driver with all the go fast parts from the racecar. Going for a very clean car this time. Every bracket and bolt will be clean.
Running a DIYPNP ecu from DIYAutotune. Soldered it together myself. This is a huge change. Sold the Autronic ignition a few years ago. Thinking about selling SMC if this thing runs. Fired up the ECU for the first time in years on a bench and pulled the old .cal file map from it.
Will be so weird to be street driving a Starion again after 10 years.
Getting the engine bolted in is about 10% of the way there.
The next 80% can go quickly with help and skill.
That last 10% takes about as long as the 90% that came before it.
-
DJpowerHaus
- Sir Post A Lot
- Posts: 1779
- Joined: Wed Apr 07, 2004 3:24 pm
- Location: Baltimore, MD
- Contact:

The Zero is starting to come together. This swap started in August 2011. First start was in winter 2015. Finally getting it from paint in Nov 2015.
Big Turbo

Big Brakes... Big wheels (9s all around)


Big Color Change:


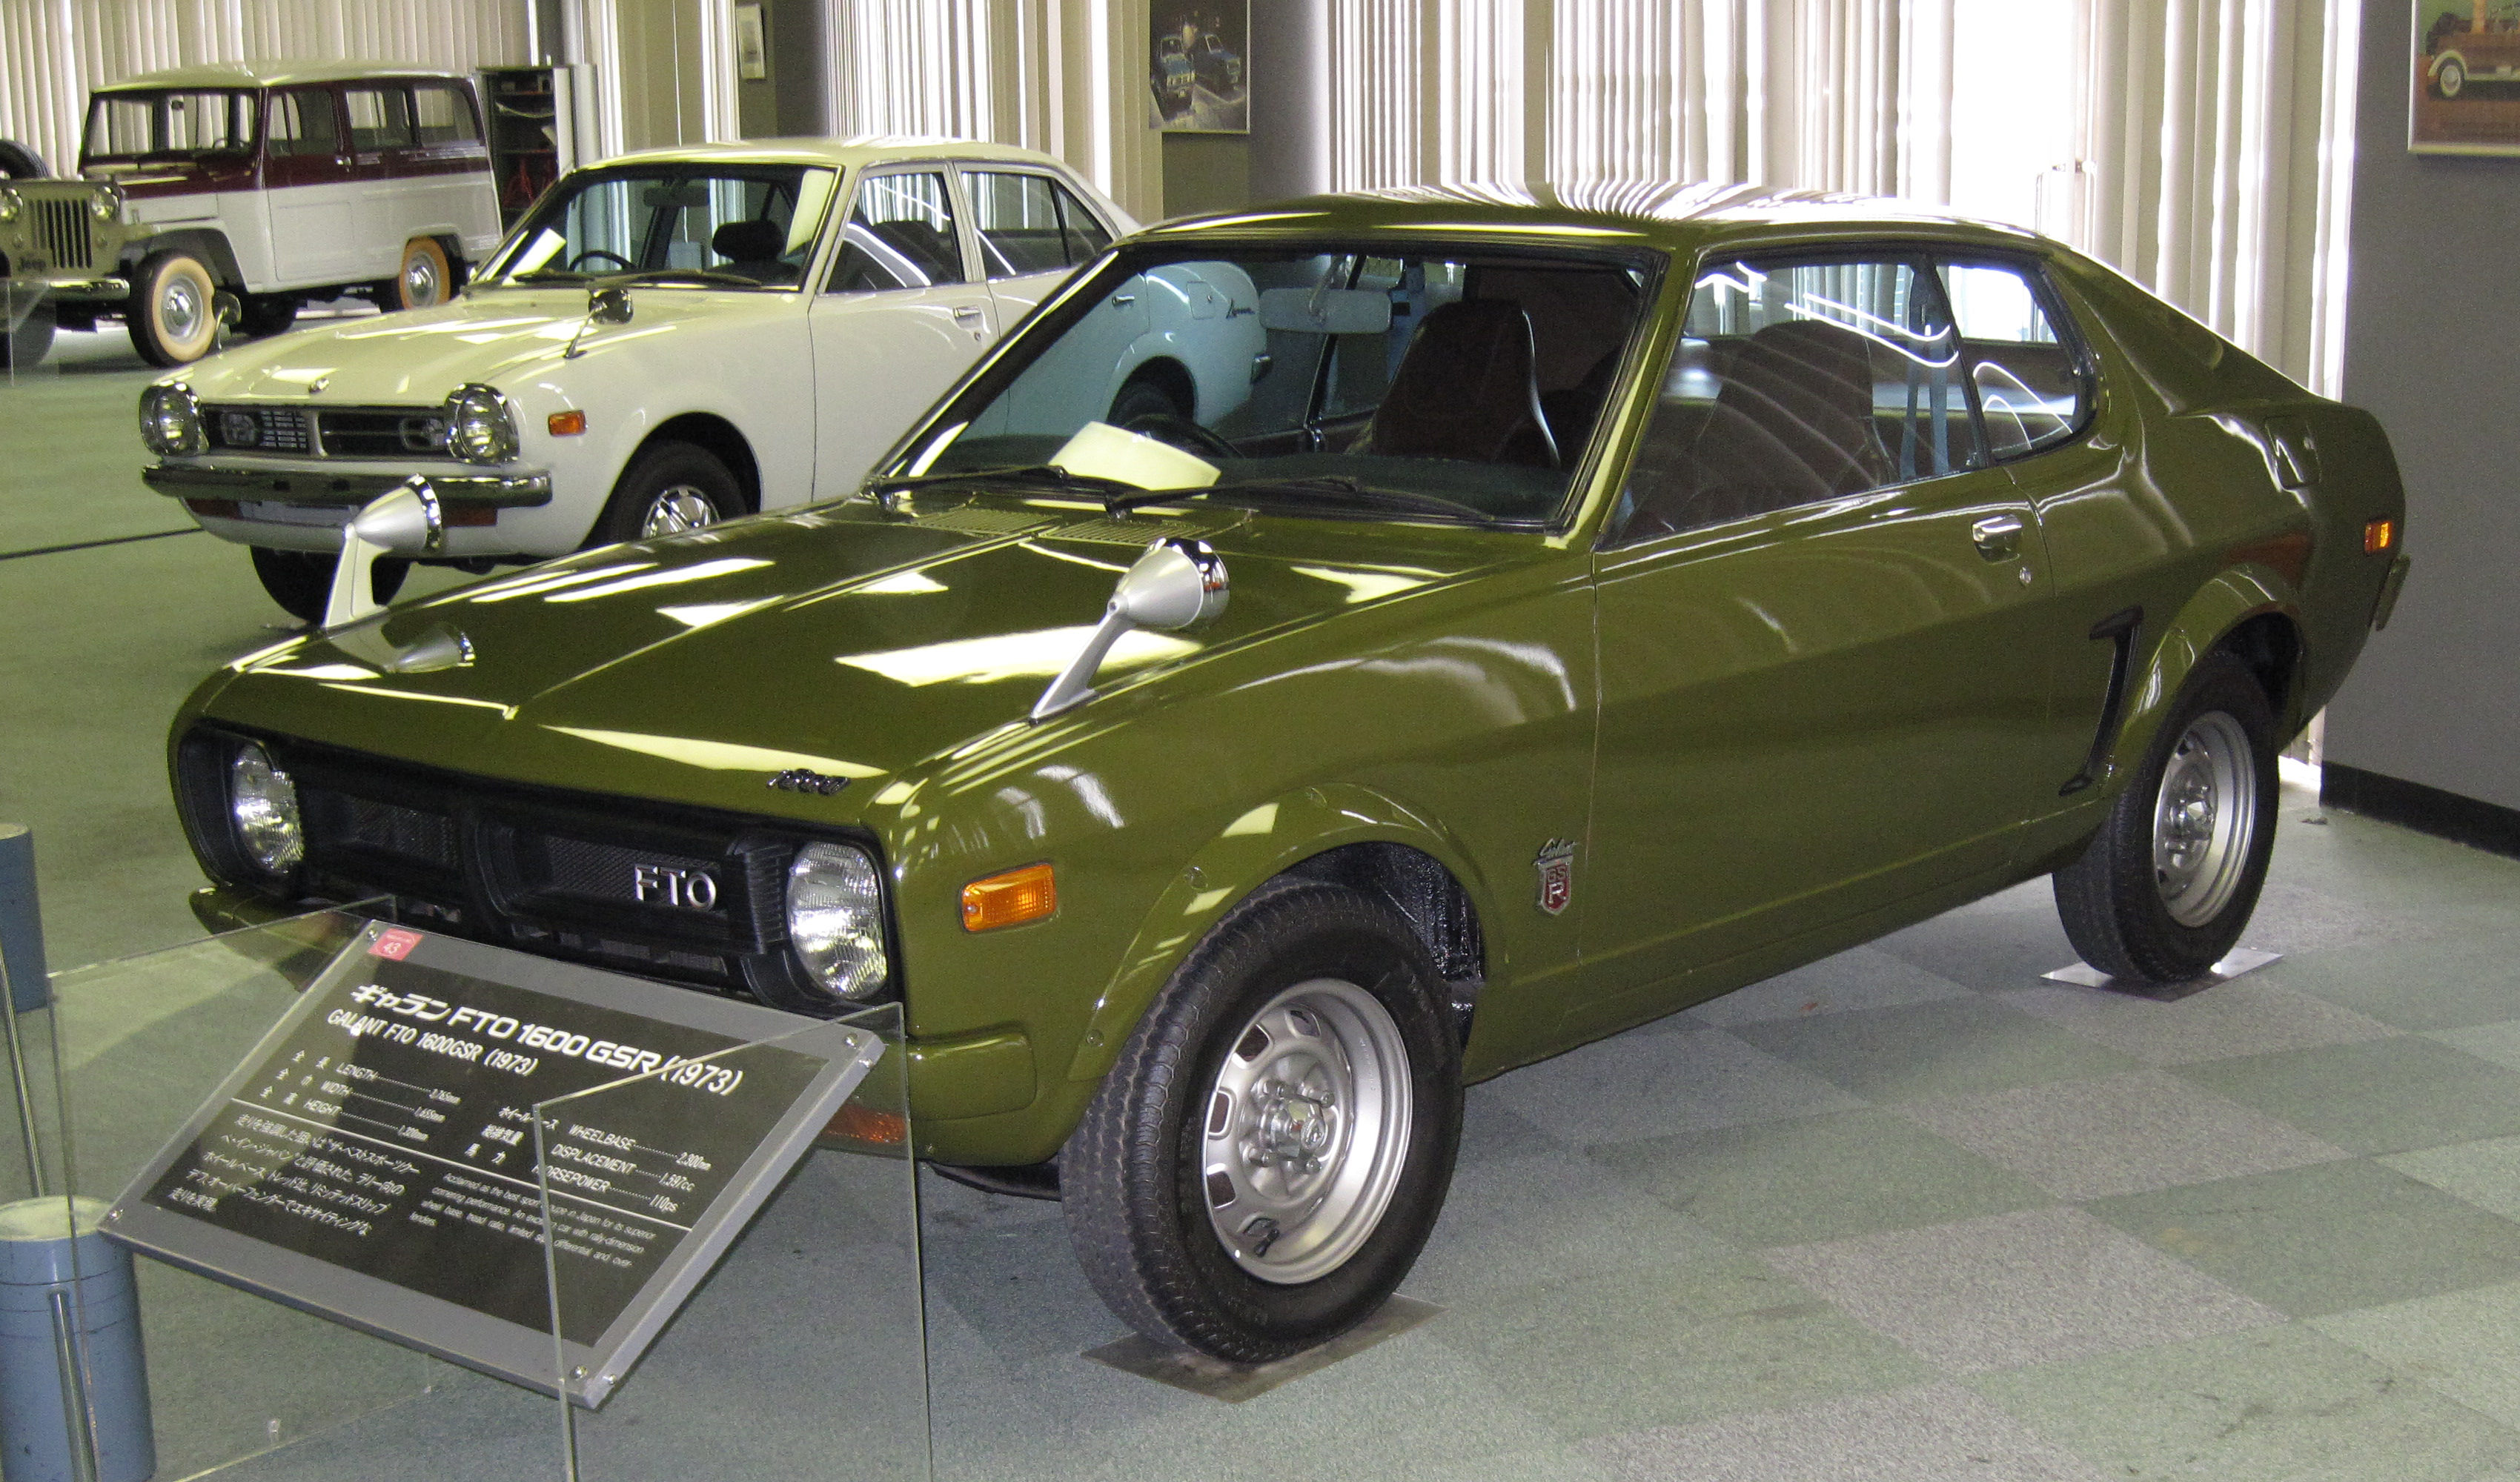
The color is from a 1973 Galant GTO / FTO... Athens Olive (L47)
I'll post more as the livery comes together. Plasticoat black hood (in the spring), yellow fog light tint, Red and White meatball on the doors, Black sandpaper tape for the chip guards.
I've got 2 days of assembly this weekend and it should finally be starting to look like a car again.
Finally feeling good enough to register and insure it. One of the perks of taking for fucking ever on this thing is that now it's old enough to qualify in MD for "Street Rod" tags.

Getting the engine bolted in is about 10% of the way there.
The next 80% can go quickly with help and skill.
That last 10% takes about as long as the 90% that came before it.
-
DJpowerHaus
- Sir Post A Lot
- Posts: 1779
- Joined: Wed Apr 07, 2004 3:24 pm
- Location: Baltimore, MD
- Contact:
Finally the slow process of putting it back together starts.
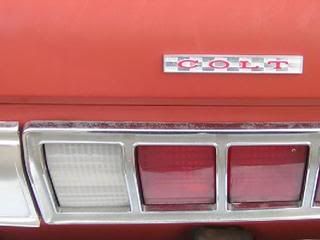
The tail lights I've had since my very first SQ back in 2002. They've managed to stay pretty nice even having been lightly into a tire wall once. I never really had them on the race car unless it was a show or meet which was rare. I always swapped over to Conquest tails for the rough stuff. They took a few hours to get ready to put on as they were covered in mud and needed a good cleaning, polishing, and even some light socket replacement. All the good pieces from my pile of 8 lights went into 2 that look pretty good, even after 29 years.

Also got some more parts on the motor. Retorqued the head when I changed the scratched up Hyundai cover to my one of a kind "DOHC 2400" with big -10 vent hoses.


Also added some little touches like the light covers. This is supposed to be a subtle reference to the yellow leading edge of the Zero's wings.

The tail lights I've had since my very first SQ back in 2002. They've managed to stay pretty nice even having been lightly into a tire wall once. I never really had them on the race car unless it was a show or meet which was rare. I always swapped over to Conquest tails for the rough stuff. They took a few hours to get ready to put on as they were covered in mud and needed a good cleaning, polishing, and even some light socket replacement. All the good pieces from my pile of 8 lights went into 2 that look pretty good, even after 29 years.
Also got some more parts on the motor. Retorqued the head when I changed the scratched up Hyundai cover to my one of a kind "DOHC 2400" with big -10 vent hoses.
Also added some little touches like the light covers. This is supposed to be a subtle reference to the yellow leading edge of the Zero's wings.
Getting the engine bolted in is about 10% of the way there.
The next 80% can go quickly with help and skill.
That last 10% takes about as long as the 90% that came before it.